 |
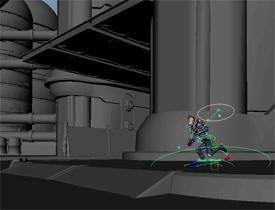
Scene Assembly is a system that lets you work with complex Maya scenes without the burden of typical memory overhead. Constructing a scene with Scene Assembly improves viewport interactivity and accelerates file loading, helping to solve common issues when working with large data sets. Scene Assembly includes a new way of loading alternative forms of your production assets called Assembly representations. You can use Assembly representations to manage the scene's complexity at the object level by switching between different versions of each scene object, letting you choose between detailed display and performance as your task requires. Use Scene Assembly in your animation workflows by adding animation curves and constraints to the representation versions of your production assets. With Scene Assembly rendering options, you can quickly setup low-resolution representations for test renders and lighting tests, then easily switch to high-resolution representations of your assets for final renders.
|
The Small Annoying Things (SAT) project is an ongoing initiative to improve your experience with Maya by engaging users in the selection of important fixes and enhancements. We're listening and we want your input!
We addressed numerous SATs this release based on user voting in our feedback forum, including:
For a full list of completed SATs, see: http://mayafeedback.autodesk.com/forums/160518. We encourage you to participate by suggesting ideas, and voting in the forum.
New Alembic file features in Maya 2014 let you:
Store more data in Maya Binary (.mb) scene files and geometry caches. With the implementation of 64-bit indices, .mb scene files and geometry caches can now exceed 2.0 GB.
When creating a geometry cache, select the mcx file format to take advantage of the larger cache file sizes.
Scenes saved as Maya Binary files in Maya 2014 are not compatible with previous versions of Maya.
A new Maya Metadata API lets you create any number of metadata structures which can be attached to Maya nodes and the components of mesh objects. Metadata can also be added to the Maya scene as a whole, meaning it does not need to be attached to any particular node. A small set of MEL commands provides access to the metadata from within Maya.
You can now use the Maintain Pic Aspect Ratio attribute in the free image plane Attribute Editor to adjust the size of your free image plane while maintaining the original image aspect ratio. This feature allows you to set free image planes to exact dimensions, and to easily align two image planes along one dimension.
You can choose to display your free image plane in all views; or, only through a specified camera. The drop-down list beside the Display > looking through camera allows you to select the camera through which the image plane is displayed.
Free image planes are now supported by the mental ray for Maya renderer.
Easily load scene files from any version of Maya by turning on the new global Ignore Version preference.
Use the MAYA_CER_INCLUDE_SCENE_NAME environment variable to determine whether your scene file name is included with your CER report to Autodesk. If this variable is not set, the scene name is shown as undisclosed.
Set the MAYA_FORCE_PANEL_FOCUS environment variable to 0 so that when you have a Maya or Qt window over another window with a model panel (or a window such as the Outliner, Graph Editor, or any panel under Panels > Panel), hitting the Shift key does not cause the model panel's window to steal focus.
The new Increment & Save option (File > Increment & Save) lets you save multiple versions of a file, making it easy to revert to an earlier version. Each time you select this command, a new, incremental value is appended to the file name, so your scene is not overwritten.
When there are custom cameras in your scene, you can cycle through each view using the new Cycle Through Cameras option (View > Cycle Through Cameras).
New cameras can now be created from the current view using the Create Camera From View option (View > Create Camera From View or Ctrl + Shift + C).
The default renderer and Viewport 2.0 both render joints, cameras, lights and image planes as wireframe in bounding box mode. Image planes connected to textures render the textures in bounding box mode.
You can now draw thicker lines in your scene and adjust the line width using the Line Width attribute under the Display section of the Preferences window.
The 1-Minute Startup Movies are now available in English, Japanese, and Simplified Chinese.
You can now paint custom numeric attributes directly on a model using the 3D Paint Tool.
 Except where otherwise noted, this work is licensed under a Creative Commons Attribution-NonCommercial-ShareAlike 3.0 Unported License