Splits one or more faces on a polygon mesh into multiple faces after you specify the split location on the mesh.

 + space bar +
  , selecting Split from the marking menu, and then swiping east.
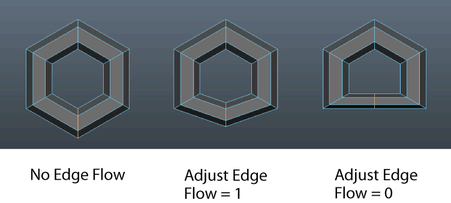
Lets you insert edges that respect the curvature of the surrounding mesh. This option is disabled by default, but you can
toggle Insert with edge flow by selecting and deselecting Edge Flow from the marking menu ( +
+  +
+ ).
).
 when you click the edge where you want the split to begin. See Split polygon faces.
Set Adjust Edge Flow to 1 to transform the surface curvature of the edges to respect the curvature of the surrounding mesh. At 0 the edges move to the middle of the other nearby edges, creating a flat surface.

 Except where otherwise noted, this work is licensed under a Creative Commons Attribution-NonCommercial-ShareAlike 3.0 Unported License