In Maya, animating characters nonlinearly involves working with many different animation components and levels of animation hierarchy. These chunks and layers of animation data are what give you the freedom to mix, manipulate, edit, and separate your character’s animation into any sequence you desire. The tool with which you manage all these aspects of your character’s nonlinear animation is the Trax Editor. See Trax Editor overview.
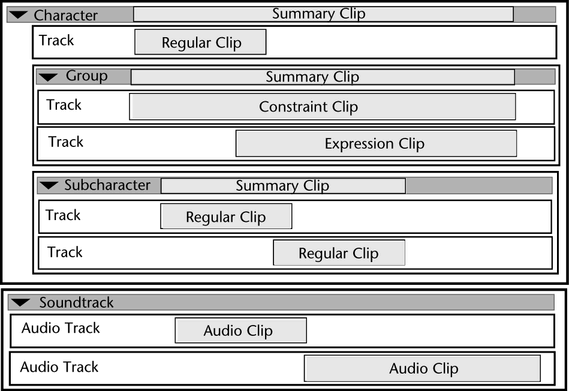
Clips are the basic components of nonlinear animation in Maya. A clip is a collection of animation curves for a character. If you create a clip for an animated object that is not already part of a character set, then the Trax Editor automatically creates a character for the clip. See Characters, groups, and subcharacters.
Clips let you gather a character’s keyframe or motion capture animation curves into one bundle, so that you can manipulate the character’s animation data nonlinearly.
When you create a clip, two kinds of clips are generated: a source clip and a regular clip.
The source clip is added to the character’s scene and the regular clip is inserted under its character in the Trax Editor. For low-level information on what occurs in Maya’s dependency graph (DG) when you create a clip, see animClip. See also Dependency graph.
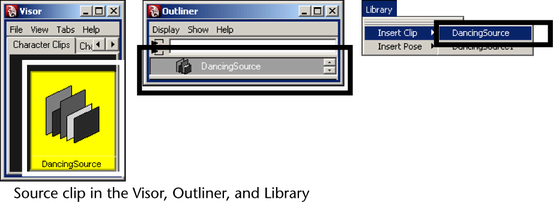
The source clip contains the original, unmanipulated keyframe animation data from the time when you turned that data into a clip. The source clip does not appear in the Trax Editor. Instead, Maya saves the source clip outside of the Trax Editor to protect the original animation curves from being accidentally modified and ensures that you have an unmodified clip to revert back to should the need arise.
Each regular clip is an instance of a source clip. When you change an attribute of a source clip, each of its regular clips in the Trax Editor are also modified.
You can access your source clips from the Visor, Outliner, or the Library menu in Trax. See What are the Visor, Outliner, and Clip Library?. You can edit source clips by modifying their attributes in the Channel Box. See Edit source clips.

The regular clip is an animation clip that is the child or instance of its source clip. The playback range of the regular clip can be part or all of the range stored in the source clip. See Source In/Out. The animation clips that appear in the Trax Editor are regular clips.
You can access your regular clips from the Trax Editor or Outliner. See Outliner. You can edit regular clips by modifying them in the Trax Editor or by changing their attributes in the Attribute Editor.
Expression and Constraint clips
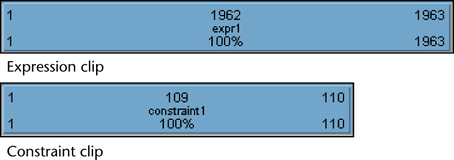
You can create special clips for animations with expressions or constraints. Expression and constraint clips can contain only expression or constraint channels. By keeping expressions and constraints separate from regular animation clips, Maya gives you more control over when in their character’s animation they take effect as well as the range of the expressions or constraints that are included in their clips.
For example, if your animated character has both keyframe animation channels and expression channels, then you need to create a regular clip for the keyframe channels and a separate expression clip for the character’s expression channels. See Create expression or constraint clips.
In the Trax Editor, you can access and edit your expression and constraint clips just like regular animation clips.

A summary clip represents the cumulative range of all a character’s clips and it lets you move all the clips in a character at the same time. See Summaries.
What can you do with animation clips?
You can do the following with clips:
See Clip interaction controls and Clip states.

Audio clips are clips that contain audio file data. When you import .wav or .aiff files into the Trax Editor, these audio files appear as audio clips under the Soundtrack. See Soundtrack. You can use audio clips in Trax to set-up the timing of your animation data and their respective audio files.
During animation playback, only one audio clip at a time plays and the play priority of audio clips goes from the top-most clip to the bottom-most clip. For example, if you have multiple audio tracks and clips that overlap in time, then the audio clip in the top-most track will always play instead of other audio clips on other tracks that are at the same position on the Trax timeline.
You can not manipulate (trim, scale, split and so on) audio clips in Trax. You can only move audio clips along the Trax timeline. See Work with audio.
You can store a snapshot of a character’s current position for any moment in its animation. This snapshot is called a pose. See Create poses. Poses are essentially clips that capture only one frame of a characters animation.
You can access your poses from the Visor, Outliner, or the Library menu in Trax. See Visor, Outliner, and Clip Library. In the Trax Editor, you can scale, cycle, and hold poses just like regular animation clips. See What can you do with animation clips?. However, clip attributes (Frame In, Frame Out, and so on) do not appear on poses in Trax since poses are only one frame in length by default. To edit pose attributes, you must use the Attribute Editor.
Poses are useful in the following ways:

When you create a clip or pose for a character, the clip or pose is placed in a track under its character. Tracks are cells in the track view area that span the Trax timeline and can contain multiple clips. The clips in a track play from left to right as the scene plays.
You can use tracks to align, separate, or group your character’s animation sequences. You can also control the state of your tracks using the buttons (Lock, Mute, and Solo) in the track control area. You can create and remove tracks using the context-sensitive menu or by dragging clips upward or downward in the track view area. For information on adding a track to a character, group, or subcharacter, see Add tracks.
Tracks appear under characters, groups, and subcharacters. See Characters, groups, and subcharacters. Each character, group, or subcharacter in Trax can have multiple tracks.
Characters, groups, and subcharacters
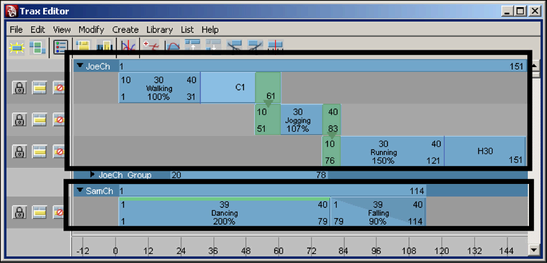
Character sets or characters are collections of animated objects, parts of objects, or attributes. If you create a clip for an animated object that is not already part of a character set, then the Trax Editor automatically creates a character for the clip. In the Trax Editor, characters appear as the first level of track hierarchy. This means that characters are the parents or top-level groups for all their tracks, groups, and subcharacters. See Track hierarchy.
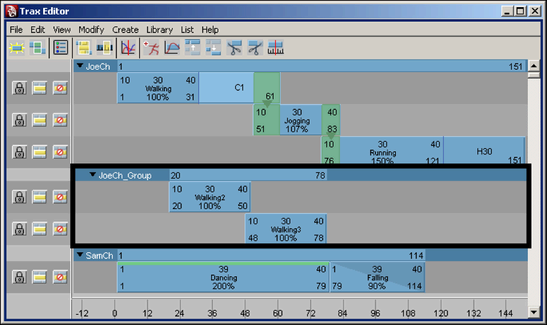
Groups are arbitrary collections of clips for a single character. You can use groups to separate and isolate specific sequences of your character’s animation. See Create groups. A character or subcharacter can have multiple groups, but you can not have groups within groups.
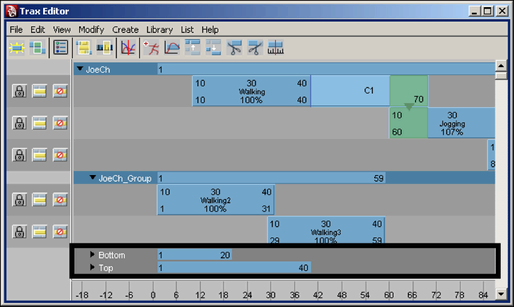
Subcharacter sets or subcharacters are bundles of related character set attributes. You can use subcharacters to simultaneously key and manipulate groups of attributes. See Create subcharacter sets.
Subcharacters are on the same level of the track hierarchy as character groups. See Subcharacters. In the Trax Editor, subcharacters always appear below a character’s groups. Characters can have multiple subcharacters.
When working with subcharacters in the Trax Editor, note the following: