


Create and edit blends
You can create a blend between two animation clips that share common attributes and are part of the same character set. A blend creates a smooth transition from the motion of one clip to another.
When blending animation clips, you will get the best results if you blend clips that have similar motion. For example, creating a blend between a Walk animation clip and a Run animation clip. In comparison, blending dissimilar motion may not produce desirable results. For example, creating a blend between a Run animation clip and a Tumble animation clip may create an awkward transition.
You can create the following types of blends:
After creating a blend, you can edit its blend curve and weight value. The Weight attribute on the blend determines the amount of influence each clip has during the blend. For example, when a blend’s weight is 0.0, the first clip in the blend has all of the influence and when a blend’s weight is 1.0, the second clip in the blend has all the influence.
The clips must have one or more common attributes or the blend operation will fail.
The Blend Clip Options window appears. See Blend.
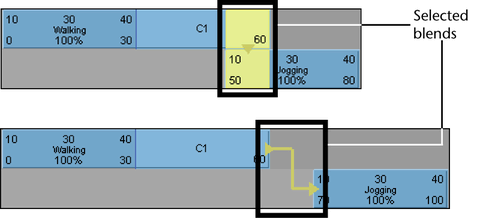
The blend is created, and a green arrow representing the blend appears between the selected clips.
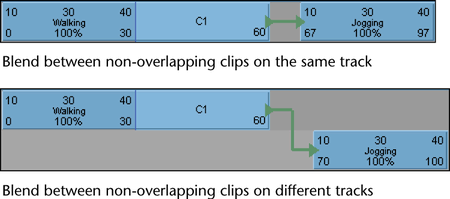
For overlapping clips, make adjustments to the clip positions in the track view area so that the animation transitions smoothly from one clip to the other.
 +a.
+a.
The Attribute Editor appears, displaying the attributes of the selected blend.
See Rotation Blend.
 button.
The Graph Editor appears with the weight curve for the selected animation blend present and framed in its graph view.

By default, the blend’s weight curve has a range from 0-1 and is linear. See Blend.
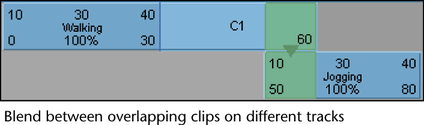
At the first frame where clips overlap, the top clip controls the motion 100% and the bottom clip controls the motion 0%. At the last frame where clips overlap, the bottom clip controls the motion 100% while the top clip controls the motion 0%.
During playback, the control of the first clip in a blend decreases as the second clip’s control increases.
 ).
).
Otherwise, Maya will not allow keys on the blend weight curve to have floating point values.
Select the weight curve’s
keys or tangents, select the Move Tool from
the Maya toolbox, and  -drag
the keys or their tangents to change the shape of the curve. For
example, you can reshape the default blend weight curve to make
it resemble the following:
-drag
the keys or their tangents to change the shape of the curve. For
example, you can reshape the default blend weight curve to make
it resemble the following:
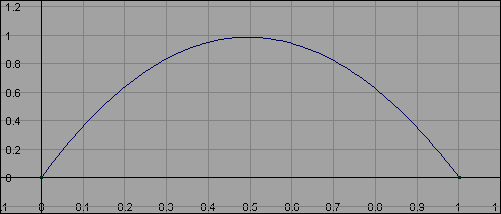
With this curve, the first clip in the blend starts with 100% control at the start of the blend, decreases to 0% at the middle, then increases to 100% control at the end of the blend. The bottom clip changes correspondingly from 0% to 100% to 0% control during the blend.
Select the Insert
Keys Tool or Add Keys Tool from
the Graph Editor’s toolbar, and -click
the curve to add additional keys to the curve. You can then use
these new keys to alter the shape of the weight curve.
 button.
 .
.