Show in Contents

Add to Favorites

Home: Autodesk Showcase Help

Change colors

Introduction to material properties

Apply environment lighting overrides

Apply
image maps
What are image maps?
An image map (sometimes
called texture map) is a regular picture
file in an image format such as jpeg, bmp, tiff, or png. Image maps
are used in materials to create specific effects or patterns.
They are known by
various names depending on the parameters they are used for:
- Color maps replace a solid color
with an image that repeats across a surface. For example, cloth
or wood patterns.
- Highlight maps (or specular maps)
create the appearance of relief. Specular maps work best to create
visible noise that in the real world if touched would feel smooth.
For example, metallic paint.
- Reflection maps provide an image
that is reflected off shiny objects. The default in Hardware rendering
is to use the environment’s reflection map, so that the object reflects
the environment.
NoteReflection maps have no effect in Ray Tracing.
The reflections in Ray Tracing will accurately reflect the environment
and other objects in the scene. A large visual difference will be
seen between Hardware rendering and Ray Tracing if a reflection
map is used.
- Transparency maps determine which parts
of an object are opaque and which parts are transparent. They can
be used for materials with holes punched out such as a metal grill
or perforated rubber. Darker areas of the transparency map produce
an opaque material, while brighter areas create a more transparent
appearance.
Often
a transparency map is the inverse of a color map. If the color map image
format has an alpha channel, you can use that alpha as the transparency map.
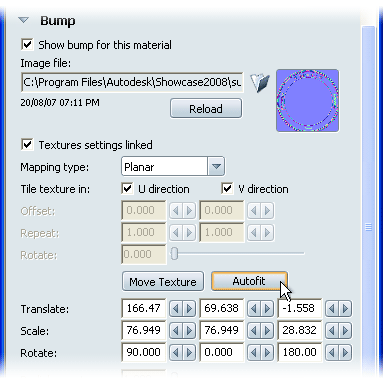
- Bump maps break up the relief
of a surface. In the real world, if the surface were touched it
would feel bumpy. For example, tire treads or rough plastic.
Bump textures must be
normal maps (that is, they must contain elevation as well as vector
information).
- Decal maps define the shape and
transparency of a decal material. This is similar to a transparency
map, except that decals can be layered on top of other materials.
For example, the numbers on a keypad or a painted logo.
Apply image maps
NoteTo
view the parameters for a particular material, select an object
with that material and press Ctrl+M.
- Select the surfaces you
want to work with.
(The
texture is applied over all of the surfaces you select.)
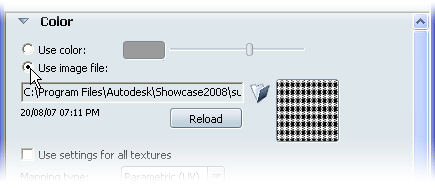
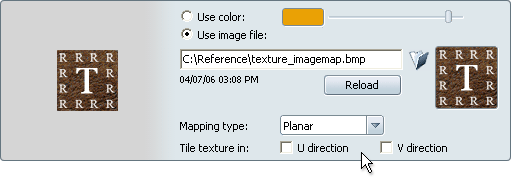
- Click the Use image file radio
button. (Decals require the use of an image file.)
- Click the folder icon to browse to and
select a texture map file.
NoteFile names should not contain special characters.
(After importing the
file, the date the file was imported appears beneath the browse
field for your reference.)
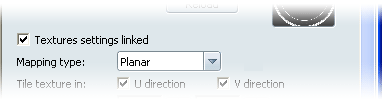
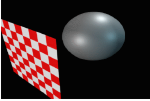
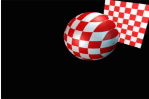
- To align the texture map to the surface,
use the appropriate Mapping type option:
- Parametric (UV)
-
No projection is used.
Instead, the image is mapped to the UV coordinates of the surface.
Each surface is mapped separately, so adjoining surfaces may show seams.
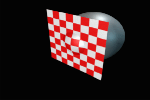
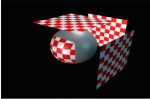
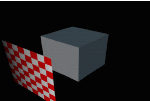
- Planar
-
The projection of a texture
or image as if the image were placed on a level surface and projected
onto the object. Use this option to apply a texture to one or more
surfaces that are relatively flat, such as wood paneling.
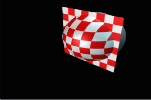
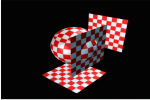
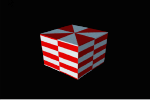
- Triplanar
-
The projection of a texture from
three perpendicular planes. Use this option for complex surfaces
where the texture needs to be applied from multiple angles to follow
the contours of an object.
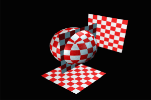
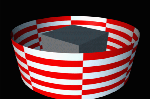
- Cylindrical
-
The projection of an
image onto an object, as if the image were rolled into a tube and projected
inwards towards the object. Use this option to apply a texture to
the edge of a circular surface, such as a car tire tread.
- Move the image map to best fit the surface.
(See the next topics.)
- To reload an image file after you have
made changes to it, click the Reload button.
Link texture settings for
image maps
To keep multiple image maps (Color,
Highlight, Bump, etc.) aligned during the process of mapping and
moving them, check Use settings for all textures above
the mapping controls.
Once this option is checked
for a single image map, all other image maps in the material inherit
the same mapping type, tiling, repeats, and transforms.
When this option is checked,
the checkbox for all image maps will read Texture settings linked. Once
this is active, changing the options for any image map in the material
will change them all.
Move image maps with
parametric (UV) mapping
For parametric (UV) mapping, use
the Offset, Repeat, and Rotate fields
to position, scale, and rotate the image onto the surface.
- Enter u and v values to offset or repeat
the image pattern.
- Type in the number of degrees or use
the slider to rotate.
Move image maps with
projection mapping
To move image maps that
use planar, triplanar, or cylindrical projection mapping:
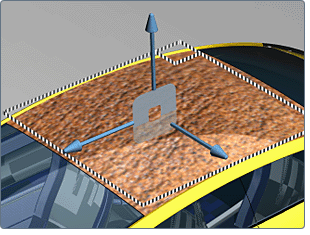
- Click the AutoFit button.
This action aligns the
image map to the surface bounding box, making the image map the
same size and plane as the selected objects.
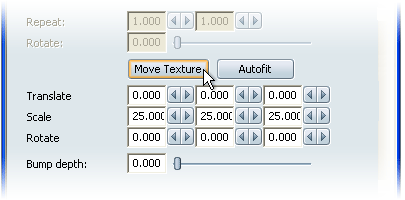
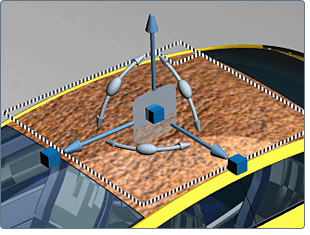
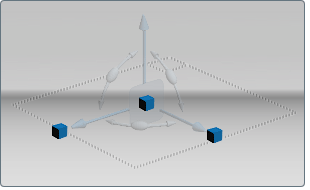
- To manually adjust the texture image to best fit
the model, click the Move Texture button.
- A manipulator appears to rotate, move,
or scale the texture map.
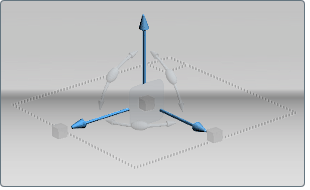
- To move the texture in one
direction, click on the arrows and drag.
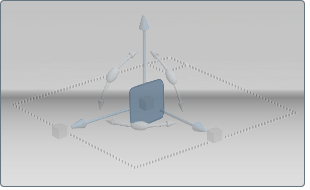
- To move the texture in one
plane, click on the large plane in the middle. (To change
the plane, rotate your view until it automatically adjusts.)
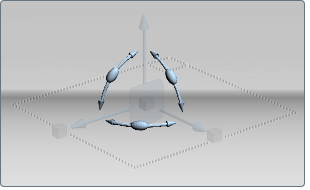
- To rotate the texture in one
plane, click on the arc handles and drag.
- To scale the texture in one
direction, click on the cubes and drag. To scale
the entire texture, click on the small cube in the middle.
- To align the projection to
be perpendicular to a surface, hold down the Ctrl key
and click with the left mouse button. Click and drag to interactively
drag across the surface.
- To move the pivot point about
which you're rotating and scaling the texture, press the Insert key.
The manipulator changes so you can move the pivot point in one direction
or in one plane.
- To stop moving the image map, click the
button again, now called Stop Moving,
or press the ESC key.
NoteYour changes are
reflected in the Translate, Scale, and Rotate fields
(which you can use to type in exact x, y, and z coordinates).
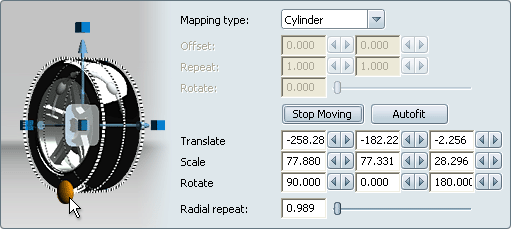
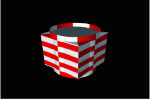
Repeat textures for cylindrical
mapping
For
cylindrical mapping, use the Radial repeat value
to repeat the texture several times around the surface. For the
textures to repeat uniformly, it is recommended that you type an
integer value (1, 2, 3, 4, and so on).
Or, use the manipulator
to drag the texture interactively:
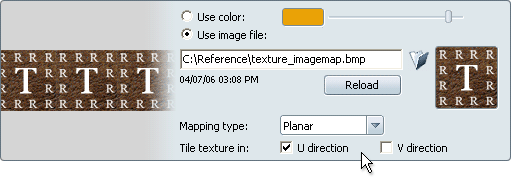
Turn off texture tiling
To apply marks, blemishes,
decals or labels to one area on a surface, you can turn off texture
tiling in both of the U and V directions. Or, turn it off in one
direction so the texture pattern repeats horizontally or vertically
(like wallpaper).
NoteThis
setting is available for color maps, highlight maps, transparency maps,
and bump maps (but not reflection maps).
To turn off texture tiling:
- In Tile
texture in, click off either (or both) U direction or V direction.
- If you turn texture tiling on
for both U and V, the texture is repeated horizontally
and vertically across the entire surface.
(This is the default setting for most materials.)
- If you turn texture tiling on
in one direction, it is repeated only in that direction
from edge to edge over the surface.
(The background is determined by the Color setting.)
- If you turn texture tiling off
in both directions, you can apply marks, blemishes, decals
or labels to one part of a surface.
(The background is determined by the Color setting.)