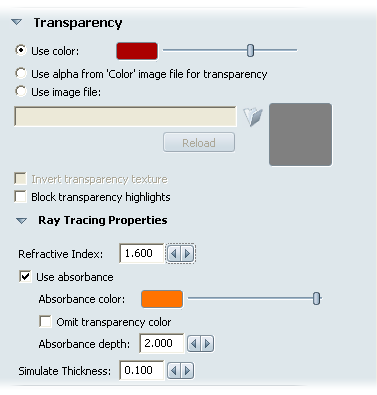
These options determine the transparency of materials. (For example, glass is more transparent.)

Click the color swatch to change the color. For detailson how to use the Color window to choose a color, see Change colors. Use the slider to adjust the transparency setting. Move it to the right for more transparency and move it to the left for more opaqueness.
If you have used an image map in the Color parameters and if that image has an alpha channel, click this button to use that alpha channel to control the surface transparency.
Using the alpha from the color image file helps you keep the color and transparency maps aligned. As you move the color map, the transparency map will stay aligned with the color map pattern.
Use a unique image as a transparency map.
Transparency maps determine which parts of an object are opaque and which parts are transparent. They can be used for materials with holes punched out such as a metal grill or perforated rubber. Darker areas of the transparency map produce an opaque material,while brighter areas create a more transparent appearance.
Reverses the transparency of a defined image file. What was fully transparent will then be fully opaque, and so on. Identical to opening the transparency image file in an image editor and inverting the colors.
Block highlights and reflections for all areas that are 100% transparent. Useful for simulating holes in solid surfaces.
For details on how to use these controls, see Apply image maps.
Ray Tracing Properties
Material transparency properties that are unique to the Ray Tracing display and rendering mode. These settings will have no effect on the material when viewed in Hardware rendering mode.
Simulate Thickness will "shift" the rays passing through the object to show refraction and absorption as if there was a second, identical surface at the specified depth behind the actual transparent surface. However, the ray tracing effects will not be as accurate with simulated thickness as they would be with true thickness. This simulation looks best when adding very small amounts of thickness to single surfaces, such as windows.