There are some tasks that you will use Video Post for more than others. This primer describes some of the more common sequences you'll find yourself using Video Post to create. The procedures are outlined in their simplest forms.
The following procedures are outlined:
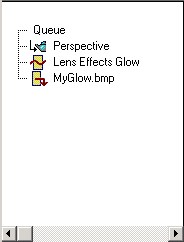
One of the most common things you'll want to do with the Glow filter is make an object glow. Here's how to do it in its simplest form.
 Video Post.
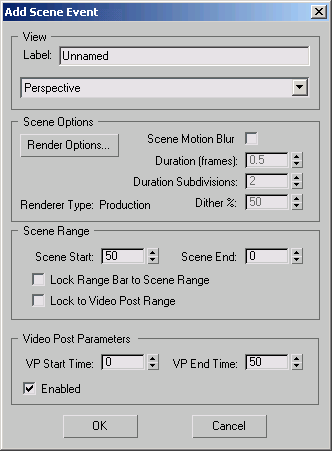
 Click Add Scene Event and set the view to Perspective.
 Click Add Image Filter Event and choose Lens Effects Glow from the Filter Plug-In list.
 (Add Image Output Event) and then click Files.
 (Execute Sequence).
You'll see the a glowing sphere in the render window.
Example: Create an animation from a series of still images:
Another common process you'll use Video Post to achieve is taking a series of still images you've rendered and convert them to an animation. To accomplish this task, you need an IFL file.
Video Post.
 (Add Image Input Event), and then click Files.
Choose the IFL file you created at step 1 and then click Open to close the selection dialog.
(Add Image Output Event), and then click Files.
(Execute Sequence).
The final product is an animation.
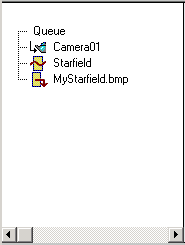
Example: Render a scene with a starfield:
At some time, you'll want to create a night scene that requires a starry sky. The key thing to remember when creating a star field is adding a camera to the scene. The Starfield filter only works with a camera. Here are the steps to set that up.
Place the camera to one side and have it pointing at the center of the sphere.
Video Post.
(Add Scene Event), and make sure the view is set to Camera01.
(Add Image Filter Event), and choose Starfield from the Filter Plug-In list.
(Add Image Output Event), and then click Files.
(Execute Sequence).
The final product is a rendered image of a sphere against a starry background.
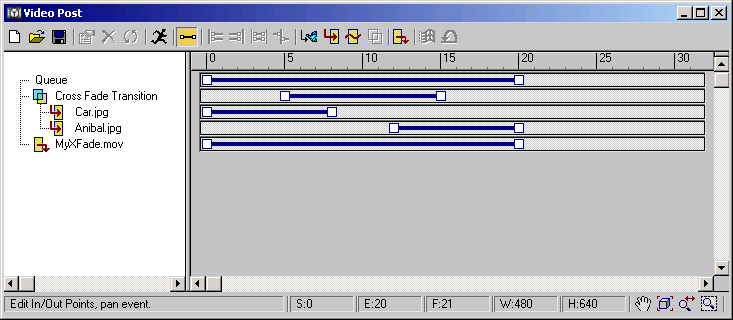
Set up a simple cross fade between two images:
Sometimes you want to transition from one view or animation to another. This set of steps with show you how to set up a cross fade from one image to another. For this example the complete cross fade will occur over 20 frames displaying the first image for five frames, cross fade for ten frame and then display the second image for the last five frames.
The resulting animation produced by this process could be used as an Image Input Event for a different Video Post sequence.
Video Post.
(Add Image Input Event), and then click Files.
Choose your first image and click Open and then click OK to close the Add Image Input Event dialog.
(Add Image Input Event) again, and then click Files.
Choose your second image and click Open and then click OK to close the Add Image Input Event dialog.
(Add Image Output Event), and then click Files.
 (Add Image Layer Event), and choose Cross Fade Transition from the list of compositors and transitions.
Click OK to close the Add Image Layer Event dialog. Notice how the Image Layer Event becomes the parent of the two Image Input Events.
 (Zoom Extents) to view the entire set of tracks.
By setting the end to frame 8 instead of 5, you'll have three frames during which the first image will fade to black.
Similarly, setting this end to frame 12 ensures that the second image will fade in over three frames and display in full color for the last five frame of the transition.
(Execute Sequence).
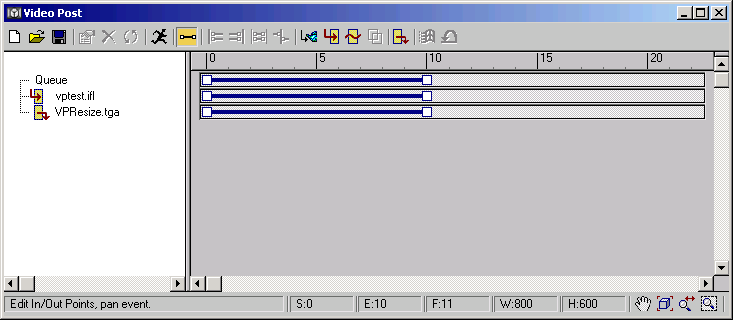
Example: Resize a series of images:
Perhaps you've rendered a series of still images but it turns out they were at the wrong resolution. You might normally think you have to re-render the entire scene again which will tie up all the systems to do the same work they just completed. Video Post can be used to resize the images without having to use all the systems.
Video Post.
(Add Image Input Event), and then click Files.
Choose the IFL file you created at step 1 and then click Open to close the selection dialog.
(Add Image Output Event), and then click Files.
(Execute Sequence).
When the rendering is complete, you will have a new series of resized images that have a name prefix of MyResize. So, if there were ten images listed in the IFL file, there will be ten new images named MyResize0000.tga through MyResize0009.tga stored in your image folder.
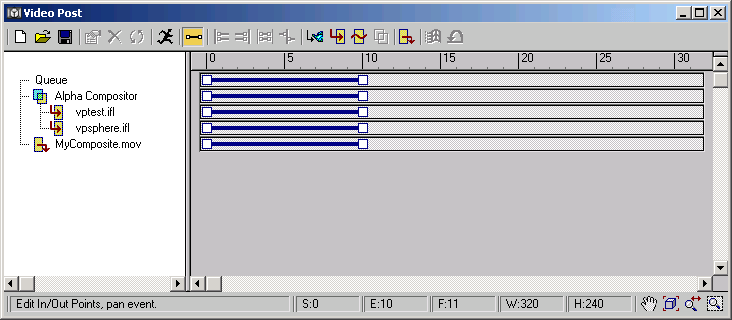
Example: Composite two image sequences:
Compositing two sets of images together is one of the “workhorse” operations of Video Post. This is commonly done when a project is nearing completion and it lets you combine all the images your artists have been rendering.
Video Post.
(Add Image Input Event), and then click Files.
Choose your first IFL file and click Open and then click OK to close the Add Image Input Event dialog.
(Add Image Input Event) again, and then click Files.
Choose your second IFL file and click Open and then click OK to close the Add Image Input Event dialog.
(Add Image Output Event), and then click Files.
(Add Image Layer Event), and choose Alpha Compositor from the list of compositors and transitions.
Click OK to close the Add Image Layer Event dialog. Notice how the Image Layer Event becomes the parent of the two Image Input Events.
(Execute Sequence).
Example: Render a scene over an image sequence or an animation:
This process in similar to the last one except you might have an animation or series of still images you want to use as the background for your existing scene.
Video Post.
(Add Image Input Event), and then click Files.
Choose your IFL file or animation and click Open and then click OK to close the Add Image Input Event dialog.
Click Add Scene Event and set the view to Perspective or a Camera you have in the scene.
(Add Image Output Event), and then click Files.
(Add Image Layer Event), and choose Pseudo Alpha from the list of compositors and transitions.
Click OK to close the Add Image Layer Event dialog. Notice how the Image Layer Event becomes the parent of the two Image Input Events.
(Execute Sequence).
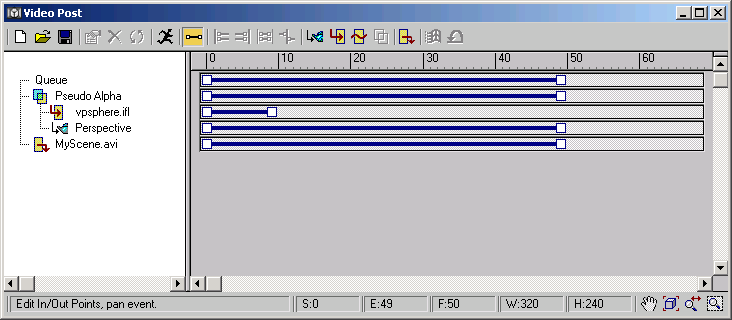
Notice that the Image Input Event in this example is only ten frames long. Normally, you'd choose a set of background images that equals the number of frames in your scene. When this sequence is executed, as is, the images in the IFL file will only appear for the first ten frames and then disappear.
 Loop Event, and set the number of times to 4.
The Image Input Event becomes further nested in the queue. If you want, you can use the default Loop setting or change it to Ping Pong then click OK to close the Add Loop Event dialog.
(Execute Sequence) again and render the scene.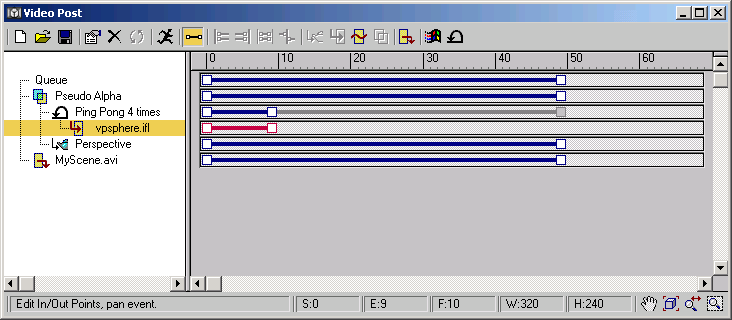
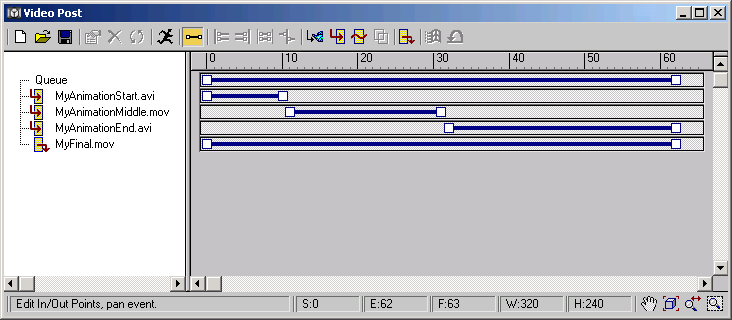
Join two animations end to end:
If you're working in a production environment, you probably do not work on an entire animation by yourself. Instead, you might work on one part while other artists are working on other parts. At the end of the project, everyone's animations need to be joined together.
Video Post.
Add Image Input Event), and then click Files.
Choose your first animation file and click Open and then click OK to close the Add Image Input Event dialog.
(Add Image Input Event) again, and then click Files.
Choose the next animation file and click Open and then click OK to close the Add Image Input Event dialog.
(Add Image Output Event), and then click Files.
 (Abut Selected).
(Zoom Extents) to view the entire set of tracks.
(Execute Sequence).
(Abut Selected).
(Zoom Extents) to view the entire set of tracks.
(Execute Sequence).
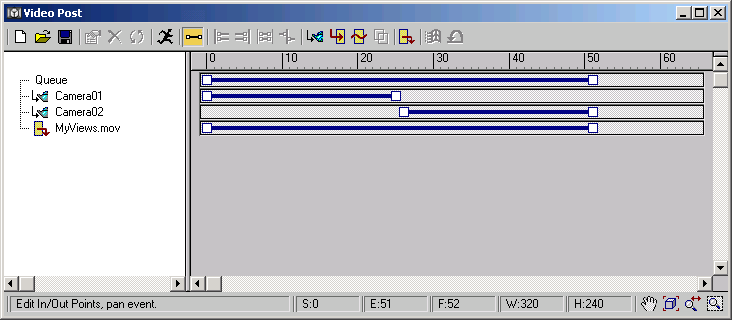
It's not often that a final scene shows views from only one viewpoint. Either the camera moves or there are multiple cameras from which images are rendered. This sequence shows you how to switch from one camera view to another.
Camera01.
Camera02.
Video Post.
(Add Scene Event), and set the view to Camera01.
(Add Scene Event) again, and set the view to Camera02.
(Abut Selected).
(Add Image Output Event), and then click Files.
(Execute Sequence).
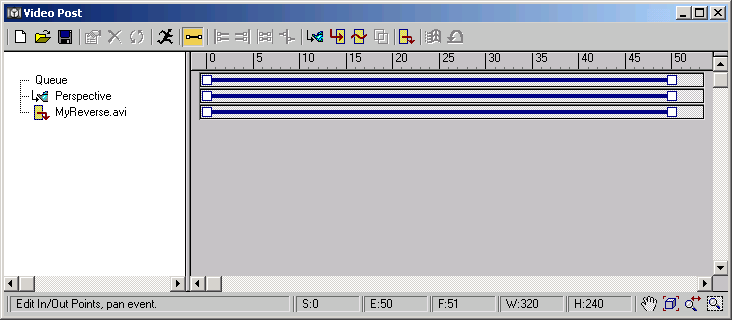
It's not commonly done but when you need to render a scene in reverse you could spend hours trying to accomplish it. Video Post makes it easy.
Video Post.
(Add Scene Event), and set the view to Perspective or a camera in the scene.
 (Add Image Output Event), and then click Files.
(Execute Sequence).
(Add Image Output Event), and then click Files.
(Execute Sequence).