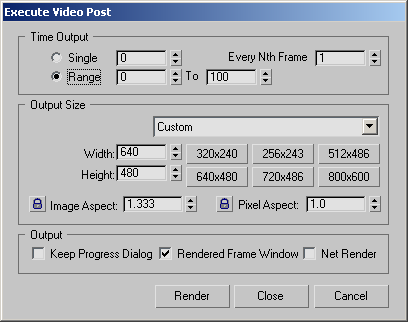
You execute the Video Post queue as the final step in creating a post-produced video. Execution is different from rendering because rendering is done for scenes only and you can use Video Post to composite images and animations without including the current 3ds Max scene.
Although the Execute Video Post controls are similar to those of the Render Setup dialog, the setting are independent, and do not affect each other.
During execution, you can move or close the rendered frame window, but you cannot use the rest of 3ds Max until the execution is completed or cancelled.
The rendering time for the last rendered frame in the Video Post sequence is displayed in the prompt line of the main 3ds Max window.

Choose Custom or a standard film or video format from the list. For Custom, you can set the aperture width of the camera, the rendering output resolution, and the image aspect ratio or pixel aspect ratio. When you choose a standard format, the aperture width and aspect ratios are locked, but you can change the resolution.
Specifies a preset resolution. Right-click a button to display a subdialog that lets you change the resolution specified by that button.
Sets the aspect ratio of the image. As you alter the Image Aspect, you also alter the Height value to maintain the correct aspect ratio. For standard formats, the image aspect ratio is locked, and this spinner is replaced by a text display.
If you lock the Image Aspect (by clicking the Lock button), Width and Height are locked to each other, so that changing one changes the other to maintain the image aspect ratio, and changing the Pixel Aspect value changes the Height value to maintain the image aspect ratio.
Sets the aspect ratio of the pixels of the image. For standard formats, the pixel aspect ratio is determined by the format and this spinner is replaced by a text display.
If you lock the pixel aspect ratio (by clicking the Lock button), the Pixel Aspect spinner is replaced by a text display. The Lock button is available only for the Custom format.
Enables network rendering. If Net Render is turned on, when you render you'll see the Network Job Assignment dialog.