| I know, you
have all these AutoCAD drawings lying around that you’ve worked
very hard on. Is that data wasted? Absolutely not! Who better to
understand all the nuances in translating AutoCAD data than the
company that made the product? Autodesk Inventor contains an Import
wizard that makes it easy to take designs created in AutoCAD into
an Autodesk Inventor part or drawing file. Your 2D data comes in
as a sketch, ready to be turned into a 3D part!

Options, Options, Options (A)
You’ll use the Open menu to import AutoCAD drawings into Autodesk
Inventor. In the Open dialog box, change the file type to DWG. Now
don’t jump the gun and hit Open—it’s very important that you click
the Options button first (in fact, this button should be in bold
type in bright red letters so you can’t miss it!). We AutoCAD veterans
are programmed to ignore additional buttons in the Open dialog box—let
this be an exception!
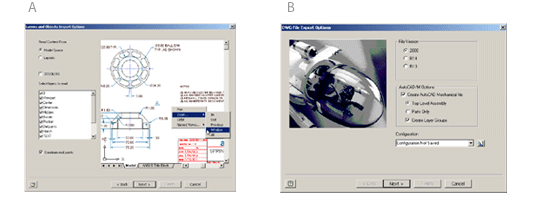
The Options button takes you to the Import wizard. Here you can
select the layers you want to translate (as shown in the figure)
and set up some basic parameters such as the units and desired destination
file type. Be sure the Constrain End Points option is selected;
otherwise, you could end up with gaps in your AutoCAD data. You
don’t want to have to run around tidying up all those unconstrained
endpoints! You can also decide whether you’d like your DWG data
to land in an Autodesk Inventor drawing or part file. After answering
these basic questions, click the Open button.
The associative dimensions you brought in from AutoCAD are not the
smart dimensions we have in Autodesk Inventor. Autodesk Inventor
automatically migrates the AutoCAD dimensions to the smarter driven
dimensions. This raises the IQ on those AutoCAD dimensions and gives
them the intelligence we’ve grown to know and love. Now you can
drive your AutoCAD geometry by changing the dimension value—if only
it were that easy in AutoCAD!
What About Blocks?
AutoCAD blocks are brought into Autodesk Inventor as sketched symbols
(the equivalent of a block). You can then insert additional instances
of those symbols into your drawing (much like blocks).
What about your title blocks and borders? Here’s a little tip for
you—split your title block and border into two different AutoCAD
drawing layers. Use the Import wizard twice, bringing the title
block in as a Title block and the border in as a Border. That way
you won’t have to re-create them in Autodesk Inventor.
The Export Wizard (B)
What if you want to go the other way? Perhaps you need to send an
Autodesk Inventor drawing to someone who only has AutoCAD. Now you’ll
turn to the Export wizard.
You can save your Autodesk Inventor file to AutoCAD Release 13 and
up. In fact, you can save it as a DXF™ file should you have a client
who’s still on Release 12. I hear they’re still out there!
The Export wizard also enables you to save your Autodesk Inventor
objects to specific layer names. You may also choose to associate
a specific template file to the drawing.
Autodesk realizes that you have made a huge investment in AutoCAD
drawing files and has made it easy to bring this data into Autodesk
Inventor.
< back next
>
|

