| First and foremost, you
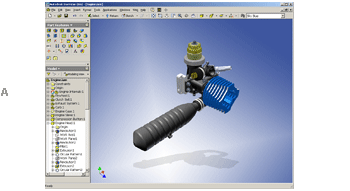
need to feel comfortable in the Autodesk Inventor environment. Let’s
take a quick tour of the user interface and point out some of the
similarities with and differences from our familiar AutoCAD environment.

What happened to my command line? (A)
We depend on it in AutoCAD. In fact, to some of us it’s practically
a religion, but in Autodesk Inventor you won’t even miss it. We
don’t use “commands” in Autodesk Inventor, we use “tools.” You can
easily access each tool from four different areas—pull-down menus,
toolbars, context-sensitive shortcut menus, and the panel bar. Of
these, only the panel bar should be unfamiliar to you. While AutoCAD
still relies on countless keyboard options for many commands, here
you’ll find a variety of friendly, dynamic dialog boxes to input
data. A message segment of the Standard toolbar helps guide you
along, but it does not accept input like the AutoCAD command line
does. You’ll also find that the status bar located in the lower
left corner of the screen often contains pertinent information.

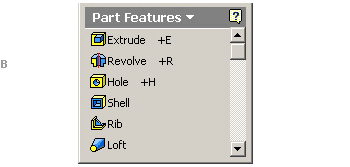
What is a panel bar? (B)
Imagine if AutoCAD were smart enough to display the appropriate
toolbar, depending on where you were in your design process. If
you were dimensioning, the Dimensioning toolbar would automatically
appear. If you were editing your drawing, the Modify toolbar would
appear, and so forth. Well, Autodesk Inventor is smart enough to
supply you with the tools appropriate for the particular mode you
are in. On the left side of the screen (by default), you’ll find
the panel bar acts much like an intelligent toolbar. If you are
sketching in 2D, the panel bar displays the 2D tools. When you are
ready to turn your 2D sketch into a 3D feature, the panel bar switches
to display your 3D tools.You spend less time looking for commands
and more time focusing on the design.
How do I use the Autodesk Inventor browser?
In the lower left corner of the screen, a browser panel displays
a history of how your geometry was created. As you select the items
in the browser, you’ll find that the designated geometry highlights
on the screen. It’s easy to edit your file by selecting the desired
geometry from the browser. In AutoCAD we select our geometry by
using the Crossing and Standard Window selections (which, incidentally,
also works in Autodesk Inventor). You’ll find that the browser is
a nice addition for selecting those hard-to-reach parts.
What happened to my UCSICON?
The UCSICON has been replaced with a color-coded 3D indicator. The
red arrow indicates the X direction, green indicates the Y direction,
and blue indicates the Z.We’re extremely dependent on the UCSICON
in 3D AutoCAD, but in Autodesk Inventor I think you’ll find your
reliance on the 3D indicator is minimal.
You can turn on a variety of snap and grid settings as well as an
origin point if that makes you feel more comfortable. In fact, if
you insist on using coordinates while drawing, you can turn on Precise
Input (but I’ll try to talk you out of that).
Take a spin through this simple and logical user interface—it won’t
take long for you to feel right at home in the Autodesk Inventor
environment.
< back next
>
|


