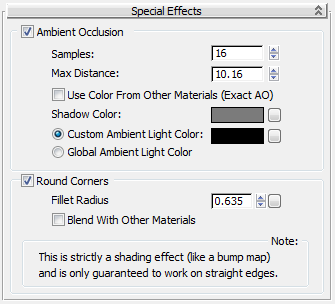
Provides settings for ambient occlusion (AO) and round corners and edges.
Ambient Occlusion (AO) is a method spearheaded by the film industry for emulating the look of true global illumination by using shaders that calculate the extent to which an area is “occluded,” or prevented from receiving incoming light.
Used alone, an AO shader, such as the separate mental ray Ambient/Reflective Occlusion shader, creates a grayscale output that is dark in areas light doesn’t reach, and bright in areas where it does.
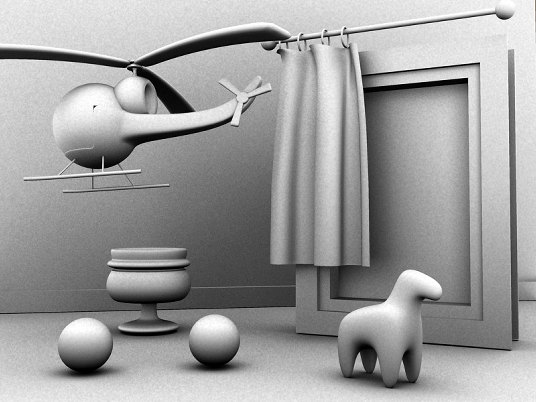
The following image illustrates the main results of AO: dark crevices and areas where light is blocked by other surfaces, and bright areas that are exposed to the environment.

An example of AO applied to a scene
One important AO control is that you can adjust how far AO it looks for occluding geometry.

AO looked up within a shorter radius
Specifying a radius creates a localized AO effect: Only surfaces within the given radius are considered as occluders. This also speeds up rendering. The practical result is that the AO provides nice “contact shadow” effects and makes small crevices visible.
The Arch & Design material gives you two ways to use its built-in AO:
The latter method is especially interesting when you use a highly smoothed indirect-illumination solution, such as a high photon radius or an extremely low Final Gather density, which could otherwise lose small details. By applying the AO with short rays, these details can be brought back.
Computer-generated imagery tends to look unrealistic, partly because edges of objects are geometrically sharp, whereas most edges in the real world are slightly rounded, chamfered, worn, or filleted in some manner. This rounded edge tends to “catch the light” and create highlights that make edges more visually convincing.
The Round Corners option in the Arch & Design material creates the illusion of rounded edges at render time. This feature is intended primarily to speed up modeling, so that you don’t need to explicitly fillet or chamfer the edges of objects.
Round Corners does not produce displacement; it is merely a shading effect, like a bump map. It is best suited for straight edges and simple geometry, not advanced, highly curved geometry.

Ambient occlusion helps emulate the look of global illumination by creating darker areas where light doesn’t reach, without actually generating shadows. With the Arch & Design material, you can specify ambient occlusion on a per-material basis.
The following illustration depicts a model helicopter that is lit almost exclusively by indirect light. Note how the helicopter does not feel “grounded” in the left-hand image: The shadows under the landing skids are too vague. The right-hand image uses AO to “punch out” the details and the shadows where the landing skids contact the floor.
See also: Built-in Ambient Occlusion.
Defines the radius within which mental ray looks for occluding objects. Smaller values restrict the AO effect to small crevices only, but are much faster to render. Larger values cover larger areas but render more slowly. Default=4.0.
The following illustrations show the raw AO contribution with two different distances:
When on, derives the AO coloring from surrounding materials, for more accurate overall results. (This is also known as color bleeding.) For example, a glowing material would return a brighter color than a dark material.
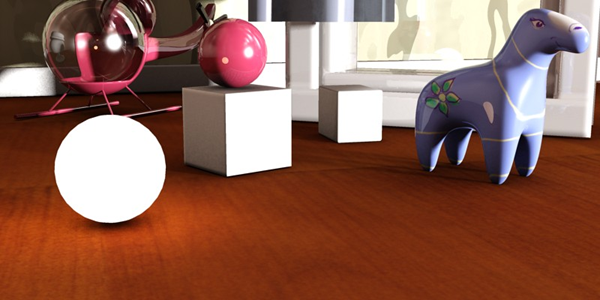
In the following pair of illustrations, the first image shows the problem with the traditional AO: It applies to all indirect illumination and always makes it darker. The problem is most noticable for the glowing sphere, which has a dark spot under it, but it can also be perceived on the floor in front of the cube which is unrealistically dark, even though the cube is strongly lit on the front. You can also see unconvincing shadows between the legs of the horse, and below the red ball.
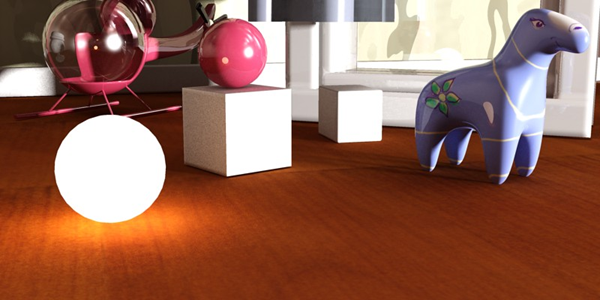
The second image has Use Color From Other Materials on for all materials, so the floor is lit correctly by the glowing ball, there is a hint of white bounce light on the floor from the cube, and the shadows of the horse legs and of the red ball better match the objects that cast them.

Use Color From Other Materials is off

Use Color From Other Materials is on
If you find that using AO creates a “dirty” look with excessive darkening in corners, or dark rims around self-illuminated objects, turn on Use Color From Other Materials for a more accurate result.
When Use Color From Other Materials (see preceding) is off, sets the darkness of the AO shadows. It is used as the multiplier value for completely occluded surfaces. In practice, a black color makes the AO effect very dark; a middle-gray color makes the effect less noticeable (brighter), and so on.
When Use Color From Other Materials is on, this setting determines the ratio between the standard AO functionality with Shadow Color set to black and the color bleeding from other materials. For example, at the default setting, R=G=B=0.2, 20 percent of the AO shadow color is derived from black, and 80 percent is derived from the color of the nearby material. If you set Shadow Color to R=G=B=0.0 (black), then 100 percent of the shadow color comes from nearby materials. If you set Shadow Color to R=G=B=1.0 (white), then 100 percent of the shadow color comes from black; this is the same as turning off Use Color From Other Materials and setting Shadow Color to black.
You can specify a color for the ambient light used in AO, or use the global color specified on the Environment panel Common Parameters rollout.
This parameter is used for doing more traditional AO; that is, supplying an imagined “ever-present ambient light” that is then attenuated by the AO effect to create shadows.
While traditional AO is generally used when rendering without other indirect light, you can also combine it with existing indirect light. Bear in mind that this “ever-present ambient light” is inherently non-physical, but can possibly help lighten some troublesome dark corners.
This effect rounds off corners and straight edges as a rendering effect only; it has no effect on geometry.
The rounding effect happens to convex corners and surfaces that actually intersect. Concave corners that merely touch will not display the effect. To get the effect to work in concave corners, the objects must be pushed into each other a little. The effect is intended for straight edges, and it is not guaranteed to work properly for highly curved, complex intersections.
See also: Rounded Edges.
By default, the rounding effect happens only between surfaces of the same material, but if you turn this on the filleting is performed against any material.
In the following image, the molten chocolate is rounded off against the submerged objects even though they use different materials. In actuality, the molten chocolate is a completely flat plane.

Objects in molten chocolate