 Using Photos to Model Façades
 Using Photos to Model Façades
With a photo of a building, you can create a remarkably realistic model. This tutorial shows you how to do so.
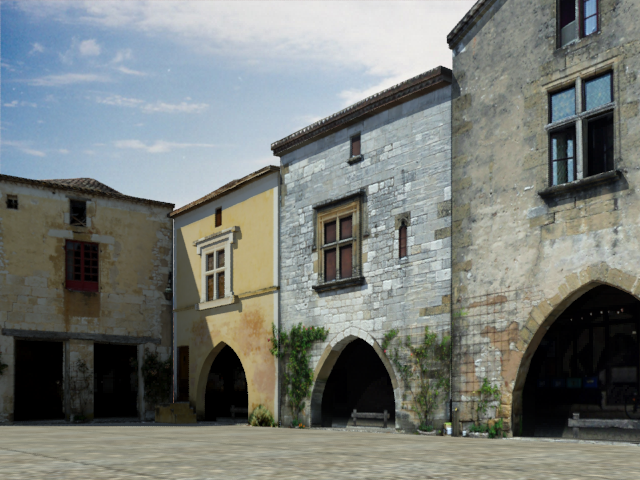
Model of house fronts on a plaza
In this tutorial, you will model two house fronts, based on photos of buildings in the plaza of Monpazier, a 13th-century bastide (fortified town) in Dordogne. The illlustration shows these houses, along with two others (in the actual plaza, the houses occupy different positions).
You use each photo both to construct the façade and to texture it. In a way, you are “reverse engineering” the original architecture. Each house is constructed as an Editable Poly object: You will use various polygon-editing tools to give the façade depth so it can cast realistic shadows, and then use the Unwrap UVW modifier to adjust the texture and improve the model’s appearance.
See Modeling an Airplane for an example of mesh modeling with more-or-less regular polygons.
 (Project Folder) and set
your current project to Autodesk 3ds Max 2011 Tutorials.
Some Pointers: Preparing a Photo Before You Use It to Build a Model
This section explains how to prepare photos for use in the kind of façade modeling the tutorial demonstrates. You might want to read it if you plan to take your own photos (or scans) to use in a similar way. Or you might want to skip this section, do the tutorial itself, and then read this material later.
In a photograph, as in the human eye, parallel lines appear to converge. But to create a façade in 3ds Max, horizontal lines should be horizontal, and vertical lines should be vertical. So you will almost always need to use a graphic editing program, such as Photoshop, to adjust the photo before you use it as a texture.
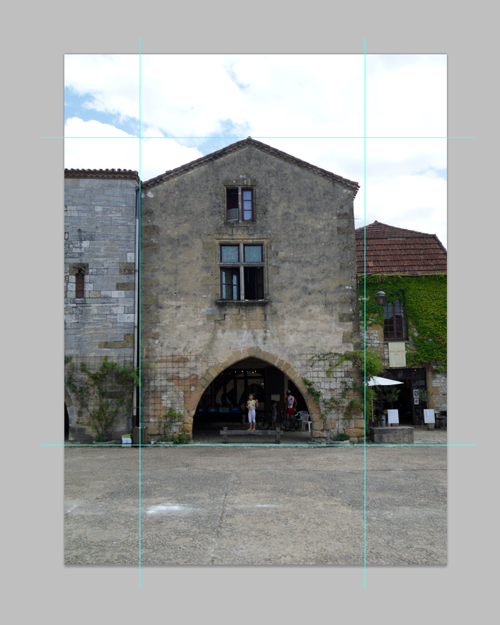
For example, here is the original photo used to create “Façade 4,” the second building you construct in the tutorial:

Superimposing guidelines on the house, shows that the groundline is horizontal, and the left side is close to vertical, but that the right side needs adjusting:
Using a perspective-correction or “distortion” tool, lets you align the sides of the house to the guides:
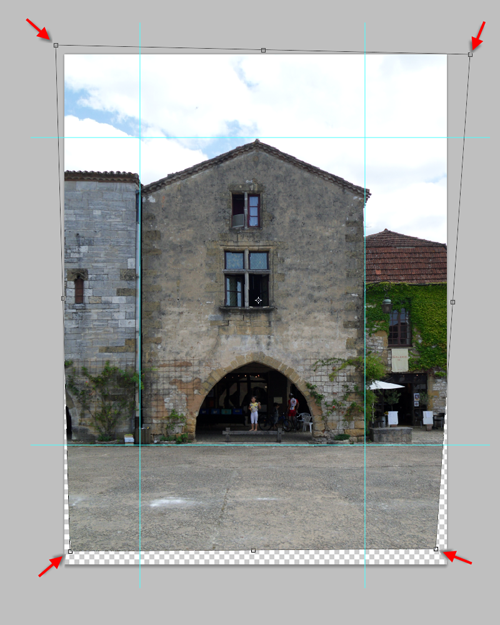
A view camera, which uses a bellows for the body, can be set to accomplish perspective correction, too. But view cameras are not in widespread use, these days.
A photo editor has other uses. In this example, we wanted to remove the little girl standing in the archway:
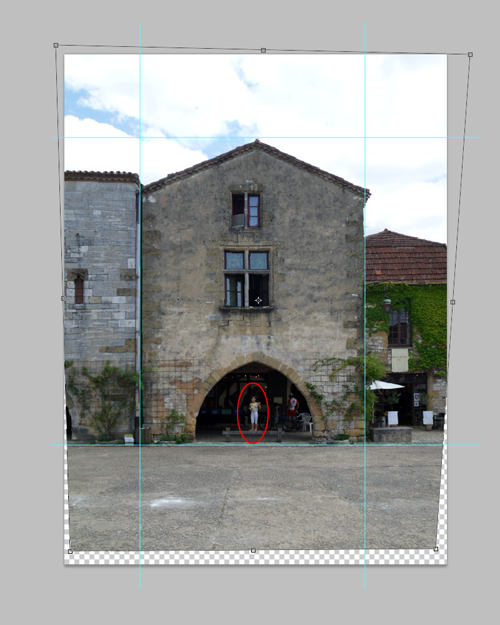
... Which is easy to do with most such programs:

The final step is to crop the image to the dimensions of the house itself:
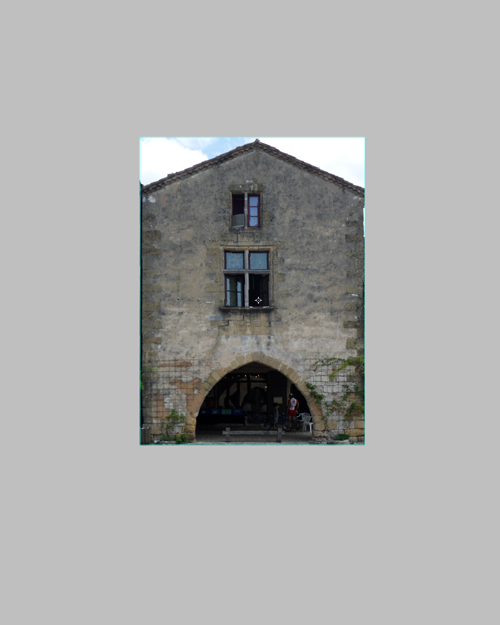
This final image becomes the bitmap used to construct and to texture the house in Modeling the Second House.