The last step in modeling Facade1 is to add the roof.
 (Zoom Extents Selected)
to see the entire façade.
(Zoom Extents Selected)
to see the entire façade.
 (Edge) to turn on the Edge
sub-object level once more.
(Edge) to turn on the Edge
sub-object level once more.
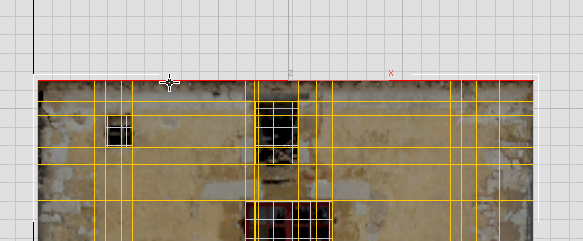
 Modify Selection panel, click
  (Loop Mode) to turn it on.
 (Select Object) active,
click one of the edges along the top of the façade.
(Select Object) active,
click one of the edges along the top of the façade.
Loop Mode selects all edges along the top of the façade.

 (Select And Move).
 Shift+move
the top of the façade forward a bit along the Y-axis.
Shift+move
the top of the façade forward a bit along the Y-axis.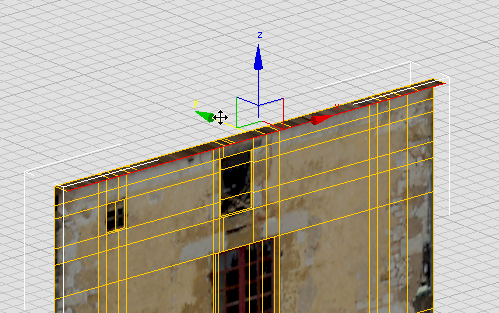
Reminder: Holding down Shift while you move, clones the edges to create new edges.
Shift+move
the top of the façade upward a bit along the Z-axis, until you can
see the ends of the roofing tiles.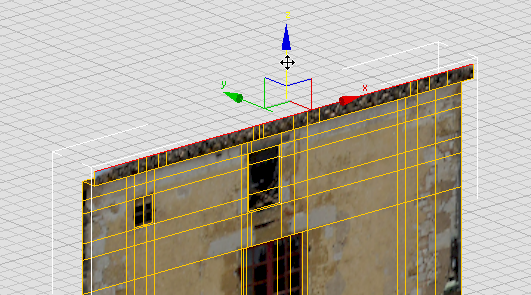
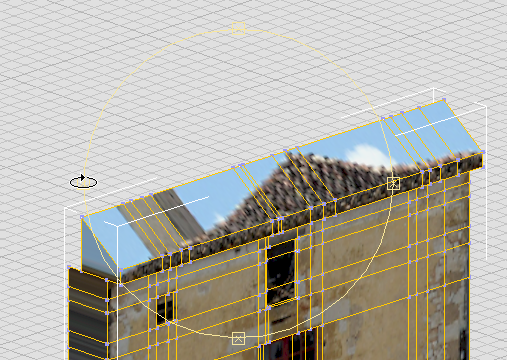
Before you finish the roof, you will add depth to the entire façade.
Add depth to the entire façade:
 (Select Object) to turn
it on and turn off Move.
(Select Object) to turn
it on and turn off Move.
 (Border) to turn on the
Border sub-object level.
Click an edge along the
top of the façade.
(Border) to turn on the
Border sub-object level.
Click an edge along the
top of the façade.
3ds Max selects the entire border.

(Select And Move).
Shift+move
the border back about 0.75m along the Y-axis.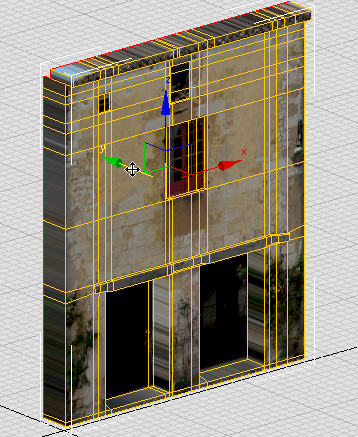
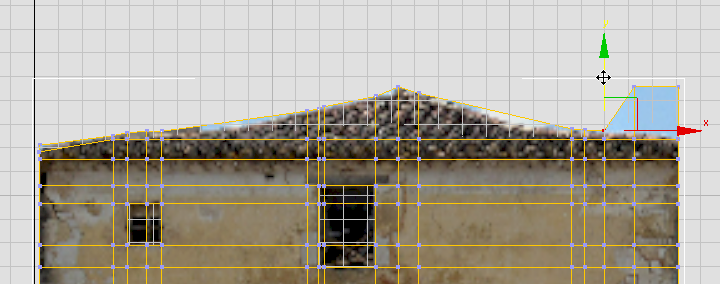
Now that the façade, including its roof area, has some depth to it, you can complete the roof.

 Zoom to get a better view
of the roof area.
(Edge) to go to the Edge
sub-object level, then drag a selection box to
select all the edges at the rear of the roof.
Zoom to get a better view
of the roof area.
(Edge) to go to the Edge
sub-object level, then drag a selection box to
select all the edges at the rear of the roof.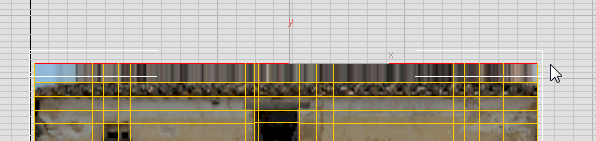
(Select And Move).
Move the selected edges
up along the Z-axis until you can see the peak of the roof.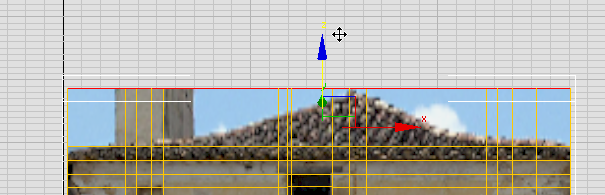
If you  orbit the view, you can
see that raising the rear edge also gives a slope to the roof.
orbit the view, you can
see that raising the rear edge also gives a slope to the roof.
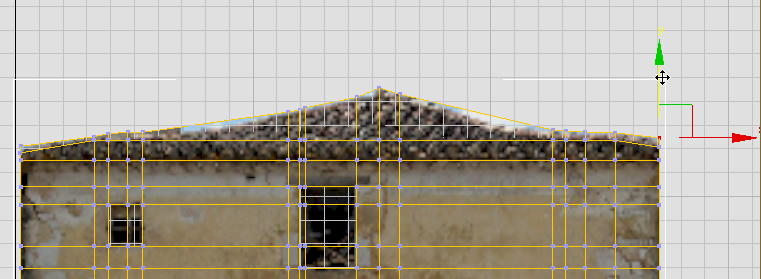
 (Vertex) to turn on Vertex
sub-object mode.
move vertices at the rear
roofline down vertically to match the bitmap of the roof.
(Vertex) to turn on Vertex
sub-object mode.
move vertices at the rear
roofline down vertically to match the bitmap of the roof.
After moving all existing vertices, you can see there are two areas on either side of the peak, where the sagging of the medieval roof still shows some sky.
Edit panel, turn on  (SwiftLoop), then in the
viewport, add two vertical edge loops. Each loop should be near
the middle of the sky area, on either side of the peak of the roof.
(SwiftLoop), then in the
viewport, add two vertical edge loops. Each loop should be near
the middle of the sky area, on either side of the peak of the roof.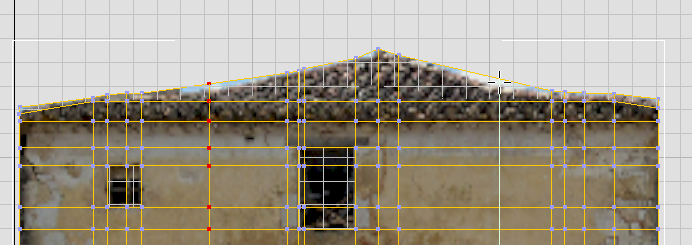
Move the new vertices at
the rear roofline down vertically to hide the sky-blue (or cloudy)
areas of the façade texture.
 (Vertex) to exit the Vertex
sub-object level.
(Vertex) to exit the Vertex
sub-object level.
Now you’ve completed the modeling of the façade: You have a convincingly three-dimensional house front with a realistic texture.
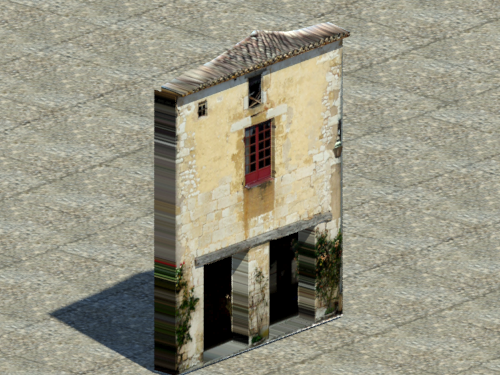
The only flaw, is that there is a good deal of streaking on those faces that are perpendicular to the projection of fac1.jpg. The next lesson shows how to correct the texture in these portions of the model.


