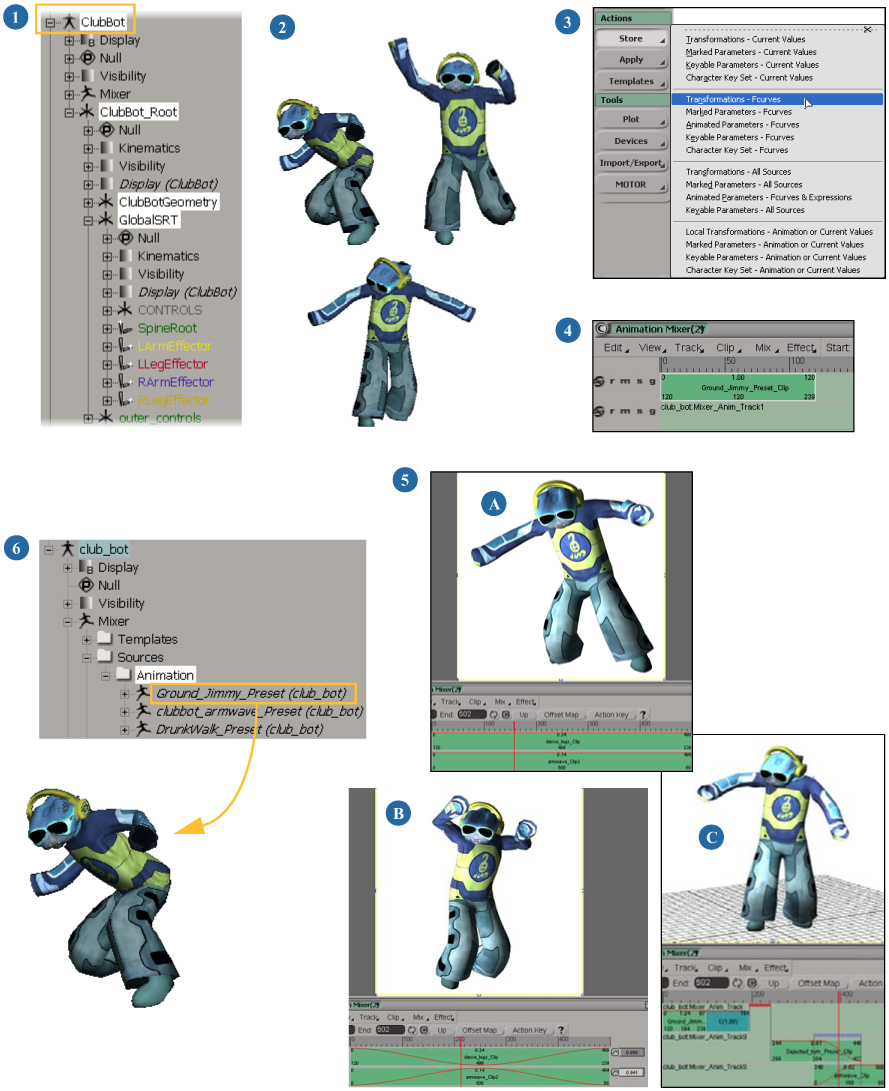
This overview shows the basic steps to getting started with using actions in the animation mixer.
Once you have added action clips to the mixer, you can use any of the mixer's features to move, copy, extrapolate (create cycles or bounces), scale, trim, transition, time-warp, and blend them.
For more information about using the mixer in general, see The Animation Mixer.

| 1 |
Create a model for the object you want to animate. This is important for a number of reasons, including being able to easily copy animation between models. See Models and the Mixer for information. |
| 2 |
Animate the object in a model. You can use any type of animation you like. Each animation sequence here will be stored in a source. See Choosing What to Store in an Action for information. |
| 3 |
Select the animated object and store its animation in an action source using an appropriate command from the Actions See Storing Animation in Action Sources for information. |
| 4 |
To add the source to a track in the mixer, right-click on a track and choose Insert Source, then pick the source you've stored. An action clip is created. You can also drag a source from the model's Sources folder in the explorer and drop it on a track in the mixer. See Creating Action Clips in the Mixer for information. |
| 5 |
Once the clip is in the mixer, you can manipulate it in many ways. Here are some ideas ... |
| A |
|
| B |
See Mixing and Weighting Clips for information. |
| C |
See Creating Transitions between Clips for information. |
| 6 |
If you removed the original animation, such as fcurves, from the object when you stored it into an action source, you can easily reapply that animation back onto your object at any point. See Restoring (Applying) the Animation in Action Sources to an Object for information. |
 Except where otherwise noted, this work is licensed under a Creative Commons Attribution-NonCommercial-ShareAlike 3.0 Unported License