Transitions are an interpolation from one clip to the next. They make the animation flow smoothly between clips, rather than jerk suddenly at the start of the next clip.
If you're working in a pose-to-pose method of animation using pose-based action clips, you need to use transitions to prevent a blocky-looking animation. As well, transitions are absolutely necessary for doing shape animation. This is because both shape and pose action clips do not contain animation themselves: they are keys representing a particular deformation (shape) or pose of an object.
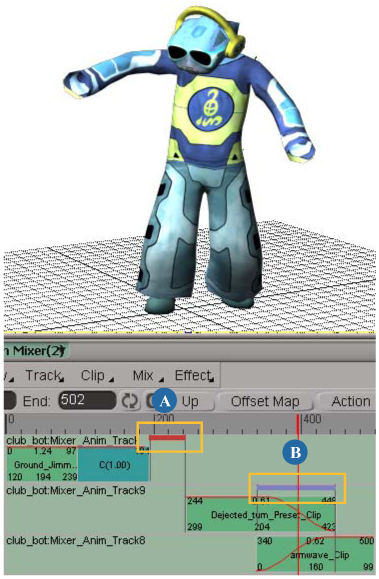
Club-bot is in mid-transition between the Arm wave and Dejected turn action clips.
There is a Cardinal transition (A) between two clips that are not overlapping.
For the clips that are overlapping in time, there is a Standard transition (B) over their overlapping frames.
Transition weight curves control the transition's interpolation: after you've created a transition, you can edit these curves to control how the transition is weighted (see Animating and Modifying the Transition's Fcurve).
There are three types of transitions you can use between clips: Standard, Cardinal, and Bridge. Clips are represented in the mixer by colored bars connecting clips (invalid transitions are black):
Bridge transitions are light orange.
You can use the bridge transition only between action clips — see Creating a Bridge Transition between Action Clips.
Standard and Cardinal transitions work well for most basic animations. They both create a transition function curve that you can edit (see Animating and Modifying the Transition's Fcurve).
The Standard transition creates a direct transition from one clip to the next.
The Cardinal transition interpolates between the sources of up to the four nearest clips (two clips before and two clips after the transition). This gives for a smoother blending than a Standard transition.
If the clips do not overlap in time, the interpolation is a weighted blend between the last frame of the first clip to the first frame of the second clip. If the clips overlap, the interpolation is a weighted blend between the clip values at each frame.
|
|
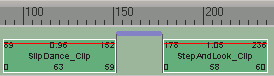
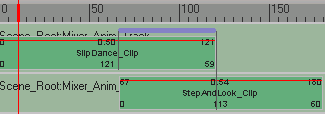
Above on the left, a Standard transition between two sequenced clips on the same track.
On the right, a Standard transition between two overlapping clips on different tracks.
Pick the first clip and then pick the second clip. A transition is created and displayed as a purple (standard) or red (Cardinal) bar joining the clips.
The Transition tool remains active and you can continue to pick clips to create a chain of transitions.
When you have finished, right-click to deactivate the Transition tool.
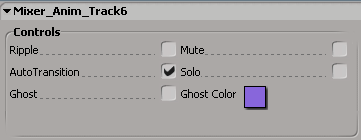
You can create transitions automatically as you add clips to tracks, making it easy to set up a series of clips in a sequence. You can turn auto-transition on or off in the mixer, but you can also turn it off for specific tracks to prevent auto-transitions even when you turn them on for the mixer as a whole.
When both of these transition controls are active for a track, transitions are created between all neighboring clips when you add a clip to that track. If you add a clip to a track that does not have auto-transition active, no transitions are created.
Make sure that auto-transition is active for each track where you want transitions (this is on by default). Right-click the
track, choose Track Properties, and select Auto-Transition in the Track property editor (or select the track and choose Track  Track Properties and do the same).
Choose Mix Auto Transition. By default, the Standard transition method is selected, which you can change as described below.
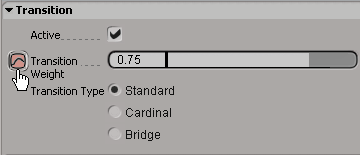
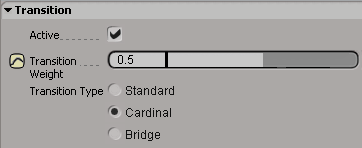
Select a transition and press Enter or right-click the transition and choose Properties to open the Transition property editor.
Select a Transition Type: Standard, Cardinal, or Bridge.
 Shape menu of the Animate toolbar. See Choosing a Shape Instance Mode for Shape Clips [Shape Animation] for more information.
When you mute a transition, you temporarily disable the effect it has on the object's animation. This helps you test out different factors of an animation as you're working.
You can modify the profile function curve that controls the transition by setting keys and editing it using the animation editor. Keep in mind that values on the fcurves represent the proportional weight of the second clip.
A value of 0 represents the last frame of the first clip with no contribution from the second.
A value of 1 represents the first frame of the second clip with no contribution from the first.
You cannot use values outside of the range [0, 1]. If you do, the values are "clamped":
Transitions weights are essentially a mechanism for mixing between clips, so the 0 to 1 range makes sense; for example, it doesn't make sense to have a transition of 110% for clip A and -10% clip B.
The type of transition (Standard or Cardinal) has nothing to do with the type of interpolation created for its weight fcurve. Standard and Cardinal refer to how the transition itself is computed. A Standard transition creates an fcurve with a spline interpolation, while a Cardinal transition's fcurve has a linear interpolation. You can change the interpolation as with any other function curve (see Editing Function Curves [Animation]).
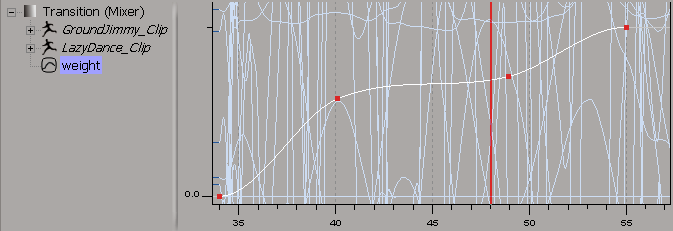
Right-click the colored bar that represents the transition and choose Animation Editor.
Select the weight curve in the editor.
You can now edit it like any other function curve (see Editing Function Curves [Animation]).
You'll notice that the time cursor in both the animation mixer and the animation editor correspond to the same frames.
Keep in mind that time is relative — the transition appears to be a certain number of frames long, but this time is stretched or squashed to the duration of the transition.
 Except where otherwise noted, this work is licensed under a Creative Commons Attribution-NonCommercial-ShareAlike 3.0 Unported License