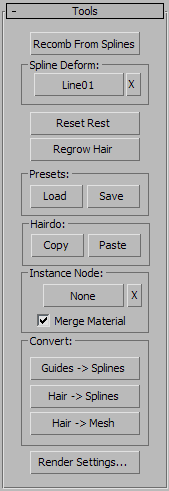
This rollout provides tools for accomplishing a variety of tasks with Hair, including creating a hairstyle from an existing spline object, resetting the hair, and loading and saving general presets for the modifier as well as specific hairdos. Here you can also specify an object from the current scene to be used as hair, such as a flower or group of flowers for creating a garden.
Besides the built-in hair strands, which are created at render time, you can assign any source object as hair strands, using the Instance Node controls on the Tools rollout. For example, in the following illustration, the original orientation of the source object affects its orientation when it is used as hair strands.
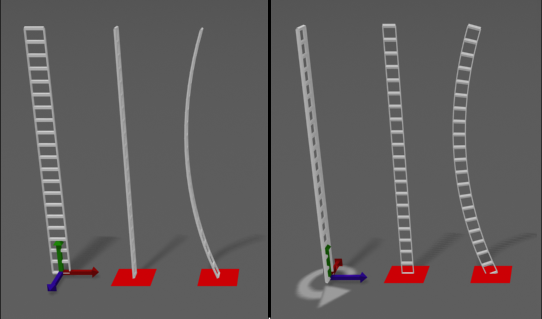
Rotating the source object affects the hair orientation.
The next illustration shows how increasing the Frizz Root value creates greater amounts of distortion in the resulting instanced hairs. This image also shows how a raised pivot in the source object causes the root of the hair to go below the surface of the growth object (the red square). Compare this with the previous illustration, in which the pivot rests at the base of the source object.
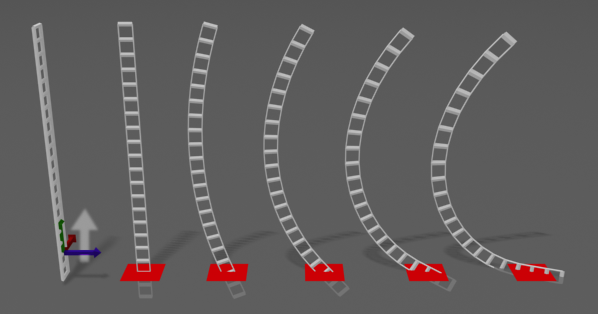
Frizz causes the instanced hairs to change shape.
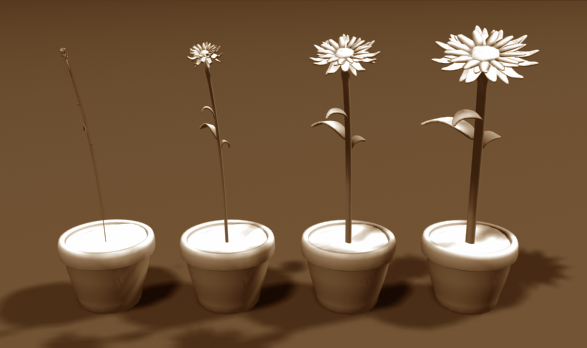
The next illustration shows the effect of the Merge Material check box. On the left side, Merge Material was left on, with the result that the flower model retained its original material and coloring when used as hair. On the right, Merge material was turned off, so the flower-hairs took on the material of the flower pot growth object.
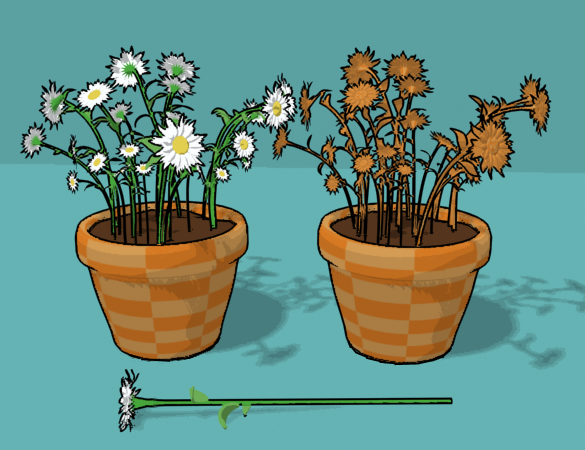
Left: Merge Material on
Right: Merge Material off
In the next illustration, the Root Thick setting, from left to right, is 2.0, 10.0, 20.0, and 30.0. With instanced geometry, the Root Thick value affects the thickness of the resulting object uniformly along its height, while the Tip Thick value has no effect. (The Root Thick and Tip Thick settings are on the General Parameters rollout.)
Increasing Root Thick affects the overall thickness of the hair geometry.
From left to right: Root Thick = 2.0, 10.0, 20.0, and 30.0
The final illustration, following, shows how the instanced hair aligns itself faithfully to the guides, no matter how they're styled. The styled hair was brushed from the center, and the instances align perfectly in all directions, face up, without twisting or other distortion. This makes it easy to style instances as scales, for example.
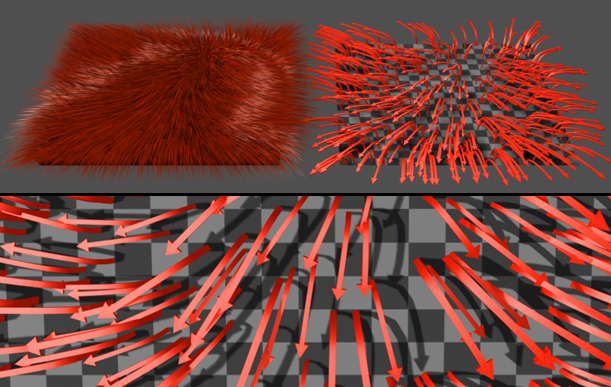
Top left: The original styled hair
Top right: The instanced hair (arrows) conforms to the styling.
Bottom: Close-up view of instanced hair
Lets you use a spline object to style the hair. Click this button and then select an object that is made up of spline curves. Hair will turn the curves into guides and populate each guide of the selected growth mesh with a replica of the closest curve.
This tool is particularly useful for creating a specific style and length, such as short hair with a part on the side, without having to manually groom the hair in the Style dialog. For optimal control, position the splines fairly closely together and use as many as possible.
Hair and guides are recombed by the spline object (white).
Spline deformation lets you style or animate hair by having it conform to the shape of a spline.
Click to choose the spline you will use to deform the hair, then click the spline in a viewport, or press H and use the Pick Object dialog to select the spline.
When no spline is picked, the label of this button shows “None.” When a spline is in active use, the label shows the name of the spline you picked.
The deformation applies to all hair guides, and is a one-time operation: while splines are active, the guides are “locked” to the spline, and moving a point on a spline deforms the closest guides. However, the base of the spline (for example, where it’s attached to the head) does not move. If you deform the spline near the base of the guide, you will move the spline away from the base, because the base is fixed and will not follow the deformation.
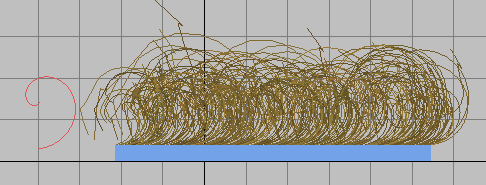
Left: The spline picked to deform hair
Right: Hair deformed by the spline
Animating the spline (for example, by animating the position of its vertices) animates the deformed hair, but not if you later alter the hair position by styling. This includes animating a modifier applied to the spline.
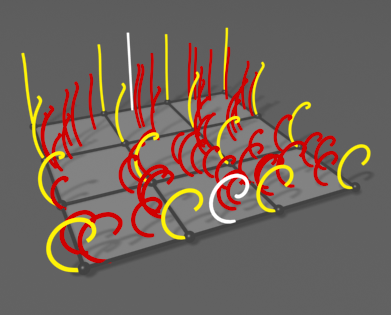
The spline can be a spline cage: in other words, an Editable Spline object that consists of multiple splines.
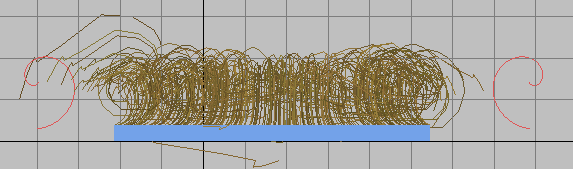
Left and right: Spline cage formed of two spiral spline sub-objects
Middle: Hair deformed by the spline cage
3ds Max interpolates between the spline shapes in the spline cage, and the shape of a hair depends on its proximity to one or another spline sub-object in the cage.
Performs an averaging of hair guides using the growth mesh’s connectivity.
This function is particularly useful after using Recomb From Splines. It's also advantageous when you change the size ratios of polygons in the growth object. For example, if you stretch part of the mesh by moving some vertices, by default the larger polygons will contain fewer hairs per unit area. Use Reset Rest to redistribute the number of hairs on the surface for more even coverage.
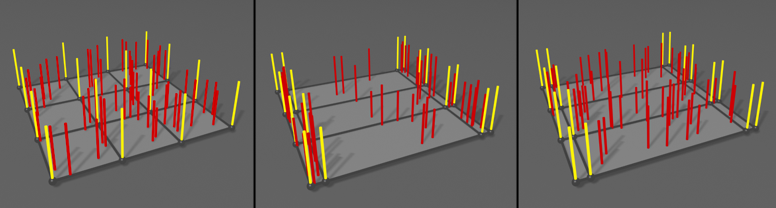
Left: Even hair distribution before resizing polygons
Center: Uneven hair distribution after moving edges, altering polygon size ratios
Right: After using Reset Rest, distribution is again evened out.
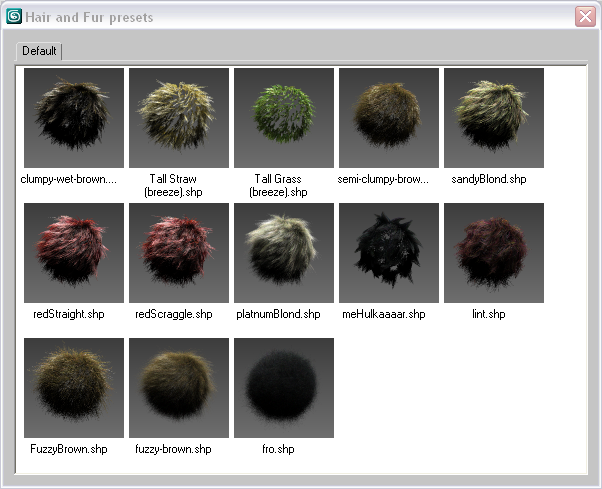
Lets you load and save hair presets. Each preset contains all current Modify panel settings (except Display settings), but not any styling information.
Creates a new preset. You're prompted for a preset name; after entering one, Hair renders the swatch, as shown by a message on the status bar. You can abort the creation of the preset by clicking the Cancel button on the status bar during rendering. If you enter an existing preset name, Hair asks you to confirm overwriting the preset.
Lets you copy and paste hairdos. Each hairdo contains all the current Modify panel settings (except Display settings) and styling information. This lets you apply all hair settings from one object to another.
Lets you specify an object to use as custom hair geometry. The hair geometry is not instanced from the original object, but all hairs created from it are instances of each other, to save memory.
To specify a hair object, click the Pick button and then pick an object to use. Thereafter, the button shows the name of the object you picked. To use a different instance object, or to use a modified version of the original object, click this button and then pick the new object.
Also, bear in mind that the instancing engine will be deforming your model as it fits it to the hairs. Make sure that your model has enough divisions along the Z (vertical) axis for the deformation to look as smooth as it needs to; the number of subdivisions should be approximately equal to the Hair Segments value. Hair doesn't perform automatic subdivision on the geometry.
Use these controls to convert guides or hair generated by the Hair And Fur modifier to 3ds Max objects that you can operate on directly.
Opens the Effects panel and rollout and adds a Hair And Fur render effect to the scene, if one doesn't already exist.


 Modify panel