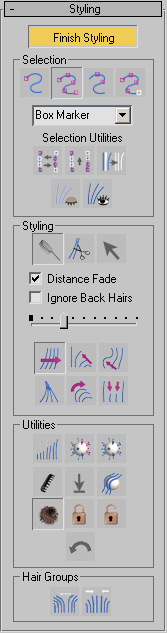
The Guides sub-object level of the Hair And Fur modifier lets you style hair interactively in viewports. Interactive styling controls are on the Styling rollout, which has a Style Hair button that you can also click to begin styling.
Styling tools aren't available until you click Style Hair to turn it on, or choose the Guides sub-object level in either the Selection rollout or the modifier stack.
Each guide hair has 15 segments and 14 vertices (there's an additional, non-selectable vertex at the root); for a tool to affect a guide, at least one of its vertices must be selected. To select vertices, click Select (in the Styling group) to turn it on, then use standard 3ds Max selection tools to select a portion of the guides. For example, you might drag a selection rectangle to select vertices on adjacent hair guides. By default, selected guides are displayed as orange, and unselected guides are displayed as yellow.
Selections you make this way are constrained by the buttons at the top of the Selection group: Select Hair By Ends, Select Whole Guide (the default), Select Guide Vertices, or Select Guide By Root. As these names imply, the constraints affect how the Hair Brush modifies hair guides. The best way to get a feel for the difference between selection constraints is to practice using the various selection constraints with tools such as Translate. The Hair Brush uses a combination of these constraints and IK to alter guide geometry.
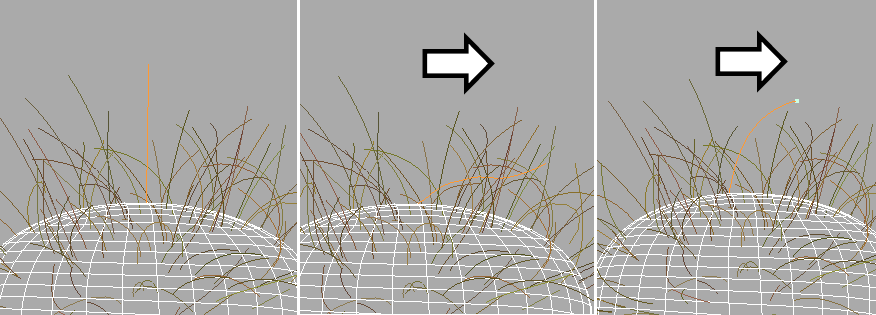
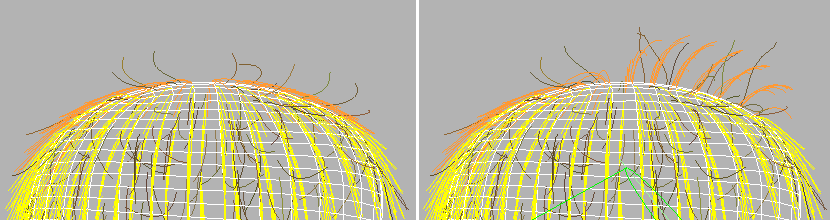
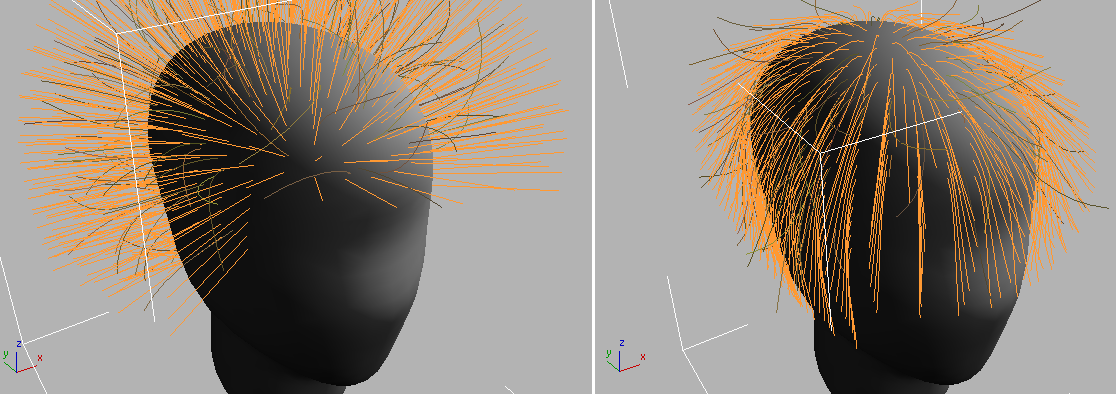
Left: Hair guide before styling
Center: Translating while Select Whole Guide is active
Right: Translating while Select Hair By Ends is active
Once you've made a selection, typicall you will click Hair Brush (also in the Styling group, to the left of Select), and then use the brush in conjunction with one of the tools at the bottom of the Styling group: Translate, Stand, Puff Roots, Clump, Rotate, or Scale.
While you style, only selected guides are affected, and in addition, only guides that fall within the brush area are affected at any given time. You can change the brush size using the slider in the Styling group, or by holding down Ctrl+Shift and dragging the mouse.
The Hair Cut tool on the Styling rollout (between Hair Brush and Select) cuts hair guides by scaling them based on the brush location.
Click Style Hair to begin styling. Click Finish Styling to turn off styling mode. When you turn this button on, a brush is immediately available and by default the active tool is Translate. Turning on Style Hair turns on the Guides sub-object level in the Selection rollout, and vice versa.
 Hair Brush
(The default.) In this styling mode, dragging the mouse affects only selected vertices within the brush area.
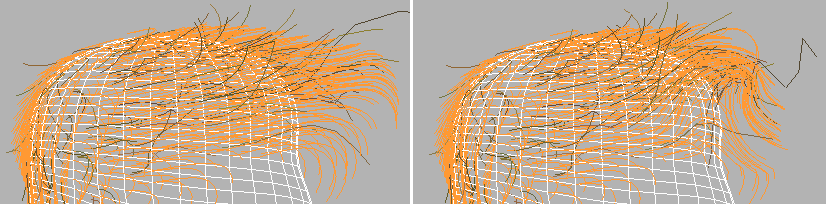
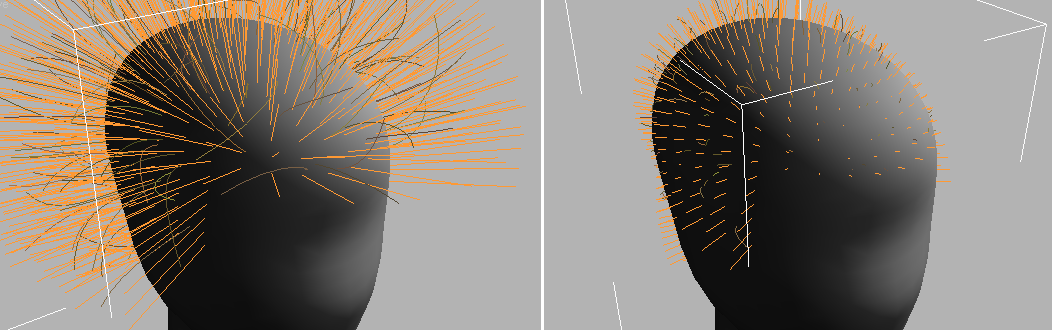
While Hair Brush is on, a brush gizmo is displayed in viewports. In the active viewport, the brush appears as a circle, but as you can see in the other viewports, the brush is actually a three-dimensional cylindrical region.
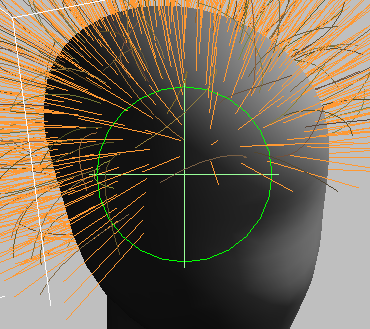
In the active viewport, the brush appears to be a circle.
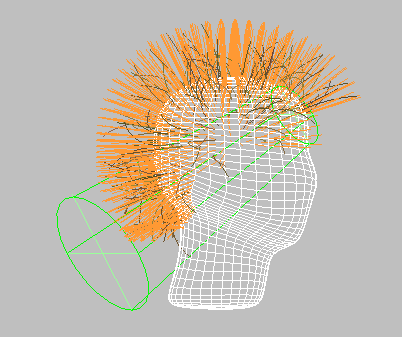
Inactive viewports show the brush to be a cylindrical region.
 Hair Cut
Lets you trim the guide hairs. To cut hair, follow this suggested procedure:
Turn on Hair Cut.
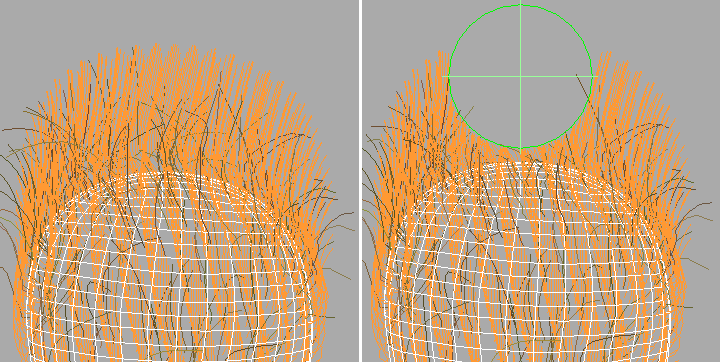
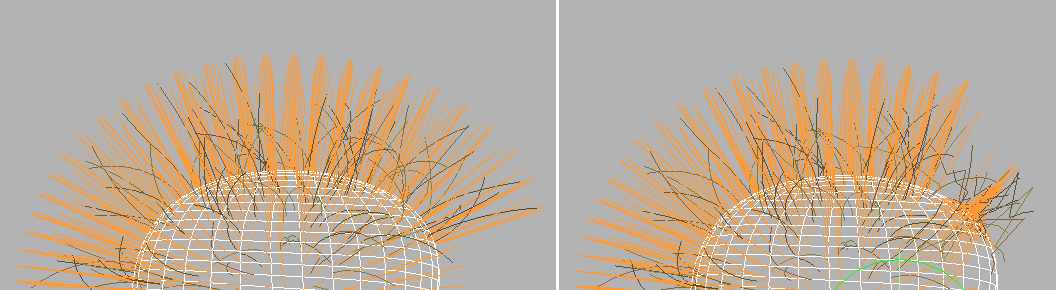
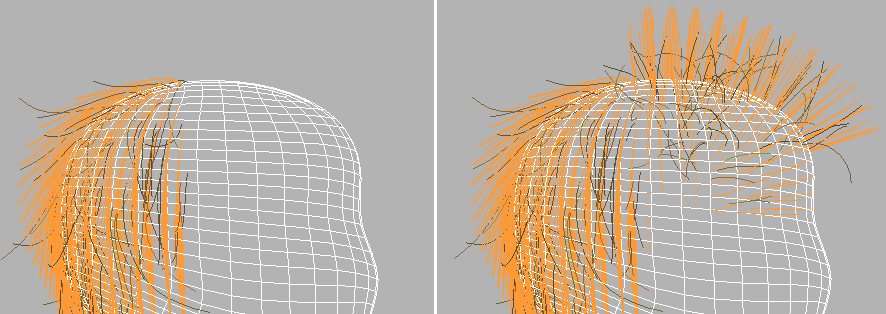
Left: Hair guides before cutting
Right: Hair guides after cutting
 Select
 Translate
 Stand
Stand Puff Roots
 Clump
Clump Rotate
 Scale
ScaleScales selected guides according to the surface area of underlying polygons. This is useful, for example, in applying fur to an animal model, which typically has smaller polygons in areas with shorter hair. For example, the polygons on an animals paws are usually smaller than the ones on the chest, and the chest fur tends to be longer.
 Pop Selected
 Pop Zero-Sized
 Recomb
Makes a guide parallel to the surface, using the guide's current direction as a hint.
Here’s a suggested procedure: Turn on Hair Brush, select guides using Select Whole Guide, and then move the guides around not worrying about skin penetration or hair shape. You’re just trying to indicate the direction of the hair flow. Click Recomb frequently, and you will soon start to see hair flowing smoothly wherever you want it to. Once you have this flow, you can do your other styling. With the Recomb tool, you probably won't need to use Comb Away. Once you have the flow as you like it, you can go in and start styling in scale, cut guides, and move some of the tips around, “shaping” or “styling” the hair.
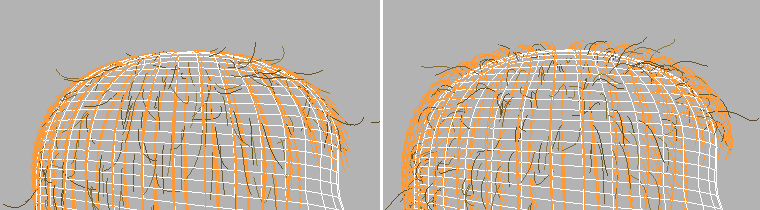
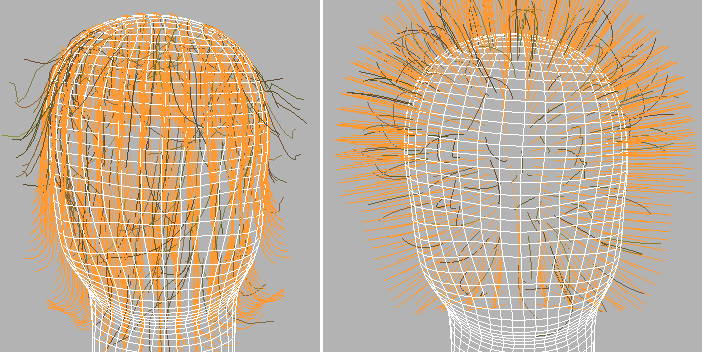
Left: Hair guides in their default position
Right: Hair guides after clicking Recomb
 Reset Rest
 Toggle Collisions
When on, styling takes hair collisions into account. When off, styling ignores collisions. Default=off.
For collisions to be used while styling, you need to have already added at least one collision object using the Dynamics rollout. If no collisions are specified, this button has no effect.
 Toggle Hair
 Lock
LockLocks selected vertices with respect to the orientation to and distance from the nearest surface. Locked vertices can be selected, but they can't be moved.
This is useful for creating different types of hair shapes. For example, to make a braid, you would comb hair down some straight tubes, and then lock the vertices to the tubes. Then, in 3ds Max, when you twist the tubes, the hairs will follow. Locked vertices are no longer dynamic, although they will follow whatever the surface does, but if other vertices on the same guides aren't locked, they can still move freely, as usual.
 Unlock
 Undo
Undo Split Selected Hair Groups
 Merge Selected Hair Groups
If you don't use Split Selected Hair Groups, then when you render hair, the generated hairs are interpolated across a styled part. When Split Selected Hair Groups is on, there is no interpolation between the split group and other hairs. To remove this effect and make the part less “clean,” click Merge Selected Hair Groups.


 Modify panel
  Select Hair by Ends
 Select Whole Guide
 Select Guide Vertices
 Select Guide by Root
 Invert Selection
 Rotate Selection
 Expand Selection
 Hide Selected
 Show Hidden