In addition to the main interface with the painting tools and brush settings, the Viewport Canvas dialog includes a number of rollouts with additional settings, tools, and options. These are covered in this topic.
Following are direct links to the individual rollout sections:
Use the Brush Images settings for painting with bitmap images and masks as opposed to solid colors. You can assign preset and custom images for brush color and masking. For example, using a mask lets you make the brush outline square instead of the default circle. You can also cause the brush rotation to follow the stroke direction or use random rotation.
Also, to avoid obvious repetition of the brush image, set Rotation (see following) to Random.
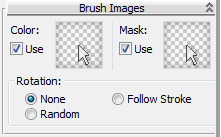
When Use is on, Viewport Canvas paints with the specified brush image.
To set the brush image, click the thumbnail; this opens the Viewport Canvas Brush Images dialog.
When Use is on, Viewport Canvas uses the specified brush image to mask the brush; that is, to hide and reveal different parts of the brush image. In other words, the mask image sets the opacity based on the brightness of each pixel in the mask image. White areas are fully opaque (apply the full color of the underlying brush image); black areas are fully transparent (no paint is applied), and gray areas use in-between opacities.
To set the mask image, click the thumbnail; this opens the Viewport Canvas Brush Images dialog.
Sets the brush angle. Choose one of the following:
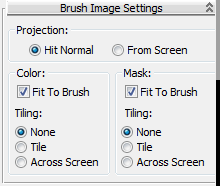
Choose a tiling option for the brush image (color or mask):
For best results with this option, set Projection to From Screen (see preceding).

Choose a map type in the object’s material to paint on. Click the button to open a list of the available map types:
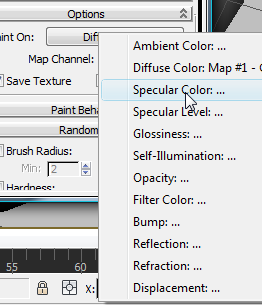
Choose a map type from the list. For example, to paint the object’s coloring with a Standard material, choose the Diffuse Color map.
If the map type does not have a bitmap image file assigned, choosing the map type opens the Create Texture dialog. Otherwise Viewport Canvas paints on the existing bitmap.
The channel to which to assign the map.
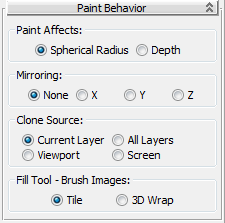
Choose whether the brush affects a spherical or cylindrical volume:
When using the Clone brush, choose where paint can be cloned from:
 ScreenAny part of the screen can be cloned from, including windows from other applications.
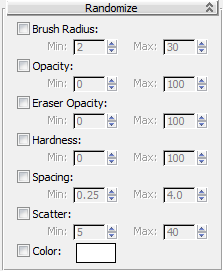
When on, the brush radius is randomized between the Min and Max values each time the brush is applied (including within continuous strokes). The Brush
Settings  Radius value is not used, except that the applied spacing is based on it (if the Spacing setting not randomized).
When on, the brush opacity is randomized between the Min and Max values each time the brush is applied (including within continuous strokes).
When on, the eraser opacity is randomized between the Min and Max values each time the brush is applied (including within continuous strokes).
When on, the brush hardness is randomized between the Min and Max values each time the brush is applied (including within continuous strokes).
When on, the brush spacing is randomized between the Min and Max values each time the brush is applied (including within continuous strokes).
When on, the brush Scatter value is randomized between the Min and Max values each time the brush is applied (including within continuous strokes).
When on, randomizes the value of each pixel in the brush based on the color of the swatch next to the Color check box each time the brush is applied (including within continuous strokes). This adds a speckled appearance look to brush strokes. This color overrides the standard Color setting.
Does not affect painting when using a color brush image.
While painting with a graphics tablet (aka pen tablet), you can vary the following settings by changing the pen pressure on the tablet as you draw.

Use these settings to store the current Viewport Paint setup to a text file on disk and reload it later. You can also make the current settings the default, so Viewport Canvas always starts with those settings.
The saved settings include the positions of the Viewport Canvas (also its size), Layers, and 2D Paint dialogs, whether Viewport Canvas rollouts are open or closed, and all numeric and other values.
