


Block the Steps for the
Forelegs
Now that you’ve adjusted time settings and the biped itself, you’re ready to block the basic walk cycle, working from pose to pose. This involves positioning the legs in space and time, giving the walk its overall tempo. You will begin with the quadruped’s forelegs.
 (Open File), navigate to
the \character_animation\quadruped folder,
and open quadruped_walk_2.max.
(Open File), navigate to
the \character_animation\quadruped folder,
and open quadruped_walk_2.max.
This scene is the same as the one you just saved, but a set of reference poses has been set up on planes in the background.
 (Orbit) to change the viewport
so you can see all four of the quadruped’s feet.
(Orbit) to change the viewport
so you can see all four of the quadruped’s feet.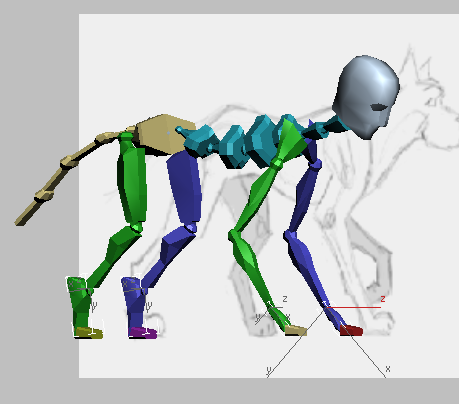
 Use Ctrl+click to select both hind feet
and both hands (forefeet).
Use Ctrl+click to select both hind feet
and both hands (forefeet).
 Motion panel
  Quaternion/Euler rollout,
choose Euler.
Quaternion/Euler rollout,
choose Euler.
Euler keys have tangent controls, which can be useful for this walk cycle exercise.
 (Linear) as the Default
In/Out Tangent type.
(Linear) as the Default
In/Out Tangent type.
Sometimes blocking the animation is easier without extra interpolation (which you can add later).
Motion panel, open the Key
Info rollout and expand its IK group (click the plus-sign icon to
the left of the IK label).
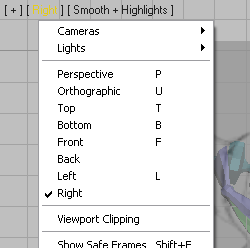
(Depending on how you adjusted the viewport, you might have to click Shift+Z more than once to return to the Left view.)
 (Auto Key).
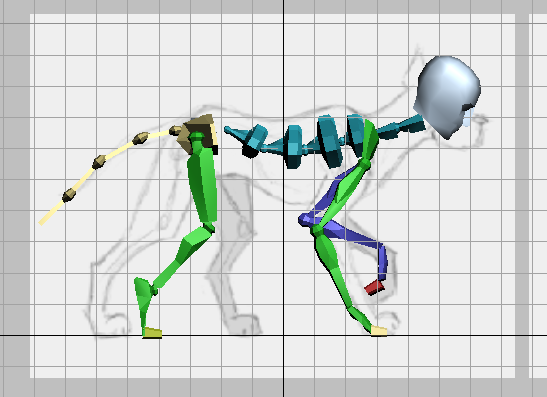
 (Move) and
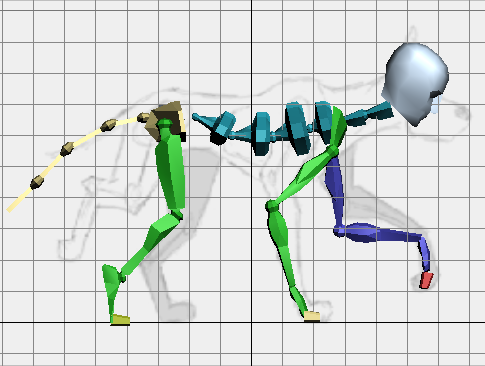
  (Rotate) to position the
arms (forelegs) and hands (forefeet) to match the reference sketch.
This is the Passing pose. (The quadruped’s hind legs are in the Down
pose.)
(Rotate) to position the
arms (forelegs) and hands (forefeet) to match the reference sketch.
This is the Passing pose. (The quadruped’s hind legs are in the Down
pose.)
You don’t have to match the sketch accurately: a general idea of the pose is the goal.
Select the right hand (forefoot),
then on the Key Info rollout, click  (Set Sliding Key). Do the
same for the left hand (forefoot).
(Set Sliding Key). Do the
same for the left hand (forefoot).
One advantage of the ForeFeet toggle is that it lets you set keys such as this for “hands” on the ground plane, as you do for feet.
Double-click the right clavicle
to select the entire arm (foreleg), then on the Copy/Paste rollout,
click  (Copy Posture).
Paste Options group,
under Auto-Key TCB / IK Values, choose Copied.
(Copy Posture).
Paste Options group,
under Auto-Key TCB / IK Values, choose Copied.
When Copied is chosen, IK info is pasted along with the new key. When Default is chosen, IK info is not pasted and the new key is a free key, FK rather than IK, which is not what you want for this animation.
 Go to the last frame (frame
25), and then click
Go to the last frame (frame
25), and then click  (Paste Posture).
 (Paste Posture Opposite).
Frame 13 is the midpoint of the walk cycle animation: frames 13 through 24 are essentially the same poses as frames 1 through 12, but with the legs in opposite positions. (Frame 25 is the same as frame 1, so that the animation will play as a seamless loop when you preview it in viewports.)
 Go to frame 1, double-click the left clavicle
to select all the left arm (foreleg).
(Copy Posture).
Go to frame 25, then click (Paste Posture).
Paste Posture Opposite.
Go to frame 1, double-click the left clavicle
to select all the left arm (foreleg).
(Copy Posture).
Go to frame 25, then click (Paste Posture).
Paste Posture Opposite.
Now the forearms/legs have the same posture in the extreme poses: the first and last frames of the cycle, and the mid frame.
 (Auto Key) is still on.
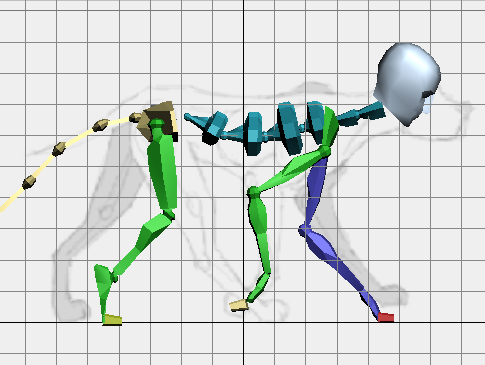
(Move) and (Rotate) to set up the transitional
poses, as follows:
select the right forefoot
and click (Set Sliding Key), then
do the same for the left forefoot.
(Auto Key) is still on.
(Move) and (Rotate) to set up the transitional
poses, as follows:
select the right forefoot
and click (Set Sliding Key), then
do the same for the left forefoot.
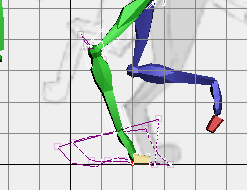
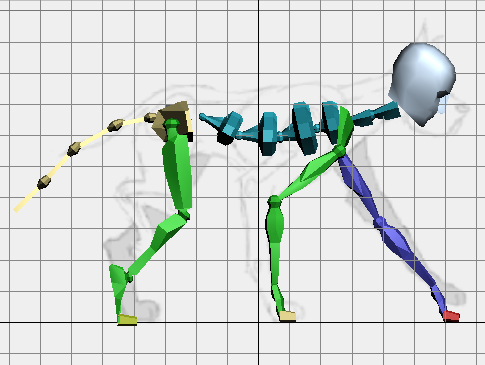
Check your work by looking at trajectories:
Double-click the right clavicle
to select all of the right foreleg.
 (Trajectories) to turn int
on.
(Trajectories) to turn int
on.
The elbow trajectory describes an arc, and the foot trajectory describes a rough trapezoid.
Double-click the left clavicle
to see the trajectories for that limb, as well.
Copy poses to the second half of the cycle:
Double-click the right clavicle
to select the entire foreleg, then click (Copy Posture).
(Paste Posture Opposite).
(Copy) then (Paste Posture Opposite) from
the right foreleg in frame 7 to the left foreleg in frame 19, and
from the right foreleg in frame 10 to the left foreleg in frame
22.
 (Play) to see the animation.
The quadruped’s forelegs now move in a plausible walk cycle.
 (Stop).
 (Select By Name).
 Save the file as my_quadruped_forelegs.max.