


Complete the First Step
In this lesson, you complete the first step by moving the biped body forward and its right foot to the contact position.
When the foot lifts off the ground completely, you’ll set a free key.
 Move the foot up off the
ground and forward.
Move the foot up off the
ground and forward.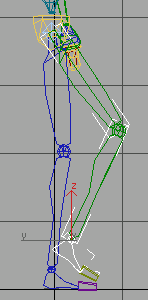
By moving the foot, you are seeing an example of Biped’s IK system. You are creating rotations for the upper and lower leg links as you move the foot.
 (Set Free Key) to keyframe
the lifted position of the foot.
(Set Free Key) to keyframe
the lifted position of the foot.
 select Bip01 L Foot.
 (Set Key).
 (Set Planted Key) to set
an initial key for the left foot at frame 0.
(Set Planted Key) to set
an initial key for the left foot at frame 0.
This key locks down the foot for any subsequent movement in upcoming frames. If you were to grab the center of mass and move it down, both legs would bend instead of moving below the ground plane.
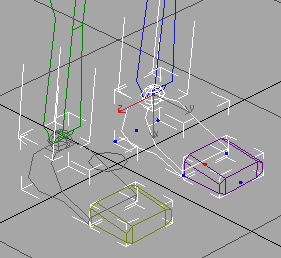
The left foot with a new pivot point.
 (Body Horizontal).
(Set Key) for Bip01.
move the center of mass
so the torso shifts forward, and then set another key.
(Body Horizontal).
(Set Key) for Bip01.
move the center of mass
so the torso shifts forward, and then set another key.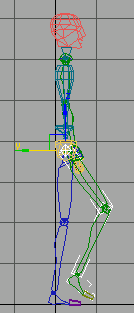
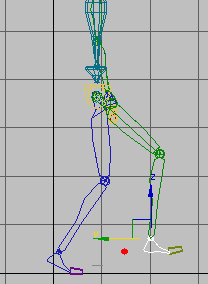
move the center of mass
down a little, so the left knee bends slightly, then set another key.
The left leg bends automatically as the center of mass moves down.
Select Bip01 L Foot.
set a planted key for the
ball of the foot.
 Rotate the foot so the heel
is lifting up off the ground, and then set another planted key.
Rotate the foot so the heel
is lifting up off the ground, and then set another planted key.
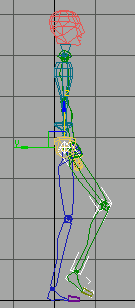
The heel is rotated off the ground.
(Set Key).
 (Set Sliding Key), then turn
off Select Pivot.
rotate the left foot up
a little more, and set another sliding key.
(Set Sliding Key), then turn
off Select Pivot.
rotate the left foot up
a little more, and set another sliding key.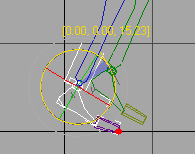
(Body Horizontal). Move the center of mass
forward again, and set a key.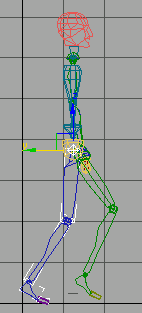
Keyframe the right heel hitting the ground:
select Bip01 R Foot and move it forward, then set a sliding key.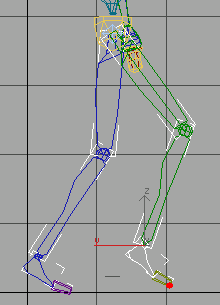
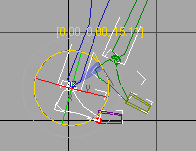
 (Select And Rotate), note
the location of the gizmo intersection, and then turn on Select
Pivot (this tuns off Select And Rotate). Pick the point at the ankle
that lay at the gizmo intersection, and then set a sliding key.
set a sliding key.
(Select And Rotate), note
the location of the gizmo intersection, and then turn on Select
Pivot (this tuns off Select And Rotate). Pick the point at the ankle
that lay at the gizmo intersection, and then set a sliding key.
set a sliding key.
Set another sliding key.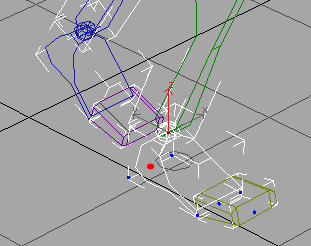
The pivot point moved to the heel.
move the right foot forward
a little.
Notice that the foot moves away from the pivot point in the viewport.
Sliding Key lets foot move away from pivot.
Set a sliding key.
The pivot point in the viewport moves to the heel of the foot.
Move the right foot down
so it touches the ground, and set another sliding key.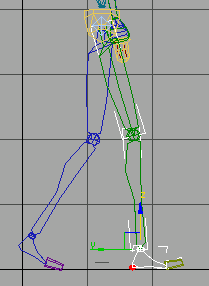
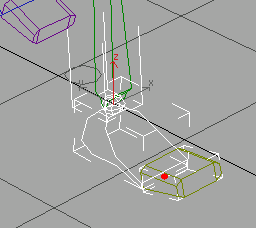
The pivot moved to the ball of the right foot.
(Body Horizontal), move the center of mass
so that it is over the heel of the right foot, and set a key.
select Bip01 L Foot and set a free key.
 Save the scene as walkcycle_1step.max.