


The Skin button on the Sculpt panel allows you to sculpt the forehead, eyebrow, neck, and jaw areas.
The eyebrows confirm and intensify expressions communicated by the eyes. Driven by muscle groups on the forehead, they can deform in complex ways and through exaggeration allow animators to create intriguing and unusual facial expressions. As the eyebrows move, the skin around them slides over the skull and a significant region of the face is affected.
The frontal portion of the neck changes shape in a variety of ways. As the head rotates or tilts, the tissue is compressed or stretched and creates bulging and other deformations in the neck portion below the jaw and on the sides of the neck.
During swallowing and during speech, the Adam's apple (larynx) slides up and down along the trachea create a visible bulge. When the head turns or tilts or when the jaw moves, the Adam's apple is also visible (particularly in men) as the skin of the neck slides over it.
On the face in the viewport, select an animation control in the region you want to sculpt and position it where you want it in relation to the sculpting you will be doing.
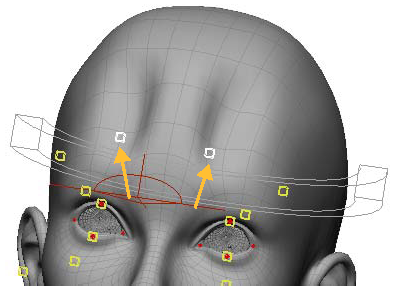
For example, in this case, whenever the inner eyebrow controls are moved up, indentations will appear in the forehead. Probably not a likely scenario, but you get the point.
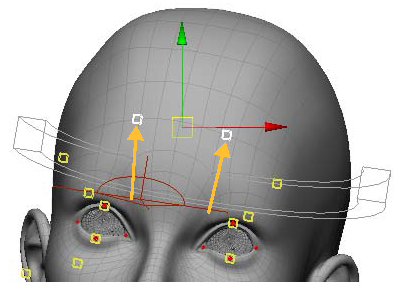
Inner right and left brow animation controls are moved up from their default position so that they are quite high on the forehead.
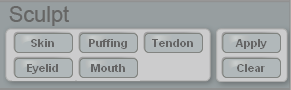
In the Sculpt area at the bottom of the Tune panel, click the appropriate button for that region: Skin, Tendons, Mouth, Eyelids, or Puffing.
Click the Skin button to sculpt the forehead, neck, and jaw areas.
See the following sections for more information on the other areas:
Puffing — see Working with the Cheek Area
Tendon — see Sculpting the Tendon Area
Eyelid — Sculpting the Eyelid Deformers
Mouth — see Sculpting the Mouth
Face Robot generates a special mesh that lets you sculpt separately from the actual face mesh. An outline of this special sculpt mesh becomes translucent and blends with the rest of the face.
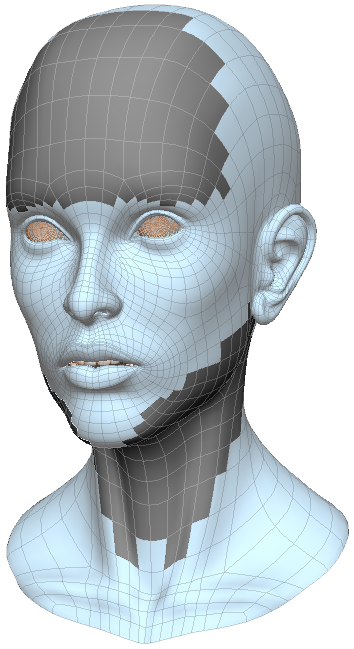
Depending on which animation control you have moved, when you click the Skin button, Face Robot generates a special mesh for the forehead, neck, and jaw areas that lets you sculpt separately from the actual face mesh.
Move the points on the sculpt mesh as you like. You can use any of the standard Softimage modeling tools, but these are some that you'll find useful:
The Tweak Component tool - tag the points (press T) and press M, then and move points, edges, or polygons.
The proportional modeling tool - click the Prop button on the main command panel, then press M and move the points.
Weight painting tool - press W and paint values on a weight map (press Ctrl+W to open the paint brush properties). See Painting Weight Maps for tips on painting.
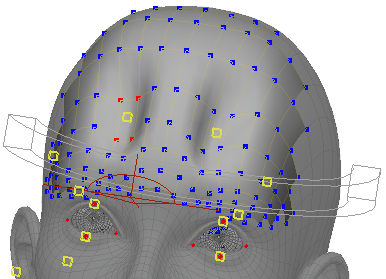
In this example, indentations are sculpted in the forehead for the current position of the animation controls.
Click the Sculpt  Apply button when you're happy with the results of the sculpting. This applies the changes you made to the sculpting mesh to the
actual face's geometry.
Apply button when you're happy with the results of the sculpting. This applies the changes you made to the sculpting mesh to the
actual face's geometry.
This sculpt is saved as a pose shape that you can then mute, apply, or delete using the sculpt history (see Working with the Sculpt History).
When you're finished, click the Act button at the bottom of the Tune panel to go to the Act panel. On the Face > Select tab, click the Reset All button to return the animation controls to their default positions.
Now when you move the animation control to the position it was in when you started sculpting, you'll see the adjustments you made to the geometry.
Reset the position of the animation controls after you're done sculpting. Now when you move these animation controls up again, the sculpting you did is activated — in this case, causing some painful forehead injuries.
 Except where otherwise noted, this work is licensed under a Creative Commons Attribution-NonCommercial-ShareAlike 3.0 Unported License