


Sculpting the deformers is one of the main ways to get the face to look the way you want it, especially for extreme or unusual expressions that often require tweaking. This section describes how to sculpt the mouth, but for general information on sculpting, including symmetry issues, see Overview of Sculpting.
The mouth can get asymmetrical during animation, but for initial sculpting of extremes poses, you will probably want to work in symmetry. While you're sculpting, you can mirror the results from one side of the mouth to the other. See Mirroring the Mouth Sculpts for information.
On the face in the viewport, select an animation control in the mouth region and position it where you want it in relation to the sculpting you will be doing.
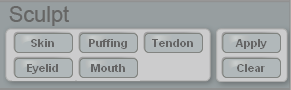
In the Sculpt area at the bottom of the Tune panel, click the Mouth button.
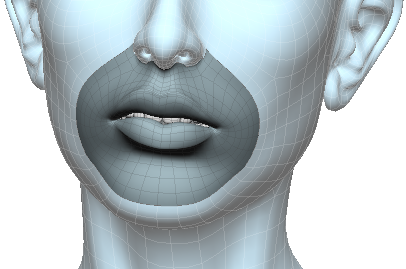
Face Robot generates a special mouth mesh that lets you sculpt separately from the actual face mesh. An outline of this special sculpt mesh becomes translucent and blends with the rest of the face.
Move the points on the sculpt mesh as you like to adjust the mouth's geometry. You can use any modeling tool, but these are some that you'll find useful:
The Tweak Component tool - tag the points (press T) and press M, then and move points, edges, or polygons.
The proportional modeling tool - click the Prop button on the main command panel, then press M and move the points.
Weight painting tool - press W and paint values on a weight map (press Ctrl+W to open the paint brush properties). See Painting Weight Maps for tips on painting.
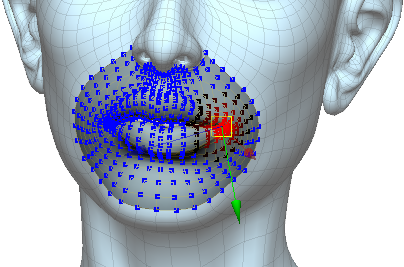
Here, the proportional modeling tool is used to move points with a nice falloff.
Click the Sculpt > Apply button when you're happy with the results of the sculpting. This bakes the changes you made to the sculpting mesh back to the face's geometry.
Click Sculpt > Clear button to undo the edits and start over.
When you're finished,> click the Act button at the bottom of the Tune panel to go to the Act panel. On the Face > Select tab, click the Reset All button to return the animation controls to their default positions.
Now when you move the animation control to the position it was in when you started sculpting, you'll see the adjustments you made to the geometry.
When you apply a sculpt, a Sculpt Proximity parameter is added to the Tune Mouth parameters (see Tuning the Lips and Mouth), allowing you to adjust the falloff of this sculpt.
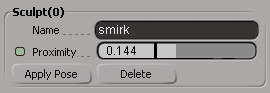
At 0, there is no influence of the sculpt; at 1, the sculpt is fully implemented. This lets you set when you want a particular sculpt to blend in to a pose, and even animate its effect (click its green animation icon to set a key).
Enter a name for this sculpt in the Name text box, which is useful when you have several sculpts that you need to keep.
Click Apply Pose to put the mouth into the pose where the sculpt was created. If you sculpt the mouth and the mouth is in a pose of an existing sculpt, it will modify the existing sculpt instead of creating a new one.
While you're sculpting one side of the mouth, you can immediately apply the results of that sculpt to the other side while staying in sculpt mode. Unlike the other Mirror options on the Face > Tools tab, you don't have to wait until you've applied the sculpting to mirror the sculpts.
For example, say you're sculpting the left side of the mouth and you want to apply it to the right side, you just choose Mirror Active Mouth Sculpt L  R from the Face > Tools tab and the sculpt will show up on the right side of the mouth while you're still in sculpt mode.
This is because the mouth area can support multiple sculpts, and at any given time, you can have a mixture of these sculpts active. When you choose a Mirror Active Mouth Sculpt command, the active (current) sculpt mixture is copied from one side of the mouth to the other.
 Except where otherwise noted, this work is licensed under a Creative Commons Attribution-NonCommercial-ShareAlike 3.0 Unported License