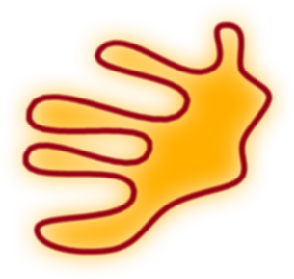
Color shapes are shapes that you draw using the various shape tools. They consist of an outline, which is painted using the current paint brush settings and foreground color (unless the brush settings specify otherwise), and/or a fill. In vector paint operators, color shapes are composed of a series of connected points. You can edit the points to modify and animate the shapes.
You can paint color shapes using four different tools:
The Rectangle and Ellipse tools, which are described in Marking Out Shapes.
The Mark Out Shape Tool, which is described in Drawing Freehand Shapes.
The Freehand tool, which is described in Setting Freehand/Lasso Shape Accuracy.
In raster paint clips, you can only use the Rectangle and Ellipse tools. Once you paint a rectangle or ellipse, it is not editable.
In vector paint operators, you can use all of the shape tools. Once you've painted a color shape, you can edit its properties to changes its attributes.
The following sections describe how to set the properties of new color shapes, as well as how to edit the basic properties of existing color shapes in vector paint operators.
Before you begin drawing shapes, you should start by setting the properties for new shapes. These properties define new shapes' type, whether they are open or closed, and whether their outline and/or fill are displayed.
A shape's type determines how its outline is drawn. Each shape type connects the points in the shape outline differently, resulting
You can draw three different types of shapes: Bézier, B-Spline, and Polyline.
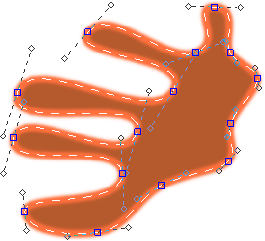
Bézier shapes consist of a series of control points, each connected to the next by a smooth or straight Bézier curve.
Straight Bézier curve shapes resemble polyline shapes since all of the points are connected by straight lines and the points' handles are hidden.
Smooth Bézier curve shapes tend to curve at every point. The points' handles are displayed, allowing you to adjust the curve.
To open the property editor, position the mouse pointer over the Fx viewer and press 3.
B-Spline shapes consist of a series of control points, each connected to the next by an interpolated curve. Each point is assigned a weight value that defines the degree top which it pulls the curve. The higher the weight, the stronger the pull, and the straighter the curve connecting a point to its two adjacent points.
B-Spline point weight is described in Animating Vector Shapes.
Polyline shapes consist of a series of control points, each connected to the next by a straight line segment.

Edit a paint operator, as described in Editing and Previewing Paint Operators.
From the Fx Viewer paint menu, choose Shape  Bezier, B-Spline, or Polyline.
Position the mouse pointer over the Fx viewer and press 3 to open the Paint Tool Settings property editor. On the Paint tab, click the Bezier, B-Spline, or Polyline button.
Once you set the new shape type, all new shapes that you draw are of that type. This does not affect existing shapes.
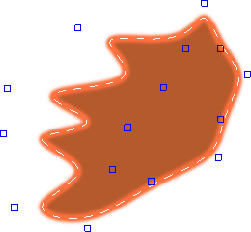
Shapes can either be open or closed. A closed shape's last point is connected to its first point so that the outline goes completely around the fill. An open shape's last point is not connected to its first point, leaving a gap in the outline.
From left to right: a closed shape, an open shape, and an open shape with no fill, used to create a Bézier paint stroke.
Notice that there is nothing connecting the open shapes' first and last points.
Edit a paint operator as described in Editing and Previewing Paint Operators.
Position the mouse pointer over the Fx viewer and press 3 to open the Paint Tool Settings property editor. On the Paint tab, click the Closed button.
If new shapes were previously set to be closed, they will be open, and vice versa. This does not affect existing shapes.
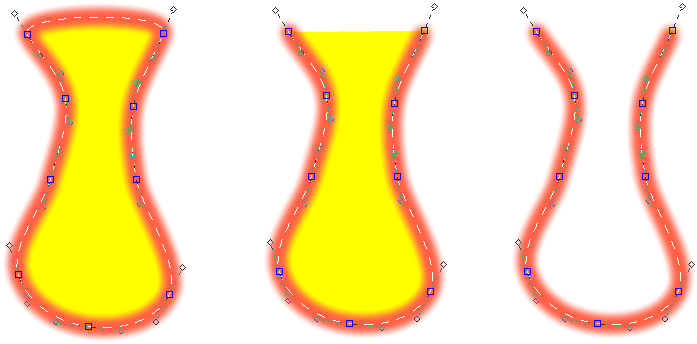
Color shapes have two parts, an outline — or stroke — and a fill. Before you draw a color shape, you can specify whether you want to display the stroke, the fill, or both. The initial stroke/fill settings determine how the shape uses the foreground and background colors.
If you paint the stroke only, it uses the specified foreground color. The fill uses the specified background color, but is not displayed.
If you paint the fill only, it uses the specified foreground color. The stroke also uses the specified foreground color, but is not displayed.
If you paint both stroke and fill, the stroke uses the specified foreground color, and the fill uses the specified background color. Both are displayed.
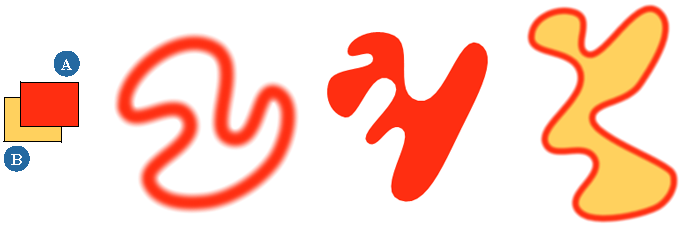
The three Bézier shapes were drawn using the foreground (A) and background (B) colors shown.The New Shape settings were (from left to right) Stroke, Fill, and Both.
If you choose Stroke or Both, the shape's outline is drawn using the currently selected paint brush. In vector paint operators, the brush properties used to draw the outline are added to the shape's hierarchy in the explorer.
Edit a paint operator as described in Editing and Previewing Paint Operators.
From the Fx Viewer paint menu, choose Shape Stroke, Filled or Both.
Position the mouse pointer over the Fx viewer and press 3 to open the Paint Tool Settings property editor. On the Paint tab, click the Stroke, Filled or Both button.
New shapes that you draw now consist of only the stroke, only the fill, or both the stroke and the fill, depending on what you specified. This does not affect existing shapes.
Once you've painted a color shape in a vector paint operator, you can open its property editor to change its attributes. In addition to editing the properties described in this section, you can:
Transform the shape as described in Transforming Shapes.
Edit the shape's points as described in Editing Shape Points.
Animate the shape as described in Animating Other Shape Parameters.
Edit the vector paint operator in which you want to edit color shapes, as described in Editing and Previewing Paint Operators.
Select a color shape, as described in To select shapes in the Fx Viewer, and press Enter to open its property editor.
On the Shape tab, change the shape's Type if necessary. As with color shapes you can set the shape type to Bézier, B-Spline, or Polyline. For more information, see Closed Shapes vs. Open Shapes.
To open or close the shape, click the Close button. For more information, see Shape Strokes and Fills.
Adjust the Opacity value to make the shape more or less opaque. Changes to the opacity affect both the stroke and the fill.
If desired, set the shape's Fill Style to one of the following:
If desired, toggle the shape's outline on or off. When the outline is activated, you can set the following properties:
Color: specifies the outline's color. Set any color using the RGBA sliders.
Start/End: specify the start and end points of the outline as percentages of its total length.
This allows you to display partial outlines. You can also animate these values to create the effect of the outline being drawn. An example of this can be found Merging and Cloning.
Brush properties: when you activate the shape's outline, the Brush property editor is appended to the shape's property editor. You can use it to set the brush properties for the shape's outline.
The brush properties are described in Setting Paint Brush Properties.
To blur the edges of the shape's fill, adjust the Edge Blur value. For more information, see the next section, Adding Drop Shadows to Color Shapes.
To add a drop shadow to the shape's fill, activate the Drop Shadow option. The Drop Shadow property editor is appended to the shape's property editor.
For more information, see Drawing Rectangles and Ellipses.
In vector paint operators, you can soften color shape fills by blurring their edges. Because the blur is only applied to the fill, heavy blurring may spill out past the outline, if the outline is displayed.
Edit the vector paint operator whose shapes' you wish to edit, as described in Editing and Previewing Paint Operators.
Select a shape, as described Transforming Shapes, and press Enter to open its property editor.
On the Shape tab of the ColorShape page, adjust the Edge Blur value until satisfied. The higher the value, the greater the amount of blur.
If you have applied a drop-shadow, as described in the next section, the blur affects the drop-shadow as well.
In vector paint operators, you can add a drop shadow to any color shape's fill. You can adjust the shadow's position and change its color, opacity and softness. If your shape has both a stroke and a fill, the stroke is painted over the drop shadow. As such, especially thick shape outlines can sometimes obscure drop shadows.

|

|
| The image above shows a fill-only shape with a drop shadow added. |
Adding a thick outline to the shape all but obscures the drop shadow. |
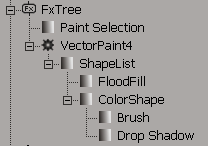
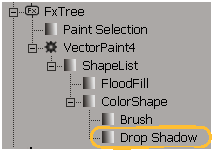
When you add a drop shadow to a color shape, it is added to the shape's hierarchy in the explorer.
Edit the vector paint operator whose shapes' you wish to edit, as described in Editing and Previewing Paint Operators.
Select a shape, as described Transforming Shapes, and press Enter to open its property editor.
On the Shape tab of the ColorShape page, activate the Drop Shadow. The Drop Shadow property editor is appended to the shape's property editor in a new page.
From the Drop Shadow page, adjust the following properties as needed:
Color sets the shadow's color. Set any RGB value using the sliders.
Offset X/Y offsets the drop shadow from the shape in X and Y. The higher the value, the greater the offset.
Opacity controls the shadow's opacity. The higher the value, the more opaque the shadow.
Softness blurs the drop shadow's edges. This blur is added to the blur specified by the shape's Edge Blur setting (see Adding Drop Shadows to Color Shapes).
 Except where otherwise noted, this work is licensed under a Creative Commons Attribution-NonCommercial-ShareAlike 3.0 Unported License