In a vector paint operator, you can edit any shape's points to change its form. Although editing points is basically the same for all shape types, some types have special options that give you additional control over the line segments connecting the points.
The point-editing tools and techniques discussed in this section apply to all shapes in vector layers. This includes:
Stroke shapes painted with the paint brush tool. See Painting with the Paint Brush for more information.
Lines painted with the line tool. See Painting Lines for more information.
Color shapes painted using the Rectangle, Ellipse, Freehand, and Mark Out Shapes tools. See Setting New Shape Properties for more information.
Stencil shapes, active or not, created using any of the stencil tools except for the Magic Wand tool. See Viewing the Paint Selection Mask for more information.
Edit the vector paint operator whose shapes' points you wish to edit, as described in Editing and Previewing Paint Operators.
From the Fx viewer paint menu, choose Shape  Edit Point Tool, or position the mouse pointer over the Fx viewer and press M.
Click a control point to select it.
Hold down Shift and click additional points to add them to the selection.
Drag the selected control points to modify the shape as desired.
Depending on what type of shape you're editing, you may be able to further edit its points:
If you are editing a Bézier shape, you can further modify it by adjusting the control handles at each of its points, as described in the following section, Editing B-Spline Point Weights.
If you are editing a B-Spline shape, you can further modify it by adjusting its point weights, as described in Animating Vector Shapes.
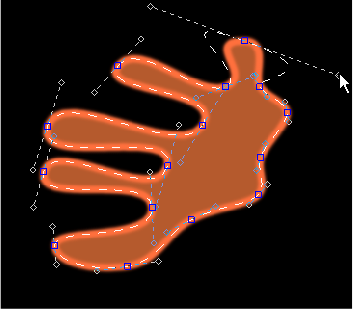
Editing points on Bézier shapes is a bit more involved that editing other shapes' points. Each point has a set of handles that you can use to adjust the shape's curve at that point.
When you select a Bézier shape, some or all of its points' handles are displayed with lines joining them to their respective points. Where the shape's outline passes through a control point, it is always parallel to the line joining the control point to its handles.
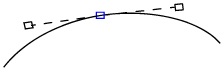
If the two handle lines are at an angle, then the shape's outline also has a sharp corner at this point, with the same angle. The shorter the handle line, the tighter the curve of the outline as it passes through the control point.
To display a point's handles, hold down Ctrl, click the point and drag.
Edit a Bézier shape's points as described in the previous section.
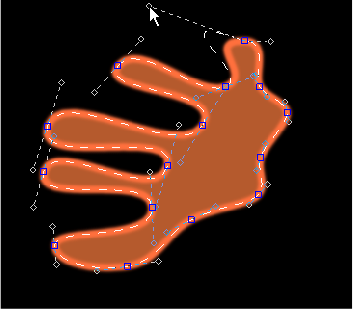
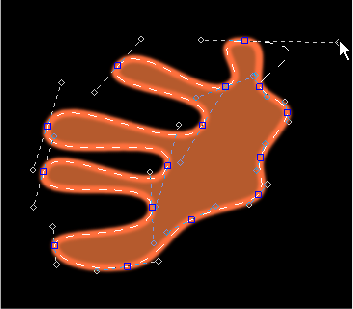
Drag control points or their handles to create the desired shape.
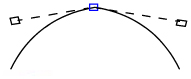
As you drag the handle of a control point, its other handle simultaneously pivots to keep the angle between the two handle lines constant.
Do any of the following as needed when editing control points and handles:
Each point in a B-Spline shape has a weight value that defines the shape's curve at that point. Weight values range from 1 to 3, with higher values creating sharper curves. By default, all of a shape's points have a weight value of 1, which you can change using the BSpline Point Weight tool.
Edit the vector paint operator whose B-Spline shapes you wish to edit, as described in Editing and Previewing Paint Operators.
Select a B-Spline shape in the Fx viewer.
Alternatively, you can select a shape of another type, open its property editor, and set its Type to B-Spline.
From the Fx viewer paint menu, choose Shape BSpline Point Weight Tool, or with the mouse pointer positioned over the Fx viewer, press Ctrl+B.
To adjust point weights, do the following:
You can add points to any type of vector shape using the Insert Points tool.
Edit the vector paint operator whose shapes you wish to edit, as described in Editing and Previewing Paint Operators.
From the Fx viewer paint menu, choose Shape Insert Points, or with the mouse pointer positioned over the Fx viewer, press Insert.
You can remove points from any type of vector shape using the Edit Point tool or the Delete Point tool.
From the Fx viewer paint menu, choose Shape Edit Point, or position the mouse pointer over the Fx viewer and press M.
Click a any point to select it. Hold down Shift and click additional points to add them to the selection.
Alternatively, you can drag the mouse pointer over a region to select all of the points in the region.
Press Delete to delete the selected points. The shape's outline is reshaped accordingly.
 Except where otherwise noted, this work is licensed under a Creative Commons Attribution-NonCommercial-ShareAlike 3.0 Unported License