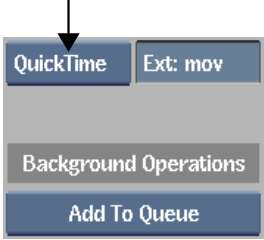
You can encode clips into QuickTime. You can export files of almost any size and, depending on the QuickTime file format, you can apply variable compression rates to create video files with a suitable trade-off between image quality and file size.
If your video clip contains audio that extends before or after the video portion, ensure that the Consider Audio Head/Tail button is enabled. See Audio Preferences.
You can export QuickTime video files by adding them to the render queue™ and rendering them as a background process. When you export video files, the following frame size requirements must be met.
| For this file type: | Frame size must be a multiple of: |
|---|---|
| QuickTime | 4 (width only) for most compression schemes |
When exporting QuickTime MPEG-4 files, ensure that you export the clip in Progressive mode, rather than Interlaced mode. QuickTime MPEG-4 clips exported in Interlace mode are not supported properly on Mac® computers.
You can also use Cleaner® XL to export video file formats. The advantage of using Cleaner XL rather than native video export is that it offers a much broader range of export formats and compression options. Its export process also runs on a separate computer, which is dedicated to the encoding process. See Exporting Media to Cleaner XL for Encoding.


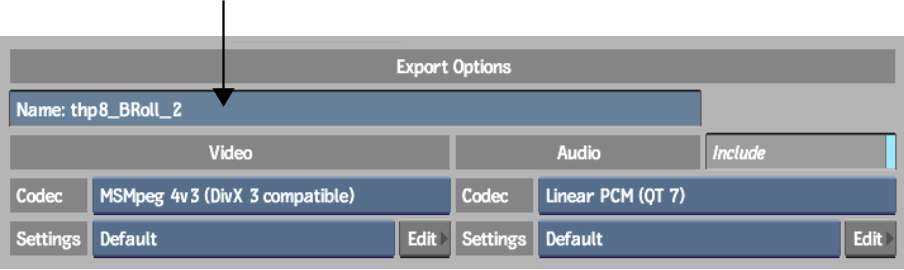
AudioDesk settings are always applied to the exported audio track.

When exporting files to a Mac, use Convert 2.2 to 1.8 for gamma correction.
| Select: | To: |
|---|---|
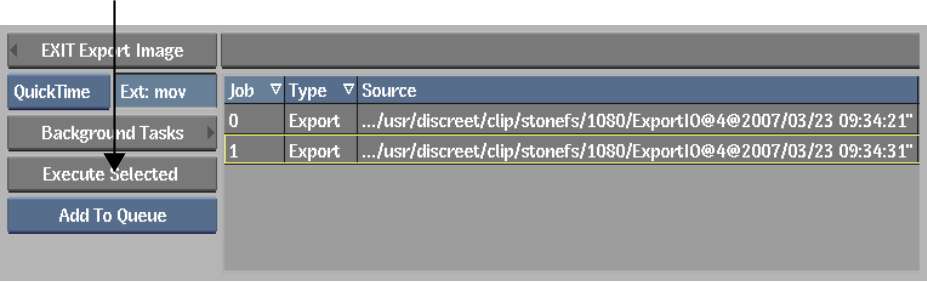
| Add to Queue | Add the job to the queue. |
| Add to Queue & Execute | Add the job to the queue and execute it automatically. If there are any jobs in progress, this job (and any others already added to the queue with the Add to Queue & Execute option) is triggered upon the completion of its predecessor. |
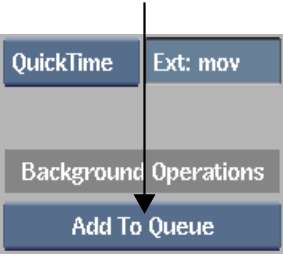
Selecting an option from the Add to Queue box adds the export job to the Background Import/Export Queue. Video files can only be exported as a background process.
The selected clips are exported. When the export is finished, you are returned to the clip library.


