You can export DPX files while taking advantage
of all their inherent properties, such as LUTs and DPX Transfer
Characteristics.
To export a DPX file:
- Open the clip library containing the
clip that you want to export.
- Select the clip that you want to export
and click Export Image.
The Export Image menu
appears.
- In the file browser, browse to the directory
to which you want to export the clip.
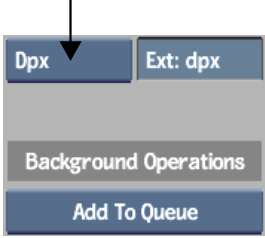
- From the File Format box, select DPX.
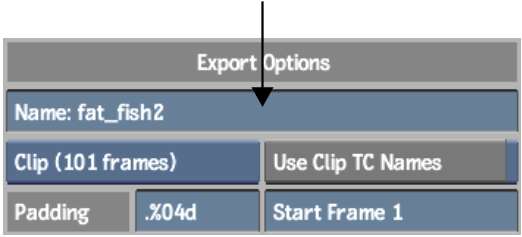
- To change the name of the exported DPX
file, enter a name in the Name field.
NoteTo avoid filename
compatibility issues upon export, underscores will be substituted
in your filename in place of any of the following characters: `
# ~ @ $ % ^ & * ( ) [ ] { } < > \ | / ! ? , ; : ' "
- Specify whether you are exporting a single
frame or a clip in the Frame/Clip box.
- Enable Use Clip TC Names, if you would
like to use the timecode contained in your clip to number the exported
files.
- Adjust any other file numbering parameters.
See
Export Options Group.
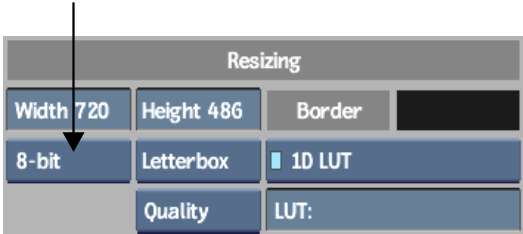
- From the Bit Depth box, select a bit
depth value.
DPX files can be exported
as 8-bit, 10-bit, or 12-bit clips.
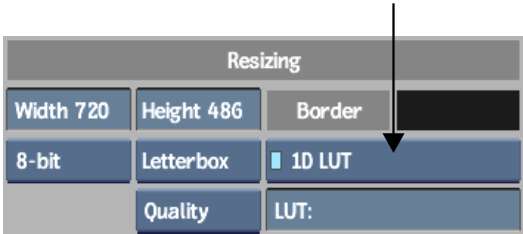
- To use a predefined LUT, load it using
the Colour Correction Type box.
See
Applying a LUT on Import or Export.
- Adjust any other parameters for resizing
options. See
Resizing Group.
- Select a DPX Transfer Characteristic.
This is used to identify
the attributes associated with a particular film or video format,
such as resolution, frame rate, and colour space. The commonly used
options are listed here. See
DPX Transfer Characteristics Group.
| Select: |
For: |
| Unspecified |
Images where the format is not specified. |
| Logarithmic |
Negative film scanners recording status M densities. |
| Linear |
Video images which have built-in gamma correction. This
refers to images having a true linear quantization scheme (such
as CG-originated material).
|
| Printing Density |
Negative film scans which use the SMPTE Printing Density
settings. SMPTE Printing Densities use status M density measurements
with a higher gain in the red component.
|
- To generate thumbnail proxies for the
file browser, select an option from the Proxy Generation box. See
Proxies Group.
- Click Export.
The DPX files are generated
and saved in the specified location.
When the export is finished,
you are returned to the clip library.