Garment Maker is a modifier that is designed to put together 2D patterns that you can then use with Cloth. With Garment Maker you can take a simple, flat, spline-based pattern and convert it to a mesh, arrange its panels, and create seams to sew the panels together. You can also specify internal seam lines for creases and cuts.
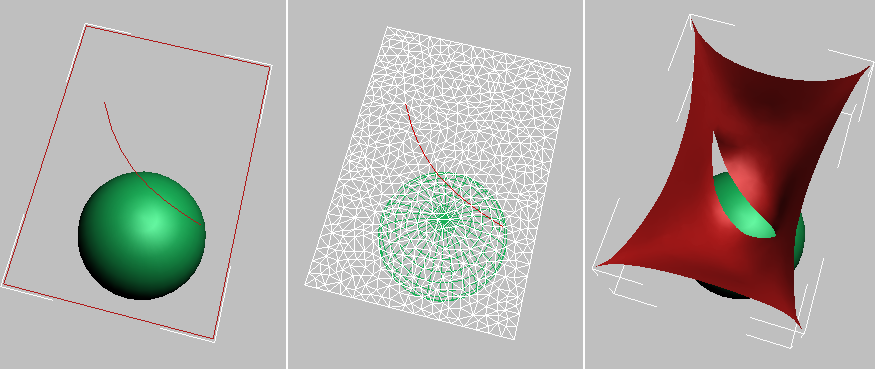
When you start working with Garment Maker, you begin either by importing or drawing traditional 2D splines in the 3ds Max Top viewport. To use a spline with Garment Maker and eventually Cloth, it must be a closed shape. This does not mean that you cannot have splines inside of splines, but if you have multiple spline shapes inside of one another, the inner splines are treated as "holes" in the fabric, as shown below.
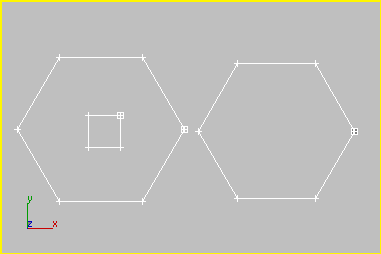
Two closed splines - one with a nested spline inside
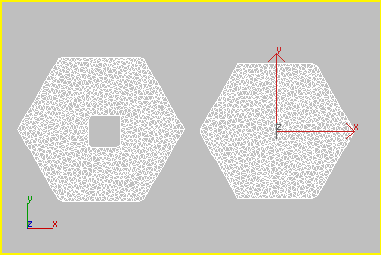
Resulting geometry after applying Garment Maker
Also, to keep your patterns precise, no rounding of boundary edges and corners, you must break the splines at the corner vertices. This is also important because it directly impacts the segments of the splines that are to be used to create seams between the individual panels. To understand this better, take a look at the following example.
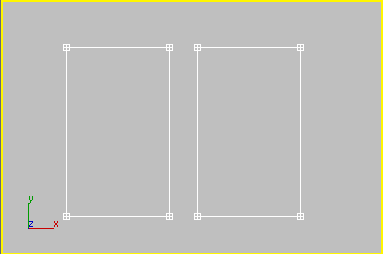
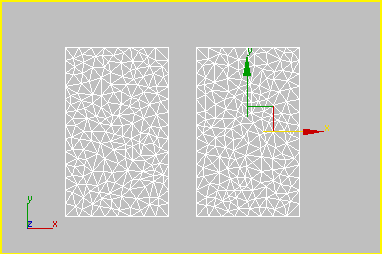
In the image below are two rectangular splines to which a user might want to apply Garment Maker. After applying Garment Maker, the idea is to then create a seam between the two panels along the inner edge. First, it should be noted that both splines are closed shapes and have been attached so they are part of the same editable spline object.

When Garment Maker is assigned, look what happens:
Garment Maker seems to have "chopped" corners of the rectangular splines off, altering the pattern. Beyond that, if the user tried to select the edges of the panels that make up the seam, they will not be able to. This is because Garment Maker currently has only a single spline to work with for each panel.
To keep the pattern clean, do the following:
 Vertex sub-object level of the editable spline.
 Select the vertices where the seams should be.
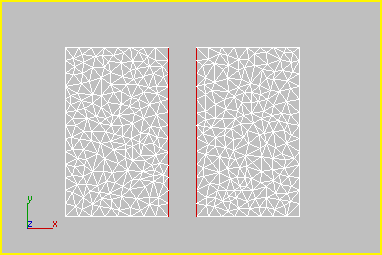
Shown below are the results when all of the vertices are selected and then broken.
All vertices in both panels selected and then "broken"
Garment Maker applied to "broken" splines
The corners are now preserved. When the user goes to select the edges between the panels to act as seams, they will be selected independently of the other panel edges and highlight in red. This is what you want in order to create seams.
Seam edges selected at the Seam sub-object level in red
Garment Maker's Panels sub-object level lets you arrange the panels of the pattern around the character. You can then create seams where the panels should connect and be "sewn" together. This lets you create the seams you need while seeing how the clothing will look around your character. Creating seams like this is in many cases far superior to making them in a flat layout because it allows you to visualize what is being done.
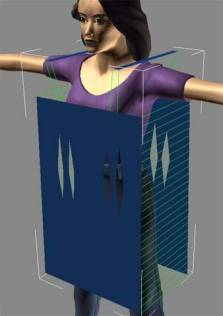
Arranged panels with seams defined
To make patterns you can use the basic 2D spline tools in 3ds Max. Cloth comes with several patterns, but after you learn to use them, you will most likely want to start making your own. Patterns can take advantage of many features that real sewing patterns have, such as darts and multi-segment seams. To learn about other pattern making software, see Pattern-Making Software.
As you begin to move beyond the basic patterns for your garments, there are a number of rules that you should follow in order to work effectively with Cloth:
When creating a seam you cannot use:
Both these issues arise in the common sleeve assembly shown below. The sleeve needs to be sewn to the armhole. When assembled, both the sleeve and the armhole form closed loops. The sleeve forms a loop via the seam along its underside. The armhole is closed by two seams: one across the shoulder and one down the side.
Now, since you cannot seam closed loops together, it therefore follows that both the armhole and sleeve must be left open when creating the seam connecting them. So the order is as follows:
In this case, you have an arm seam that is open at the bottom, and a MultiSegment that is open at both the top and the bottom. If you closed the side of the garment, you'd end up with the situation illustrated in the center image below, where the seam is twisted (it cannot be “untwisted” by reversing the seam). By closing the top of the armhole MultiSegment with a seam at the shoulder, you'll create proper topology to make the MultiSegment seam.
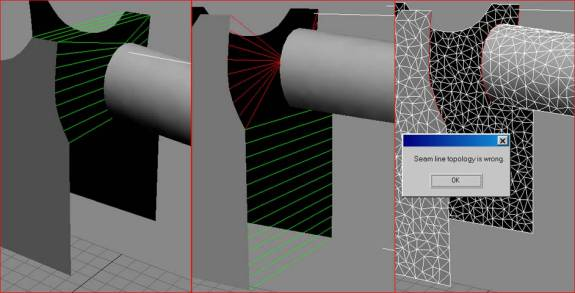
Left: Seam created for shoulder first and then for the MultiSegment, producing the desired result.
Middle: Seam created at the bottom of the body MultiSegment first, resulting in an irreversible MultiSegment seam from the arm to the body.
Right: No seams made on the body to connect its MultiSegment, resulting in a seam topology error.
When drawing panels, you can use extra open splines to define seam lines within the panels, also known as internal seam lines. Triangulation always occurs along these internal seam lines, so you can use them to help define the structure of the cloth panel, and as crease lines. Also, you can specify that an internal seam line should be cut, so that the cloth separates along the line during the simulation.
To create an internal seam line, simply specify a Material ID of 2 for the internal spline, which should not be closed. Also, for best results, keep its endpoints away from other splines in the shape. And, as with outside seam lines, an internal spline should not cross over itself or other splines.
Left: Open spline, set to Material ID 2, specifies internal seam line.
Center: At Garment Maker  Curves or Seams sub-object level, seam line is selected and Cut is turned on.
Right: Cloth separates along cut line during simulation.
To place garment panels automatically:
The Garment Maker modifier provides tools for positioning garment panels on a humanoid character model. This automatic placement is approximate; further adjustment is typically necessary.
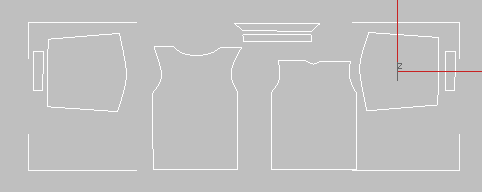
Shirt panels, as seen in the Top viewport
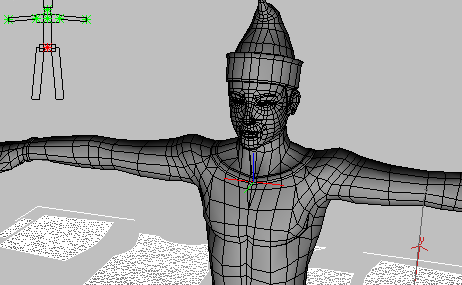
A character outline appears in the corner of each viewport. Superimposed on the outline are seven asterisk-shaped points; the one at the center-top of the chest is highlighted in red.
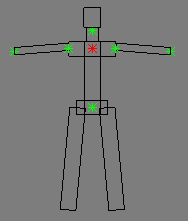
The character outline lets you mark points for positioning panels.
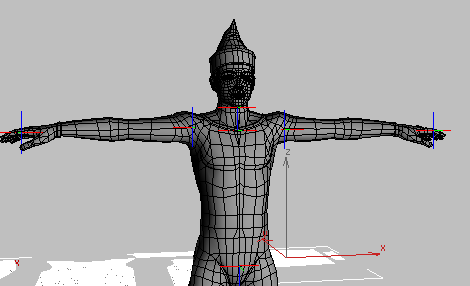
As you move the mouse cursor over the surface of the model, a red circle shows where the marker will be placed. When you click, an axis tripod appears on the surface at that location, and the next point on the character outline, at the center of the pelvic region, is highlighted in red.
The axis tripod appears on the object surface where you click.
All seven points are marked on the character model.
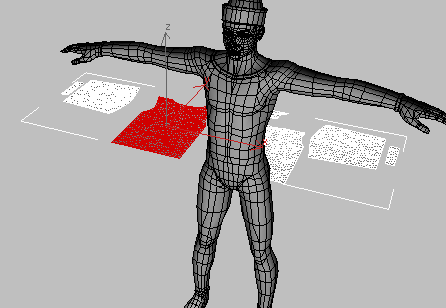
The front shirt panel is selected.
The panel moves to the designated position.
Panel Position=Front Center; Level=Top at shoulder
Front Center again.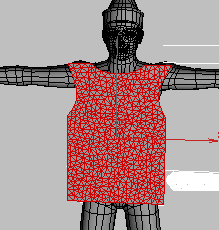
Panel Position=Front Center; Level=Top at neck
Of course, you can also move the panel manually; in fact, in most cases it will probably be necessary to do so. Panel Position serves primarily as a starting point for placing panels.
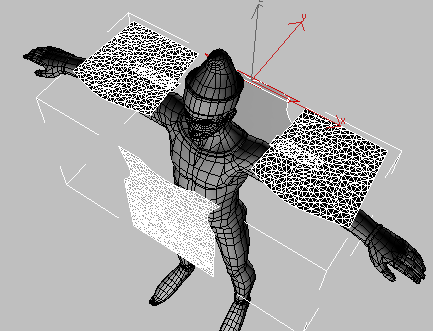
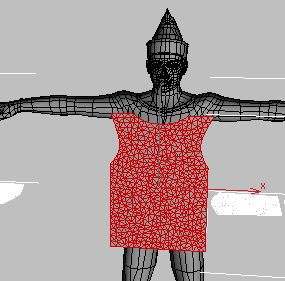
All panels placed with Panel Position. Note that sleeve panels need to be rotated 90 degrees, and cuff panels need to be rotated and moved to the wrists.
The Main Parameters rollout is the first rollout you see on the Modify panel once you apply the Garment Maker modifier.
Use the Curves sub-object level to stitch your pattern panels together.
The Panels sub-object level of the Garment Maker modifier lets you position and bend the panels of your pattern to fit your object or figure.
At the Seams sub-object level, you can define and edit seams and their properties.
When you are working with Garment Maker, you may encounter errors if your splines are set up incorrectly. This topic lists the common error messages you might see, and how to correct the problems they report.


 Modify panel