The Cloth modifier is the heart of the Cloth system, and is applied to all objects in your scene that need to be part of the Cloth simulation. This is where you define cloth and collision objects, assign properties, and execute the simulation. Other controls include creating constraints, interactively dragging the cloth, and erasing parts of the simulation.
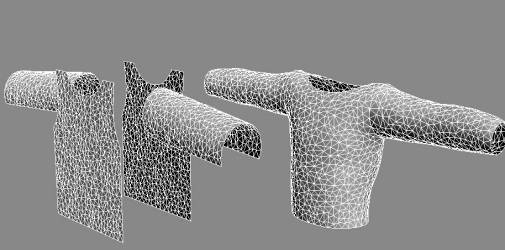
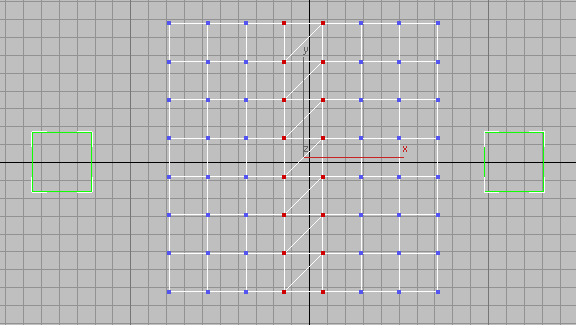
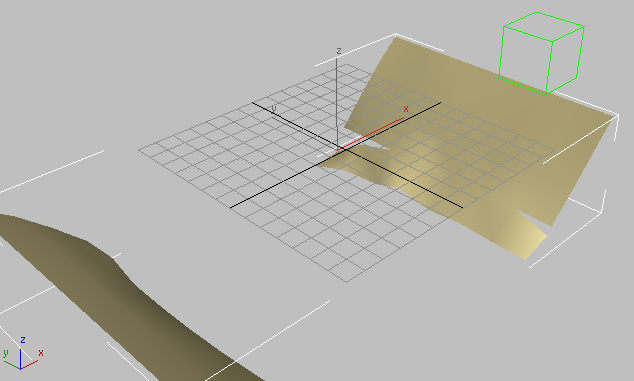
Left: Cloth modifier not yet applied
Right: Cloth modifier applied and simulated
In a Cloth simulation, you will let Cloth know which objects will be part of the simulation, and which objects will not. Once you have done this, you define what the objects are made of. You can specify what is made of cloth, and what is a solid, collision object.
Because Cloth is a modifier, an instance of it is assigned to each object to be included in the Cloth simulation. This includes all cloth and collision objects. Be aware that two cloth objects with two separate applications of the Cloth modifier will not interact with one another. There are a couple of ways to include objects in the simulation:
It is important to think about size in doing clothing simulations. A very large flag behaves differently from a handkerchief. If the scale is off, then the simulation will be off. Because Cloth deals with real-world physics, it works in real-world units. This means that Cloth needs to know the relationship between units in 3ds Max and units in its own world.
For example, suppose you create a plane that is 10 x 10 3ds Max units. If you want this plane to behave like a 10-inch x 10-inch handkerchief, you would tell Cloth that 1 3ds Max unit=1 inch. If you want it to behave like a 10-foot x 10-foot bed sheet, you would tell Cloth that 1 3ds Max unit=1 foot.
Except as noted at the start of this section, Cloth ignores the 3ds Max System Units Setup (under Customize menu  Units Setup System Units Setup). Cloth has its own units setup, which is determined by the cm/unit parameter on the Simulation Parameters rollout. This tells Cloth how many centimeters (cm) correspond to each 3ds Max unit. One inch equals 2.54 cm, so the default setting of 2.54 means that one 3ds Max unit corresponds to 1 inch.
Following is the procedure to follow to determine what setting to use here.
Here is a quick example: You import a file, man.obj, into 3ds Max, and want to put a shirt on him.
Cloth provides many different ways to set up fabric behaviors. You can make your cloth behave like leather, silk, burlap, and anything in between.
Once all of your parameters are set and you’re ready to go, it’s time to simulate. In many cases, you will first perform a local simulation to fit your fabric to your character. Once your fabric is in place, you can simulate over time.
Running a simulation in Cloth is very freeform. You are able to make many changes and edits to a simulation, making it more of a work in progress than a click and a “hope for the best” scenario.
You can constrain fabric in various ways to create different fabric effects during simulations. Cloth can constrain cloth to have extra drag as it flies through the air, or can cause it to be affected by a space warp in the scene. Linking a portion of the fabric to an animated object or attaching to a surface are other common constraints. If you wanted to create a pair of pants you would constrain the top portion of the pants to the waist of the character or a curtain can be constrained to a rod. Constraints are a very important and robust part of Cloth. Cloth has the ability to make multiple groups of constrained vertices for great flexibility. You can constrain many different parts of a piece of clothing to different nodes' surfaces or other cloth objects.
You build constraints in Cloth at the modifier's Group sub-object level. At this level, you can see vertices of all selected objects, both cloth and collision. You can then select these and place them in groups. Once a group is defined, you can then attach or "constrain" the selection set to another object, or have it affected by some external force.
You can tear cloth. For an example of how to do so, see this procedure.
Cloth tears during the course of a simulation under a couple of circumstances:
A Strength or Tear Threshold value (they are the same) lets you set how easily cloth is torn.
You must specify where the cloth will tear before you run the simulation. There are a few different ways to do this:
See Seams Sub-Object Level (Cloth), Curves Sub-Object Level (Garment Maker), and Seams Sub-Object Level (Garment Maker).
Tearing Cloth and the Point Cache Modifier
If you use a Point Cache modifier to optimize a Cloth animation, there is a chance that tears will not be smoothed correctly before tearing occurs. To fix this problem, you can add a Welder modifier to the stack. Place the Welder above the Point Cache modifier.
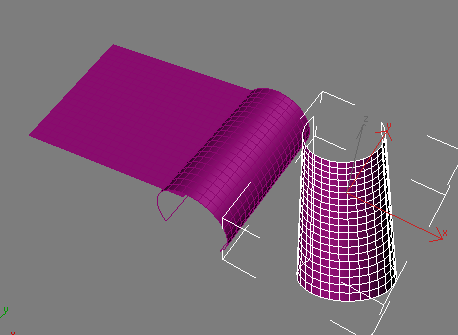
Example: To use the Keep Shape option:
If your cloth object starts out with 3D shape that you'd like to retain during the simulation, you can use the Keep Shape option and setting to preserve this shape, or even reverse it. This simple procedure provides an example of how to use Keep Shape.

 Select all three planes and apply the Cloth modifier.
Turning off Gravity keeps the cloth objects from falling during the simulation, so they stay in view, and lowering the cm/unit setting compensates for the planes' relatively large size.
This also sets V Bend to 500.0 automatically.
Using high Bend values allows the simulation to proceed more quickly.
Next, you'll set different Keep Shape properties separately for each object.
Selected Objects Manip group Use Target State is off.
Select both the reverse shape and the keep shape objects, but not don't keep shape, and then turn on Use Target State.
After a few seconds, the don't keep shape object starts to flatten out, the keep shape object doesn't change, and the reverse shape object has, in fact, reversed its shape, effectively creating a negative bend angle.
Example: To tear a piece of cloth:

 create a Plane. Make it about 150 units on each side. Set its Length Segments and Width Segments both equal to 7.
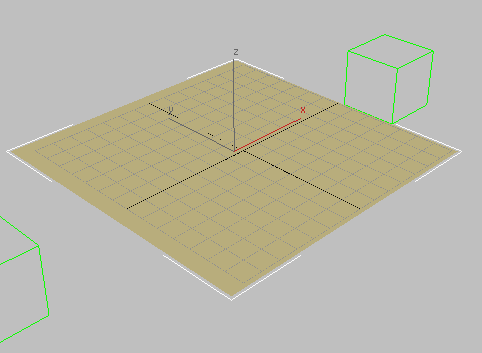
 Dummy objects: one on each side of the plane.
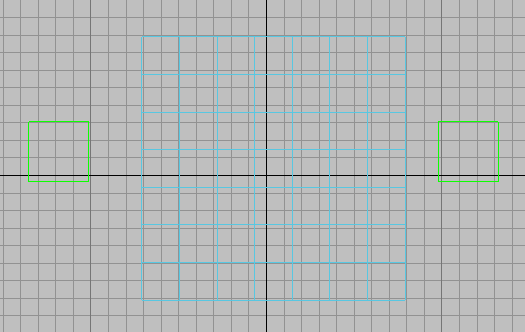
The plane flanked by two dummy objects
 (Auto Key). Go to frame 100, then animate each dummy object so it moves about 300 units away from the plane along its X axis: Move the left-hand dummy to the left, and the right-hand dummy to the right.
 (Auto Key).
 Go back to Frame 0.
Select the plane. Go to the
Go back to Frame 0.
Select the plane. Go to the  Modify panel, and apply a Cloth modifier to the plane.
 Select the vertices along the left-hand side of the plane, and then on the Group rollout, click Make Group. Click OK to accept
the default name of Group01. With Group01 still highlighted in the Group list, click Node, and then in a viewport click the left-hand dummy object to assign it to
this group.
Select the two center columns of plane vertices, and then on the Group rollout, click Make Tear. Click OK to accept the default
name of Group03.
Select the vertices along the left-hand side of the plane, and then on the Group rollout, click Make Group. Click OK to accept
the default name of Group01. With Group01 still highlighted in the Group list, click Node, and then in a viewport click the left-hand dummy object to assign it to
this group.
Select the two center columns of plane vertices, and then on the Group rollout, click Make Tear. Click OK to accept the default
name of Group03.
Central vertices selected to create a tear in the cloth
3ds Max creates a new Weld constraint that comprises the vertices at the center of the cloth plane.
After clicking Make Tear
 Simulation group, click Simulate.
3ds Max animates the dummies pulling at the cloth. As this happens, the cloth tears along the vertices that you set to tear.
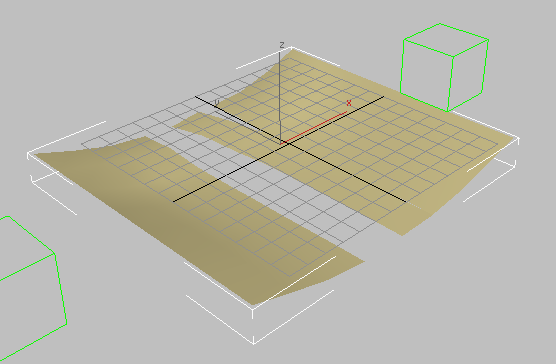
Cloth tearing in the center as its edges are pulled apart
Depending on the position of the dummy objects, the tear you see in your example might differ from the one shown in these illustrations.
To run a cloth simulation with a networked render farm:
A complex cloth simulation can require extensive computation and take a long time. Cloth includes commands that make it easy to run a simulation on a networked machine (part of a render farm), freeing up your machine for working on other parts of the scene.
select the object, and then on the Selected Object rollout click Set and specify a path and file name for the cache.
For best results, specify a mapped drive and turn on Force UNC Path. This specifies the path using the Universal Naming Convention so that it can be found by all computers in the network. Also, it's probably a good idea to keep all the cache files in the same directory.
 Save the scene file.
Unlike rendering, network Cloth simulation cannot be split up among multiple Server machines.
As soon as the Server machine starts the render, it begins computing the simulation and saving it to disk. At any point you can load the simulation in its current state from the cache file to check its progress by clicking the Load button.
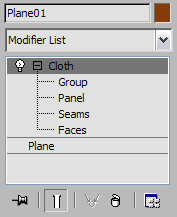
The Object rollout is the first rollout you see on the Command panel once you apply the Cloth modifier. It comprises mostly controls to create a Cloth simulation and adjust fabric properties.
The Selected Object rollout lets you control the simulation caches, control and optionally animate the cloth properties with a texture map or interpolation, and specify a bend map. This rollout appears only when a single object in the simulation is selected.
The Simulation Parameters rollout settings let you specify general properties of the simulation such as gravity, start and end frames, and sewing-spring options. These settings apply to the simulation on a global scale, that is, to all objects in the simulation.
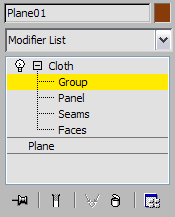
Groups let you select groups of vertices and constrain them to surfaces, collision objects, or other cloth objects.
At the Panel sub-object level, you can select one panel (cloth section) at a time and change its cloth properties.
The Seams sub-object rollout is used to define seam properties.
The Faces sub-object rollout enables interactive dragging of cloth objects while they are simulated locally. This sub-object level is useful for positioning cloth within your scenes in a more interactive way.


