Chapter 12, Image Processing Tools
| Filtering Tools | Image Generation Tools | ||
Chapter 12, Image Processing Tools |
|||
In some cases you will be working with images of different sizes and color depths. Use Formatting tools to change these parameters.
There are five image formatting tools:
| Tool: | Description: |
| Convert Depth | Changes an image's color depth--see Convert Depth Tool. |
| Crop | Removes rows or columns of pixels next to the edges of the input image--see Crop Tool. |
| Premultiply | Premultiplies an input image--see Premultiply Tool. |
| Unpremultiply | Unpremultiplies an input image--see Unpremultiply Tool. |
| Resize | Changes the resolution of an image--see Resize Tool. |

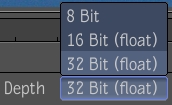
The Convert Depth tool lets you change the color depth of an input image.
Drag the Convert Depth tool from the Tools tab to the dependency graph in the Schematic view.

 "Show full-size image")
Select the target color depth from the color depth list.
 "Show full-size image")
The Crop tool lets you change the size of an image. When you perform a crop, adjacent rows or columns of pixels next to the edges of the input image are removed. You can crop an image relative to its input size or perform an absolute crop if you want to retain certain portions of the image. To assist in cropping, you can keep a fixed image size regardless of input dimensions.
|
|
|
| Original image | Cropped image |
You can also animate the Crop tool's parameters by setting keyframes or using expressions--see Setting Keys Manually and Validating and Applying the Expression String.
 "Show full-size image")
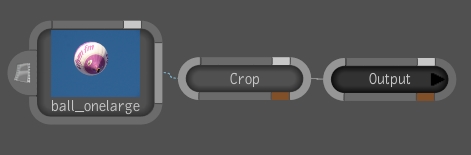
Drag the Crop tool from the Tools tab to the dependency graph in the Schematic view.
 "Show full-size image")
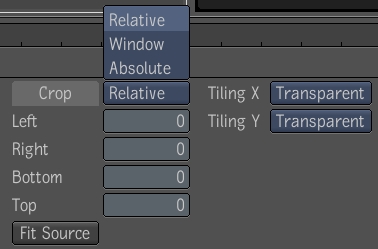
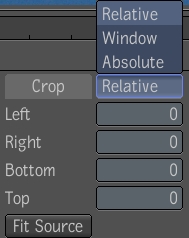
Select a crop type: Relative, Window, or Absolute.
| Use: | To: |
| Relative Crop | Crop an image relative to the size of the input image. The default value for all parameters (left, bottom, right, top) is zero. All parameters have a range of zero to the respective size (width and height) of the image being cropped. Cropping more pixels than an image has results in an invalid image size of zero. |
| Window Crop | Crop an image using absolute values. You can set values for Center X, Center Y, Width, and Height. |
| Absolute Crop | Crop an image using absolute values. You can set values for Left, Right, Bottom, and Top. |
| Tiling | Specify how the input image should be extended outside its region of definition (ROD).The supported tiling modes are Transparent (default), Edge, Repeat, and Mirror. |
Crop the image by doing any of the following:
Enter values in the Crop fields.
Manipulate the crop box in the Player by dragging it.
Adjust the red crop lines or crop handles in the Player.
Resize the image symmetrically by using the Ctrl key and dragging until you get the desired image size.
Reset the values, if needed, to that of the input image by clicking the Fit Source button.
Tools that can change the resolution of an image (Garbage Mask, Lens Distort and 2D Transform) have extra controls to manage the crop.
 "Show full-size image")
The Auto Crop feature computes a fit-all region where the entire distorted image fits into the output without losing any part of the image. When you set the crop mode to Auto Crop, the output region at each frame will automatically be computed. The region is automatically resized and all crop fields except the mode are disabled.
The Premultiply tool lets you take an input image and create an image where each pixel color's component is multiplied by the pixel's alpha component. The multiplication result is clamped to the color range of the output image.
Drag the Premultiply tool from the Formatting folder into the dependency graph in the Schematic view.

 "Show full-size image")
The image is premultiplied.
Note: When using the Premultiply tool, make sure the output image is never processed by a tool that produces incorrect results while operating on an image with premultiplied data. Tracking of whether images are stored in premultiplied format or not, does not occur.
The Unpremultiply tool lets you recover an alpha-unpremultiplied foreground image from an alpha-premultiplied image whose foreground may have been composited on a solid color other than black.
The Unpremultiplied tool takes an alpha-premultiplied image as its input and outputs a corresponding alpha-unpremultiplied image. It assumes the input image consists of a foreground composited over a solid color background; if the background is a color other than black, you can explicitly specify this background color so that the tool can correctly separate the foreground layer from this background and output the foreground layer alone. Optionally, your can ask the tool to guess the background color.
The Unpremultiplied tool has a single parameter:

 "Show full-size image")
| Use: | To: |
| Background | Specify the background color so that the tool can correctly separate the foreground layer from the background and output the foreground layer alone. |
| Guess | Have the tool analyze the input image and guess the background color and set the color widget to that color. |
Drag the Unpremultiply tool from the Tools tab to the dependency graph in the Schematic view.
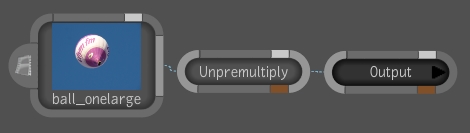
 "Show full-size image")
The image is unpremultiplied.
Note: When using the Unpremultiply tool, make sure the output image is never processed by a tool that produces incorrect results while operating on an image with unpremultiplied data. Tracking of whether images are stored in premultiplied format or not, does not occur. All tools except this one assumes unpremultiplied data.
The Resize tool lets you change the resolution of an image and its frame bit depth when working with images of different resolutions.
The Resize tool UI is divided into three areas:
Destination settings area.
Reference area (to modify crop box properties).
Resize area.
Use this area to select format, resolution, image and pixel aspect ratios, as well as bit depth of the destination image.
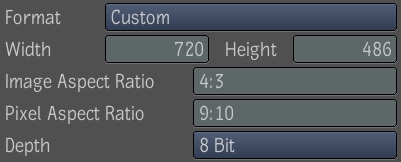
 "Show full-size image")
| Select: | To: |
| Format | Select from a list of many standard resolutions, as well as a Custom option that you can use to specify non-standard resolutions. |
| Width and Height | Display the frame width and height of the selected resolution preset. If you select Custom from the resolution presets box, use these fields to enter the frame width and height values you want to use. |
| Image Aspect Ratio | Change the image aspect ratio. |
| Pixel Aspect Ratio | Change the pixel aspect ratio. |
| Depth | Select the output depth. |
Use the Reference area to set crop box properties.
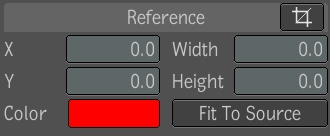
 "Show full-size image")
| Select: | To: |
| Color | Change the color of the crop box. By default, the crop box is red. If there is a lot of red in the image you are resizing, you may want to change the color of the crop box to see it better. Clicking the color pot will take you to the color picker where you can set desired color for the crop box. |
| X and Y | Change the X and Y position of the crop box. |
| Width and Height | Change the width and height of the crop box. You can either type the dimensions into the respective Width and Height attribute value fields, or you can grab the edges of the crop box with the cursor and resize. |
| Fit To Source | Fit the crop box to the source image. |
Use the Resize area settings to define the destination format into which the source sample is fit.
The Resize area has the following parameters:
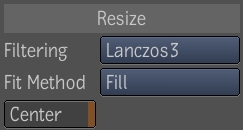
 "Show full-size image")
Pictures often appear fuzzy when scaled to a different size. The fuzziness of an image is controlled by two processes: resampling and filtering.
The filtering processes attempt to smooth the transformed pixels. When an image is being resampled to a different resolution, the old pixel map needs to be interpolated to a new one. This requires some form of image interpolation and a number of interpolation methods can be used.
| Use: | To: |
| Filtering | Select a filter type. You can choose from; Box, Triangle, Bell, B-spline, Lanczos3, or Mitchell. These filters range in quality from the Box filter being of the lowest (unsuitable for further processing, but with the least amount of processing time), to the Mitchell filter producing the best possible results. |
| Fit Methods | Select a fit method. You can choose: Fill, Crop, Letterbox, or Crop Edges. If you select Letterbox or Crop Edges, you can also select or deselect the Keep Aspect parameter. |
| Center | Select to center the destination resolution. |
Animate the position of the crop box to pan and scan a 16:9 composition to a 4:3 format. Pan and scan is a technique widely used for resizing 16:9 compositions to a 4:3 resolution when the area of interest in the shots is to one side of the 16:9 frame. You can follow the area of interest in the shot by animating the crop box along the X-axis.
Drag the Resize tool from the Tools tab to the dependency graph in the Schematic view, and connect it to the composition.
From the Destination settings area, select the 4:3 resolution to which you want to resize the source.
Select a filter from Filtering.
Select the Crop Edges fit method.
Select Center and Keep Aspect buttons.
Select the Fit To Source button (in the Reference area) to make the crop box the same size as the source frame.
Go to the first frame.
Make sure Autokey is selected so you can create position keyframes for the crop box automatically.
Scrub through the clip to identify areas where the area of interest includes the left and right edges of the clip outside the crop box.
Animate the position of the crop box accordingly by dragging the crop box. You may also type the values into the respective X, Y, Width, and Height attribute value fields--see Setting Keyframes Automatically.
Play the resized composition.
In this procedure, resize a 16:9 composition to a 4:3 destination resolution using the Letterbox fit method.
Drag the Resize tool from the Tools tab to the dependency graph in the Schematic view, and connect it to the composition.
From the Destination settings area, select the 4:3 resolution to which you want to resize the source. You can also set custom width and height in the W and H fields.
Select the Letterbox fit method. By definition, when using the Letterbox fit method, black bars appear above and below the destination composition. However, the fill color in Toxik is already black and these bars get cropped from the destination resolution.
Select a filter from Filtering.
The composition is resized.


 "Show full-size image")

 "Show full-size image")