Exposure controls are plug-in components that adjust the output levels and color range of a rendering, as if you were adjusting film exposure. This process is known as tone mapping. These controls are especially useful for renderings that use radiosity, and when dealing with high-dynamic-range (HDR) imagery.
Exposure control compensates for the limited dynamic range of computer displays, which is typically about two orders of magnitude: The brightest color that appears on a display is about 100 times brighter than the dimmest. The eye, by comparison, can perceive a dynamic range of about 16 orders of magnitude. In other words, the brightest color we can perceive is about 10 million-billion times brighter than the dimmest. Exposure control adjusts colors so they better simulate the eye's great dynamic range, while still fitting within the color range that can be rendered.
The exposure controls included with 3ds Max are:Automatic Exposure Control, Linear Exposure Control, Logarithmic Exposure Control, mr Photographic Exposure Control, and Pseudo Color Exposure Control.

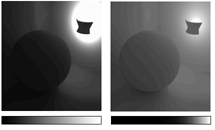
Left: Linear exposure control maps intensity evenly.
Right: Logarithmic exposure control maps most intensities to low and mid tones.
Exposure and Attenuation for Standard Lights
When you use standard lights that are not attenuated, renderings tend to have a low dynamic range, because light intensities don't vary greatly across the scene. In this situation, adjusting light values might be all you need to do to get a good rendering.
On the other hand, when lights are attenuated the illumination might be too bright on near surfaces or too dim on distant surfaces. In this situation, the Automatic exposure control can help, because it adjusts the larger dynamic range of the (simulated) physical scene, into the smaller dynamic range of the display.

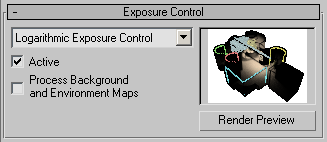
The thumbnail displays a preview of the rendered scene with the active exposure control applied. Once a preview has been rendered, it updates interactively when you changed exposure control settings.
If gamma correction or look-up table (LUT) correction is active, 3ds Max applies the correction to this preview thumbnail.
Automatic Exposure Control samples the rendered image and builds a histogram to give good color separation across the entire dynamic range of the rendering. It can enhance some lighting effects that would otherwise be too dim to see.
Linear Exposure Control samples the rendered image and uses the average brightness of the scene to map physical values to RGB values. Linear Exposure Control is best used for scenes with a fairly low dynamic range.
Logarithmic Exposure Control uses brightness, contrast, and whether the scene is outdoors in daylight to map physical values to RGB values. You can use it with either the default scanline renderer or the mental ray renderer. Logarithmic Exposure Control is best for scenes with a very high dynamic range.
The mr Photographic Exposure Control lets you modify rendered output with camera-like controls: either a general exposure value or specific shutter speed, aperture, and film speed settings. It also gives you image-control settings with values for highlights, midtones, and shadows. It’s intended for high-dynamic-range scenes rendered with the mental ray renderer.
Pseudo Color Exposure Control is actually a lighting analysis tool that provides you with an intuitive way of visualizing and evaluating the lighting levels in your scenes. It maps luminance or illuminance values to pseudo colors that show the brightness of the values being converted. From darkest to brightest, the rendering shows blue, cyan, green, yellow, orange, and red. (Alternatively, you can choose a grayscale where the brightest values are white, and the darkest are black.) The rendering includes the colored or grayscale spectrum bar as a legend for the image.
The Lighting Data Exporter renders the active viewport to images that include luminance and illuminance data that can be used for lighting analysis.