On the Gamma And LUT panel of the Preference Settings dialog, you set options to adjust the Gamma and lookup-table (LUT) values for input and output images and for the monitor display.
Lookup-table (LUT) correction provides compatibility with the same feature used in other Autodesk Media & Entertainment products such as Combustion and the Vfx suite: Inferno, Flint, Smoke, and so on. This feature allows studios to implement a consistent way of displaying colors, assuming that their monitors are calibrated to the same reference. Thus 3D artists can produce results that are closer to what the compositor expects by eliminating a variable in the equation: the way colors are displayed on screen.
Also, please note that the LUT system of the systems suite is complex and offers a variety of controls and flavors of lookup tables. This feature integrates the View LUTs only, such as that found in Combustion, where only the displayed images are modified.
Gamma correction compensates for the differences in color display on different output devices, so that images look the same when viewed on different monitors, or are used as bitmaps or in printed matter.
The calculation of “gamma” is output_intensity = input_intensity (1/gamma) . That is, the result is the original value raised to the power of the inverse of the gamma value. One result of this calculation is that a gamma value of 1.0 does not adjust the image at all.
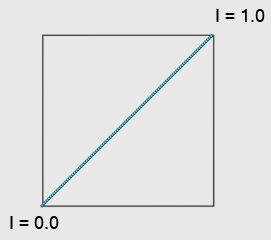
Gamma = 1.0: no correction
I stands for Intensity.
Another result of the gamma calculation is that black is not affected by the adjustment, and neither is white (or any fully saturated color). Gamma adjustment affects only the midtones of an image.
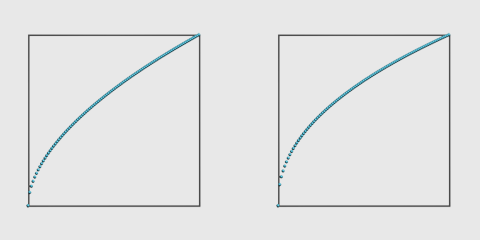
Left: gamma = 1.8
Right: gamma = 2.2, the standard
The horizontal axis represents input (the original value) and the vertical axis represents output (the gamma-corrected value).
Computer monitors don’t display color in a linear way (as in the first illustration). Also, the brightness of a monitor tends to make an image seem brighter than its intensity values really specify. Gamma correction fixes this problem, and can ensure consistency between different applications or different monitors. When you set gamma, find a value that makes middle gray on your own monitor match a true middle (50 percent) gray.
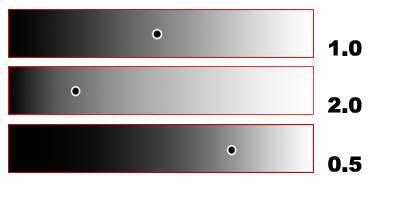
Changing gamma value to match a monitor's middle gray
The standard gamma value is 2.2. This is the theoretically correct value, making the linear color space stored in the bitmap and used by the renderer appear to be linear on screen.
However, because the response of photographic film isn’t linear either, some users find that this theoretically correct value looks too bright and washed out. A common compromise is to render to a gamma of 1.7 or 1.8, making things look more photographic; that is, as if the image had been shot on photographic film and then developed.
We recommend that you always turn on gamma correction when you share bitmaps between different computers, between different applications on the same computer, or create renderings to use in printed matter.
Two common mistakes have to do with gamma correction:
See the Procedures section below for more detailed instructions.
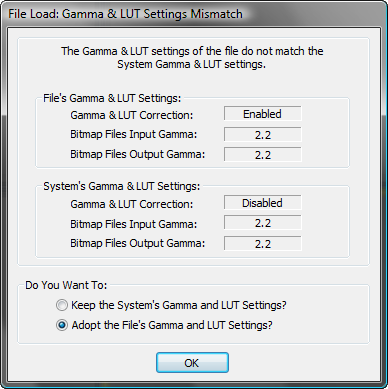
Gamma and LUT Settings Mismatch Dialog
Gamma And LUT correction settings are saved with the market defaults for the current custom UI. See Custom UI and Defaults Switcher. If you open or merge a scene whose gamma or LUT settings differ from the settings active for 3ds Max, you see a dialog that gives you the choice of using the current settings, or adopting those of the file you are loading. For example:
To set the gamma for renderings you will use as bitmaps or in printed matter:
 Preferences.
Use the Gamma spinner to adjust the Gamma value until the gray square in the center of the display shows no contrast with the surrounding border.
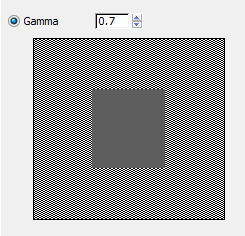
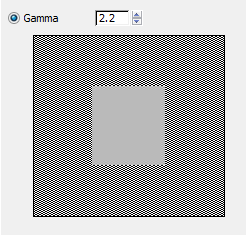
Above: A bad gamma value
Below: A good gamma value
The value you choose can vary, depending on your system's monitor.
To set the gamma for incoming bitmaps generated (or edited) by other applications:
If it does, choose Customize  Preferences
  Gamma And LUT. Turn on Enable Gamma/LUT Correction, and choose an Input Gamma value that matches the applications.
If the file type (for example, Targa) has an embedded gamma value, you might need to set Input Gamma to the inverse (1/gamma) of the file’s embedded gamma, to avoid applying gamma correction twice.
If it does not, choose Customize  Preferences
  Gamma And LUT. Turn on Enable Gamma/LUT Correction, then in the Bitmap Files group, change the Input Gamma to a suitable
value.
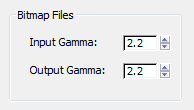
Input gamma set to a value suitable for a different application
It might take some experimentation to find the gamma value that best adjusts the bitmaps created by the other application. The bitmap should appear the way it does in the other application: if it appears too light or too dark in 3ds Max, try a different Input Gamma value.
Example: To use gamma correction with Adobe Photoshop:
 Color Settings is set to North America General Purpose Defaults, with Working Space
  RGB set to sRGB IEC61966-2.1.
 RGB to Convert To Working RGB.
 Preferences
  Gamma And LUT.
Now when you use a bitmap saved by Photoshop, the colors in 3ds Max should preserve the bitmap’s original colors.
To use gamma with video hardware:
Video devices such as video tape recorders usually have their own hardware gamma-correction circuitry.
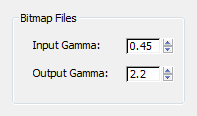
Typical input and output gamma settings for video that has no hardware gamma correction
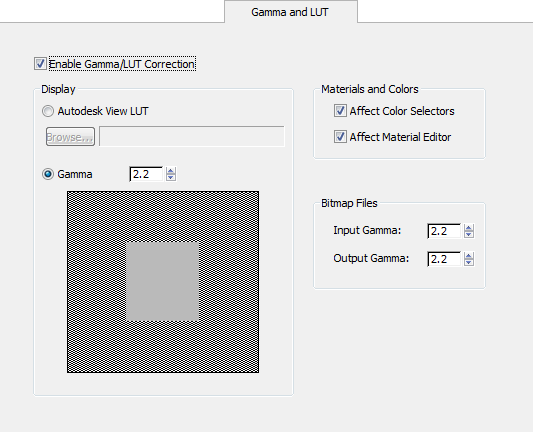
Display gamma correction or lookup tables applies to viewports and the Rendered Frame Window . Use the controls in this group to load an Autodesk View LUT or adjust gamma numerically.
(The default.) Adjusts the gamma display for 3ds Max. The spinner value increases or decreases the value (lightness or darkness) of the solid gray center square. Adjust the value until the center square is as close as possible in value to the surrounding checkered border. Range = 0.1 to 5.0. Default=2.2.
If you're creating bitmaps or renderings that will be sent to someone else, set Output Gamma to match the correct Display Gamma value. This ensures that the image will look correct at the destination site.
You can also display these gamma settings from the Gamma button in the File Browser dialog; for example, when you are rendering a scene to an image file.
By default, the Gamma setting affects the viewport display and rendered frames, but not the Color Selector or the Material Editor. These switches can enable gamma correction for either or both of these dialogs.
Adjusts bitmaps that you load (for example, texture maps), provided that the bitmap type doesn't override the gamma with its own gamma value. Range = 0.1 to 5.0. Default=2.2.
In the case of Targa files, for example, the file's inherent gamma will override the 3ds Max Input Gamma. In this case, set Input Gamma to the inverse (1/gamma) of the incoming gamma correction. This avoids applying gamma correction twice, which will make the bitmap too bright.
To maintain consistent gamma handling when rendering scenes that contain a combination of low-dynamic-range and high-dynamic-range images, follow this procedure, as outlined in the following diagram: