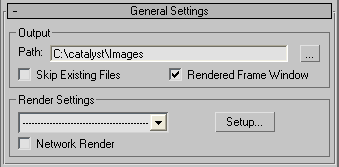
This rollout has the texture-baking controls for the current scene. It lets you control automatic unwrapping of the baked textures, map size, render settings, and where texture renderings are saved.


When on, displays the complete map in a Rendered Frame Window as the elements are rendered. When off, does not open the Rendered Frame Window. Default=on.
These controls let you choose and set up Render Presets as well as activate network rendering.
Lets you choose Load Preset. A Render Presets Load dialog appears where you can select an RPS file.
Displays the Render dialog, where you can adjust production settings, draft settings, or both.
When on, you can assign the rendering task to Server systems. If you click Render, the Network Job Assignment dialog displays where you can specify a server, or multiple servers, to take on the task. Default=off.
3ds Max can use the Split Scan Lines option when rendering to textures with a render farm. However, if you enable projection mapping and turn on Sub-Object Levels, this option is unavailable.