The mental ray Sun & Sky solution is designed to enable physically plausible daylight simulations and accurate renderings of daylight scenarios.
In 3ds Max, this is achieved through the use of two special photometric lights and an environment shader that all work together:
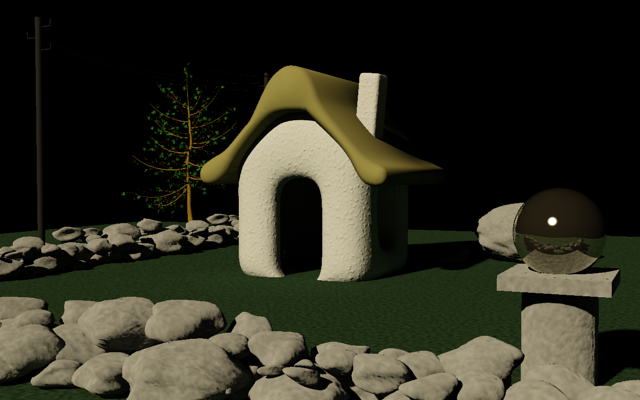
The scene is lit by mr Sun only.
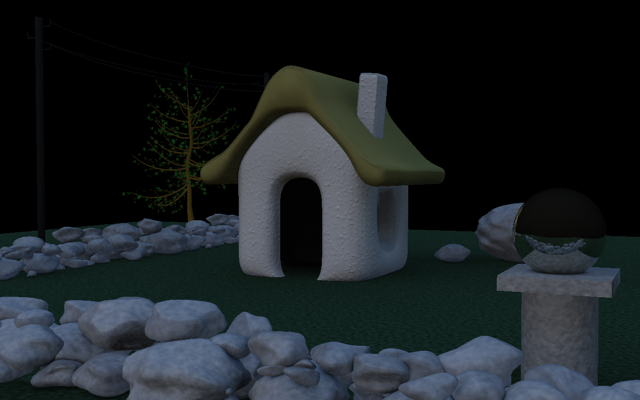
The scene is lit by mr Sky only.
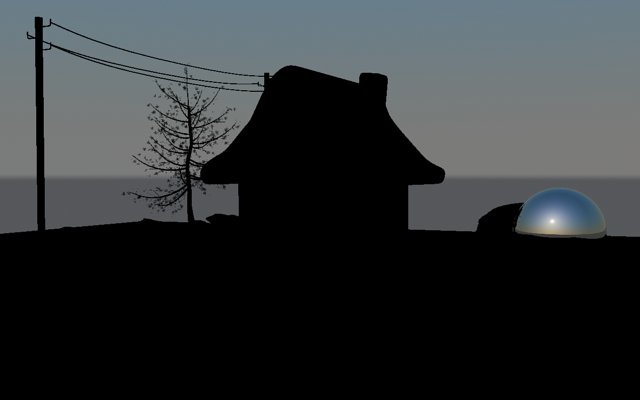
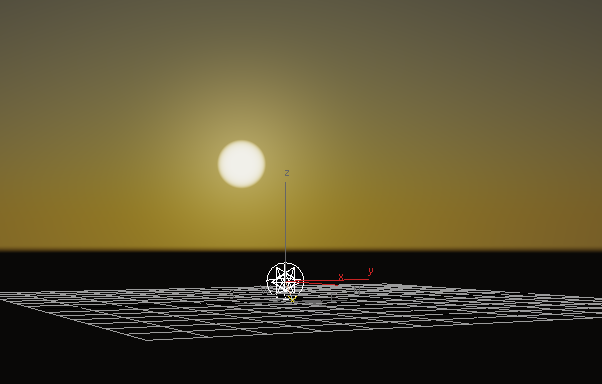
mr Physical Sky is visible, but no lighting is present in the scene.
These lights are meant to be used together: mr Sun and mr Sky appear within the 3ds MaxDaylight system. When used in combination, this solution is called Sun & Sky.
These articles, written for 3ds Max Design, have useful information about mental ray Sun and Sky:
Using Sun & Sky with SSS Materials
To use a mental ray fast SSS material together with the high-dynamic range Sun & Sky solution, be sure to turn on Scatter Indirect Illumination on the material's Advanced Options rollout so that the material can scatter the skylight, which is considered indirect.
Also, turn off Screen (Soft) Compositing Of Layers, also on the Advanced Options rollout; otherwise the output of the SSS shaders is clamped to a low dynamic range and will appear to render black.
Certain parameters do the same things in mr Sun, mr Sky, and mr Physical Sky. For physical correctness, it is necessary to keep these parameters in sync with each other in all three elements. For example, a sun with a different Haze value than the sky cannot be guaranteed to be physically plausible.
For this reason the concept of parameter inheritance is included. Both the mr Sun light and the mr Physical Sky shader have check boxes labeled “Inherit from mr Sky” that are on by default. When these are on, the common parameters are all guided by the mr Sky light, which is the central point of control.
With parameter inheritance, you can concentrate on tweaking the parameters in one spot (mr Sky) and, as long as Inherit From mr Sky is on for both mr Sun and mr Physical Sky, you're sure to obtain consistent results.
 Daylight System.
You can also find Daylight System on the Create menu under Systems, and from  Create panel
  Systems.
 Go to the
  Modify panel, and on the Daylight Parameters rollout, set Sunlight to mr Sun and Skylight to mr Sky.
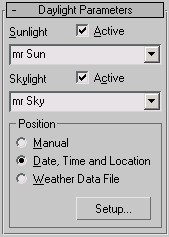
The parameters rollouts for mr Sun and mr Sky now appear on the Modify panel.
 Environment Map is set to mr Physical Sky, Exposure Control is set to mr Photographic Exposure Control.
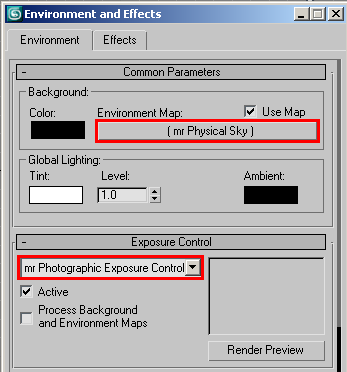
 Common Parameters rollout to a material slot (sample sphere) in the Material Editor. When prompted for the copy method, choose
Instance.
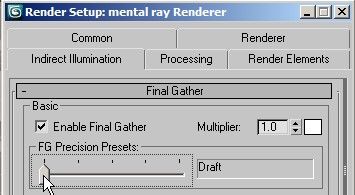
 Control Parameters settings or turn on Manual Override to place the sun by hand.
To see the sun and sky in the viewport:
The ability to display the mental ray Sun & Sky solution in the viewport lets you adjust parameters interactively, so that you can visualize the results immediately without having to render. Keep in mind, though, that the viewport representation is an approximation of the final result, so you’ll still need to render while fine-tuning the settings.
 Viewport Background.
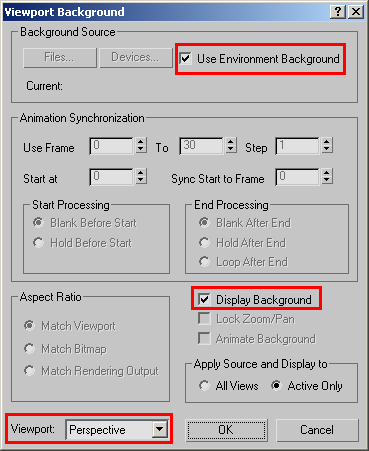
After a moment, the viewport background changes to show the environment.
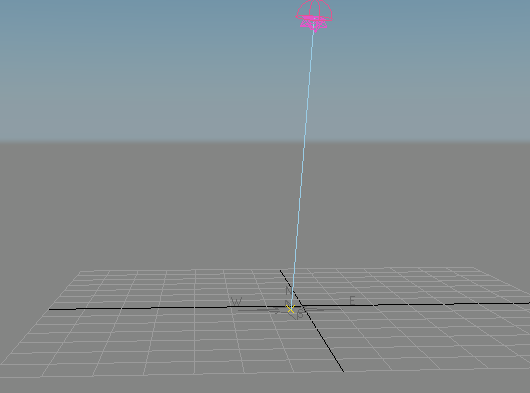
 Hours or Month setting using the spinner control.
As you adjust the setting, the sky light reflects the change.
 Modify panel and adjust the settings on the mr Sky Parameters rollouts such as Multiplier and Red/Blue Tint.
The most important common parameters are those that drive the entire shading and colorization model.
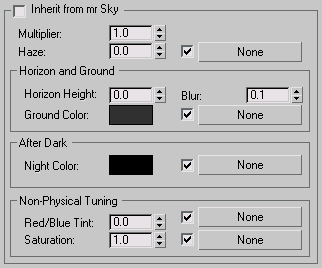
In mr Physical Sky, the Haze setting corresponds to the Haze setting used by the Haze-Driven sky model.
The vertical position of the horizon.
The default value, 0.0, places the horizon at a standard height. However, because the horizon is infinitely far away, this can cause trouble joining up with any finite geometry that is supposed to represent the ground. It can also cause issues rendering locations that are supposed to be at a high altitude, like mountain tops or the top of New York skyscrapers where the horizon really is visibly “below” the viewer.
This parameter allows tuning the position of the horizon. Note that this horizon doesn’t actually exist at a specific height in 3D space; it is a shading effect for rays that go below a certain angle. This parameter tweaks that angle. The total range available range is somewhat extreme, reaching from -10.0 (the horizon is “straight down”) to 10.0 (the horizon is at the zenith). In practice, only much smaller values are actually useful. For example, to push the horizon down just below the edge of a finite visible ground plane, use –0.2.
The color of the virtual ground plane. Note that this is a diffuse reflectance value (that is, albedo). The ground appears as a Lambertian reflector with this diffuse color, lit by the sun and sky only, and does not receive any shadows.
The minimum color of the sky: The sky will never become darker than this value. It can be useful for adding things like moon, stars, high-altitude cirrus clouds that remain lit long after sunset, etc. As the sun sets and the sky darkens, the contribution from Night Color is unaffected and remains as the base light level.
The mr Sun light is intended for use in the mental ray Sun & Sky combination. This topic mainly provides information on parameters unique to this component. A number of mr Sky parameters are common to all three Sun & Sky components. For some of those parameters, this topic provides a brief explanation plus a link to the main topic with additional details.
The mr Sky light is intended for use in the mental ray Sun & Sky combination. This topic mainly provides information on parameters unique to this component. A number of mr Sky parameters are common to all three Sun & Sky components. For some of those parameters, this topic provides a brief explanation plus a link to the main topic with additional details.
The mr Physical Sky shader is intended primarily for use in the mental ray Sun & Sky combination. This topic mainly provides information on parameters unique to this component. A number of mr Physical Sky parameters are common to all three Sun & Sky components. For some of those parameters, this topic provides a brief explanation plus a link to the main topic with additional details.
The mr (mental ray) Sky Portal object provides an efficient method of “gathering” existing sky lighting in interior scenes without requiring high final gather or global illumination settings that would result in excessively long render times. In effect, a portal acts as an area light that derives its brightness and coloring from the environment.