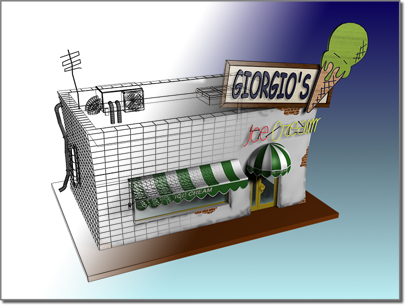
Rendering shades the scene's geometry using the lighting you've set up, the materials you've applied, and environment settings, such as background and atmosphere. You use the Render Setup dialog to render images and animations and save them to files. The rendered output appears in the Rendered Frame Window, where you can also render and do some setup.

Rendering "fills in" geometry with color, shadow, lighting effects, and so on.
Environments and Rendering Effects
A variety of special effects, such as film grain, depth of field, and lens simulations, are available as rendering effects. Another set of effects, such as fog, are provided as environment effects.
Environment settings let you choose a background color or image, or choose an ambient color value for when you render without using radiosity. One category of environment settings is the exposure controls, which adjust light levels for display on a monitor.
Rendering effects provide a way for you to add blur or film grain to a rendering, or to adjust its color balance.
Object-Level Rendering Controls
You can control rendering behavior at the object level. See Object Properties.
Rendering creates a 2D image or animation based on your 3D scene. It shades the scene's geometry using the lighting you've set up, the materials you've applied, and environment settings such as background and atmosphere.
The Rendered Frame Window displays rendered output.
The Render Output File dialog lets you assign a name to the file that the rendering will output. You can also determine the type of file to render. Depending on your choice of file type, you can also set up options such as compression, and color depth and quality.
Choose and view still images, numbered image sequences, images in an IFL file, or animation files using options in the View File dialog. Still images and numbered image sequences appear in a feature-reduced version of the Rendered Frame Window.
The main commands for rendering are on the main toolbar and the Rendered Frame Window . Another way to invoke some of these commands is to use the default Rendering menu, which contains other commands related to rendering.
The Common panel of the Render Setup dialog contains controls that apply to any rendering, regardless of which renderer you have chosen, and that lets you choose renderers.
The topics in this section describe the renderers that are provided with 3ds Max, and the controls associated with them.
Rendering to elements lets you separate various types of information in the rendered output into individual image files. This can be useful when you work with some image-processing, compositing, and special-effects software.
Rendering to texture, or "texture baking,” allows you to create texture maps based on an object's appearance in the rendered scene. The textures are then “baked” into the object: that is, they become part of the object via mapping, and can be used to display the textured object rapidly on Direct3D devices such as graphics display cards or game engines.
You can grab a viewport as an image file. You can also generate a preview of an animation. These commands are in the Grab Viewport group on the Tools menu.
The RAM Player loads a frame sequence into RAM and plays it back at selected frame rates. The RAM Player has two channels: A and B. You can load two different images or sequences into the channels to display or play back together, making it easy to compare them.
The Panorama Exporter is a rendering utility that lets you create and then view 360-degree spherical panoramas.
Network rendering is a means of mass-processing multiple rendering tasks or jobs. In order to facilitate network rendering, Autodesk Backburner TM is installed with 3ds Max. The Backburner software is responsible for coordinating how job assignments are processed.
“Batch rendering” is a term used to describe the process of rendering a series of tasks or jobs that have been assigned to a queue. Batch rendering is useful when you need to render images without supervision or when you want to render a number of test studies showing different day or night lighting, or for producing shadow studies of various sun angles. Batch rendering can also be used when you want to see how your project looks from different camera viewpoints.
The command-line rendering tool lets you perform batch rendering jobs without having to manipulate parameters by hand in a MAX file. Simple, “one-shot” rendering jobs can be submitted from the Start Run dialog. More elaborate, batched jobs can be rendered through the use of text files; for example, MyRender.bat or MyRender.xml. The ability to edit text files is what provides the power to this tool. You can quickly make changes to your rendering parameters, or output formats, simply by opening your text editor and editing the batch settings.