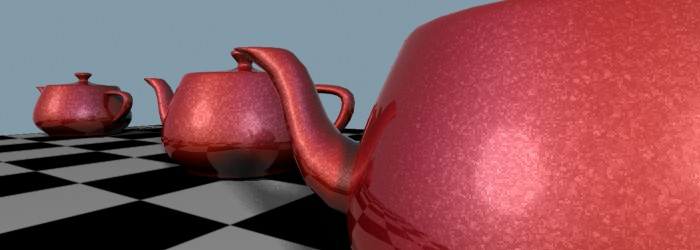
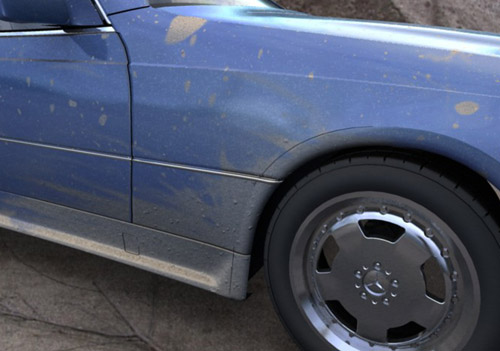
Car Paint has components for a paint layer with embedded metal flakes, a clear-coat layer, and a Lambertian dirt layer.
Car Paint is available as both a mental ray material and shader; both have identical parameters, and support the following unique characteristics of real-world car paint:

You can assign a map or shader to every parameter or “component” of the Car Paint material/shader. The small map buttons to the right of the color swatches and numeric controls open the Material/Map Browser , where you can select a map or shader for that component. These buttons are shortcuts: You can also use the corresponding buttons on the Maps rollout. If you have assigned a map or shader to one of these color components, the button displays the letter M. An uppercase M means that the corresponding map is assigned and active. A lowercase m means that the map is assigned but inactive (turned off).

Click the color swatch to choose the ambient light component.
Click the map button to assign an Ambient Color map. This button is a shortcut: You can also assign an Ambient Color map on the Maps rollout.
Click the color swatch to choose the base diffuse color of the material.
Click the map button to assign a Diffuse Color map. This button is a shortcut: You can also assign a Diffuse (Base) Color map on the Maps rollout.
The falloff rate of the color towards the edge. Higher values make the edge region narrower; lower values make it wider. The useful range is 0.0 to approximately 10.0, where the value 0.0 turns the effect off. Default=1.0.

Color shift due to view angle, shifting between a red base color and a blue edge color (atypical colors chosen for demonstration purposes) with varying Edge Bias values
The falloff rate of the color towards the light. Higher values make the colored region facing the light smaller/narrower; lower values make it larger/wider. The useful range is 0.0 to approximately 10.0, where the value 0.0 turns the effect off. Default=8.0.

Color shift due to view angle, shifting between a red base color and a green light facing color (atypical colors chosen for demonstration purposes) with varying Light Facing Color Bias values

The amount of ray-traced reflection in the flakes, which allows glittery reflections of, for example, an HDRI environment. The default value of 0.0 turns the effect off.
This effect should generally be very subtle; a value of 0.1 is often enough. The final intensity of reflections also depends on the Flake Color and Flake Weight values.
The distance at which the influence of the flakes fades out. The default value of 0.0 disables fading. Any positive value causes the Flake Weight value to be modulated so that it reaches zero at this distance.
Because flakes are relatively small, they can introduce rendering artifacts if their visual density becomes significantly smaller than a pixel. If the oversampling of the rendering is set high, small flakes can also potentially trigger massive oversampling and hence overlong rendering times needlessly, because the averaging caused by the oversampling will essentially cancel out the flake effect. If you experience these issues, use Flake Decay Distance to counteract them.

Flakes at different distances with no flake decay. The farthest flakes might cause flicker in animations, or trigger unnecessary oversampling and long render times (rendered here with low oversampling for illustrative purposes).

Using flake decay. The flake strength diminishes with distance. The same intentionally low oversampling as in the previous image has been used.

Click the color swatch to change the color of the primary specular highlight.
Click the map button to assign a Specular Color Map. This button is a shortcut: You can also assign a Specular Color map on the Maps rollout.
When on, enables a special mode on the primary specular highlight called glazing. By applying a threshold to the specular highlight, it makes the surface appear more polished and shiny. For a new sports car with a lot of wax, turn this on. For a beat-up car in the junkyard, turn it off. Default=on.

Left to right: Flake specularity only; standard specularity; "glazed" mode enabled; "glazed" mode specularity with flakes

Click the color swatch to change the color of the reflections in the clear-coat layer. By default this is white, which is the typical color.
Click the map button to use Reflection Map. This button is a shortcut: You can also assign a Reflection map on the Maps rollout.
Dirty Layer (Lambertian) rollout

Real cars are rarely clean. This shows the dirt layer (hand-painted dirt-placement map), including a bump map applied in the dirty regions.
A simple Lambertian dirt layer covers the underlaying paint and clear-coat layers.


This rollout lets you assign a map or shader to any Car Paint parameter. You can also assign maps and shaders on the rollout where the parameter first appears: The principal value of this rollout is that it also lets you toggle a parameter's shader, using the check box, without removing the map.
 The button to the right of each main shader button is for shaders that can return multiple parameters. If a shader that returns
multiple parameters is assigned to the component, the button's tooltip shows the parameter name.