This lesson shows you how to import an FBX file to MotionBuilder and characterize the bones of the skeleton you need to animate. You will then assign the skeleton a control rig.
 MotionBuilder.
 Editing so the MotionBuilder layout will
correspond to that shown in these lessons.
Editing so the MotionBuilder layout will
correspond to that shown in these lessons.
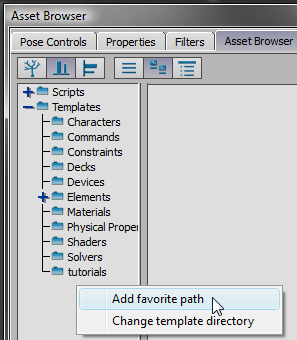
The folder contents display in the right-hand pane of the Asset Browser.
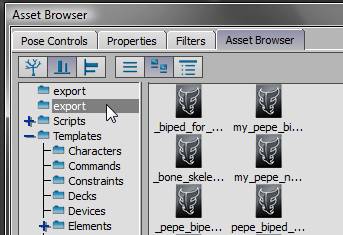
Now you have fast access to the FBX files you want to import into MotionBuilder.
If you had saved your FBX files from MotionBuilder instead of from 3ds Max, you could open them simply by dragging their file icon from the Asset Browser into the Viewer. However, dragging the icons of FBX files created in external applications launches a series of dialogs that prompt you for more information. Because of this, it is easier to import files created in 3ds Max through an FBX Plug-in Import dialog.
FBX Plug-In Import.
If you like, you can import the presaved file _bone_skeleton.fbx, instead.
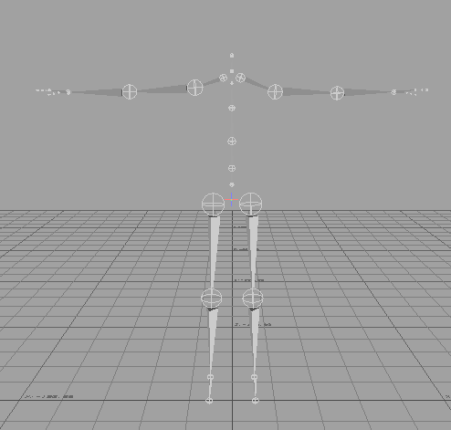
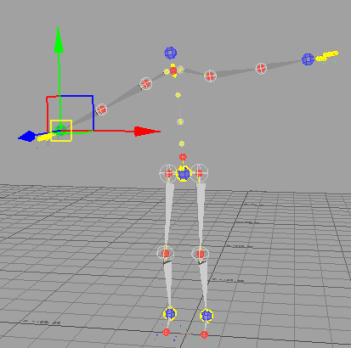
The MotionBuilder Viewer window displays the MotionBuilder equivalent of the Bones skeleton you exported from 3ds Max.
Familiarize yourself with Viewer navigation in MotionBuilder:
Pause now and take a moment to try a few MotionBuilder navigation techniques.
Now you need to characterize the skeleton bones before you can animate them. Characterization is the way you rig a skeleton in MotionBuilder.
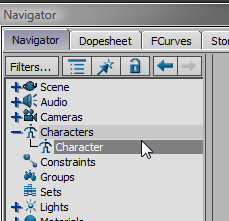
Characters.
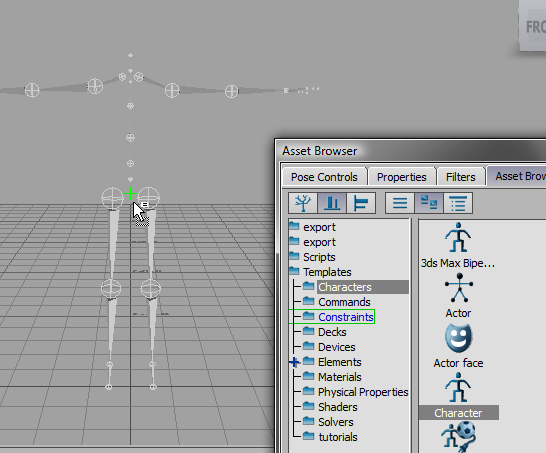
When you release the mouse, a pop-up menu shows the Characterize option.

Control Rig Input.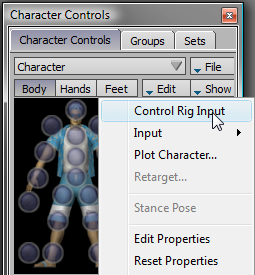
You must choose this setting if you intend to keyframe your character.
Active group, turn on
Ctrl Rig In.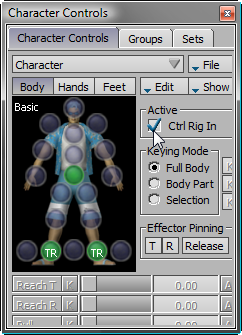
This setting activates
the Character Controls Character
Representation to the left. The Character Representation is an image
of a biped, with all the effectors you need to animate the control
rig.
Your character is now rigged and ready to receive animation.
Because your character bones were properly labeled, it took just seven steps to successfully rig your character. In 3ds Max, rigging a character using regular FK/IK constraints would have taken a great deal more effort.
Character Representation,
click to select the right hand effector.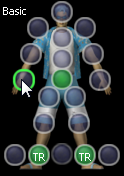
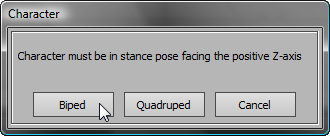
Characterize a Biped skeleton:
New. Do not save the
skeleton animation.
FBX Plug-In Import.
If you like, you can import the presaved file _pepe_biped_bip01.fbx, instead.
On the FBX Plug-in Import dialog, leave the default settings unchanged and click Open.
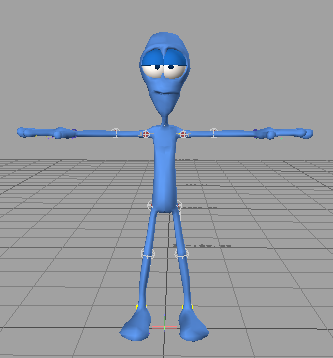
The Pepe character mesh displays in the Viewer.
Pressing A is the equivalent of using Zoom Extents in 3ds Max. It zooms in to all visible objects in the Viewer.
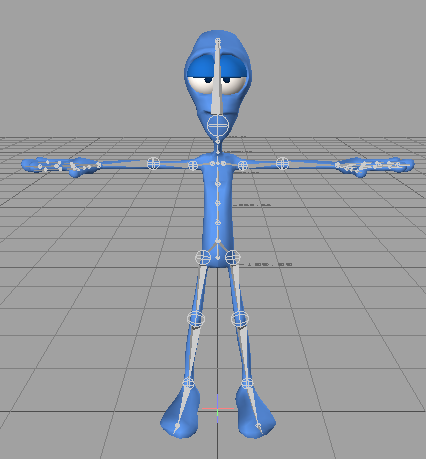
Pepe character in X-ray mode
In this mode, you can view and select both the character mesh as well as the bones, either individually or by region selection.
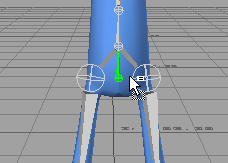
Pepe character center of mass
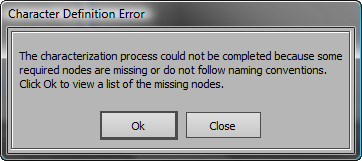
An error message displays, indicating that the characterization of the bones could not be completed. This is because MotionBuilder could not recognize the names that identify the Pepe character bone system.
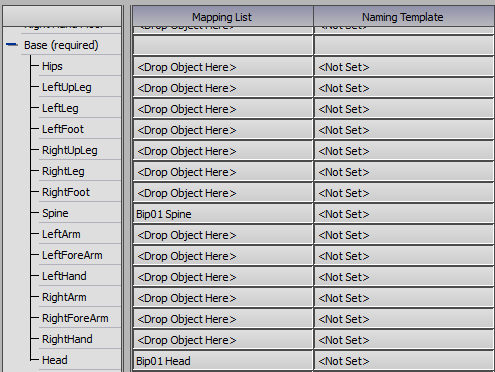
A list displays all the bones MotionBuilder could not find.
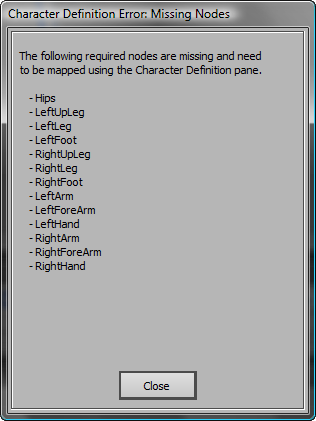
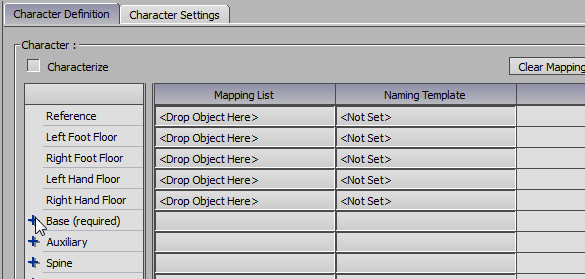
The Mapping List in the Character Definition pane shows all the skeleton components whose mapping conversion was not recognized by MotionBuilder. The Base (Required) list shows the most crucial of these.
The standard MotionBuilder character template works well for 3ds Max Bones systems, but it is not set up for Biped skeletons. You will try again with the Biped template.
Change the template to a Biped template:
This tool is similar to the Character tool you used earlier, but it is designed to recognize the bones of a biped object created in 3ds Max (bones that use the Biped link-naming convention for their suffixes).
Control Rig Input.
Active group, turn on
Ctrl Rig In.
Character Representation,
click to select the right hand effector, then with your mouse over
the Viewer, press T for Translate, and
move the hand.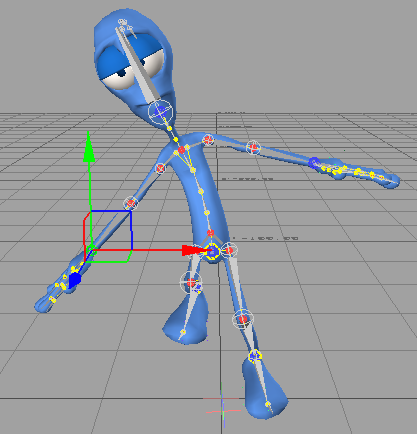
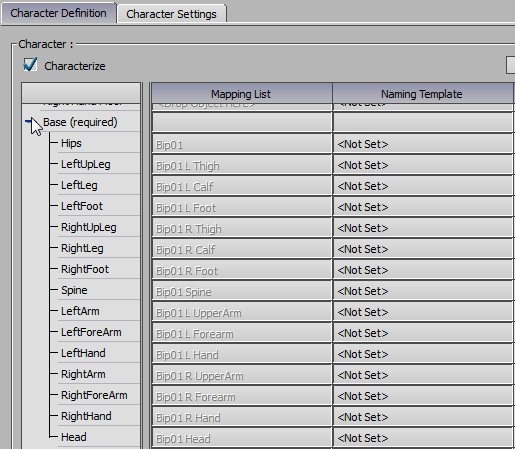
The Mapping List column shows how the 3ds Max Biped Template tool has characterized the bones by mapping their conventional Biped names onto the default MotionBuilder naming convention, shown in the Base (Required) list. No Naming Template was used.
 You can characterize any
Biped skeleton this way, regardless of the prefix given to the bones
of the biped. If you want to, try it with the file you saved earlier
called my_pepe_named.fbx (or
use the presaved file _pepe_biped_pepe.fbx).
You can characterize any
Biped skeleton this way, regardless of the prefix given to the bones
of the biped. If you want to, try it with the file you saved earlier
called my_pepe_named.fbx (or
use the presaved file _pepe_biped_pepe.fbx).
Save As, and save the file as mypepe_rigged.fbx.
In the Save Options dialog, accept the defaults, then click Save.


