In this lesson, you'll create a default biped: a simple skeleton consisting of bones connected in a hierarchy. A default biped is different from 3ds Max Bone system objects because the biped structure automatically has built-in joints like a human being. You can bend your knee so your foot touches the back of your thigh, but you can’t bend it forward so that your toe touches the front of your thigh. Biped creates skeletons in the same fashion. They are ready to animate, and work accurately without additional setup .
 Create panel, click
  (Systems).
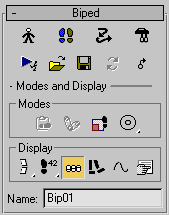
 (Biped).
A biped is created in the viewport.
The biped is a hierarchy of special objects. Its parent object (Bip01) is its center of mass (COM). The COM is displayed in the viewports as a small, blue tetrahedron, initially centered in the biped’s pelvis. After you create a biped, only the center of mass object is selected (not the entire biped).
When you create your first biped, it has a root name of Bip01. The root name of each additional biped is incremented, so the next biped you create has a root name of Bip02. The root name acts as a prefix for each part of the biped, to make it unique from any other bipeds in the scene.
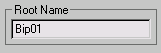
Renaming the biped's root name to the name of the character is common practice and helps with scene organization.
 (Save File), and save the
scene as MyBiped.max.
(Save File), and save the
scene as MyBiped.max.