In this concluding section
of the skinning tutorial you weight Emma’s torso, neck, head, and
hands, and learn some finishing-up techniques.
Set up the lesson:
Weight the torso:
Next you’ll adjust the
weighting for Emma’s upper body. By now, you know the drill: Look
for problem areas, examine the weighting for vertices in those areas,
and adjust accordingly.
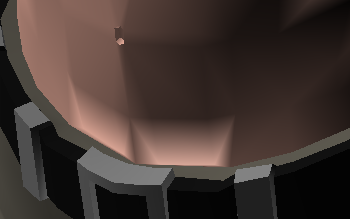
- Start by examining the animation of the
torso, roughly between frames 120 and 180.
It mostly looks okay,
except for visual artifacts in the lower abs around frame 149:
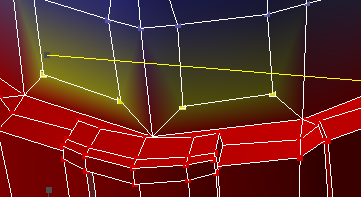
This happens because
the four vertices illustrated following are overly influenced by
the first spine bone at the sake of the pelvis bone.
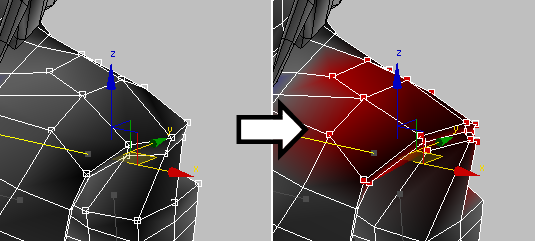
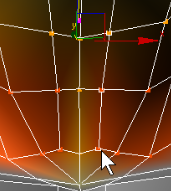
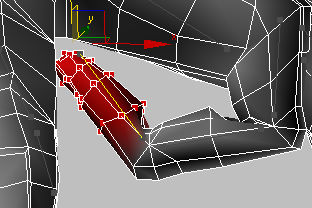
- To resolve this, go to frame 0 and select
the four vertices shown here:
NoteThese vertices should
be influenced only by the EmmaRigPelvis and EmmaRigSpine1 bones.
If you find any other bones influencing them, select each bone and
set the weight to 0.
- Select either bone and set its weight
to 0.5.
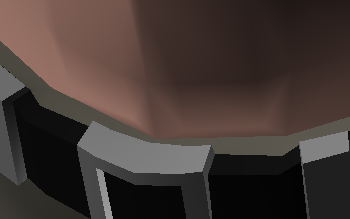
Now, at frame 149, the
artifacts are greatly diminished.
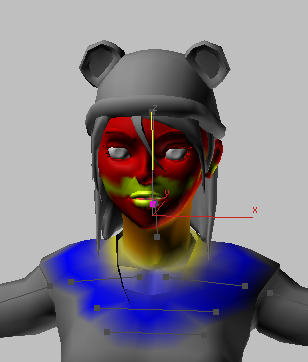
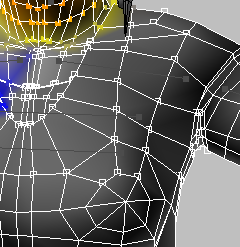
- Back at frame 0, select the head bone, EmmaRigHead,
and look at the surrounding vertex weighting.
Head motion should not
affect the chest vertices; this is easy to fix.
- Select the affected vertices on the front
and back of the left side (from the character’s point of view) of
the chest and weight them to 0.0. As you’ll
be mirroring later, you needn’t bother with the ones on the right.
Fix the collarbone:
Currently the collarbone
is not being used properly. To best correct that, you first block
out and adjust the arm.
- Select the left upper-arm bone, EmmaRigLUpperArm,
then select the upper-arm vertices and weight them to 1.0.
Make sure not to select
the vertices at the edge of the shirt.
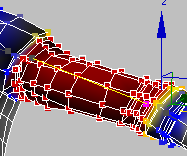
The forearm has two bones
so it can rotate the same way a person’s does. In Emma the bones
are end-to-end rather than side-by-side, as in a real human skeleton,
but the end result is the same.
- Select each forearm bone in turn and
weight the vertices surrounding it to 1.0. Also select
the main hand bone, EmmaRigLPalm, and weight all the
hand vertices at 1.0 to it.
- Weight the elbow vertices the same way
you did the knee. The forearm should have priority over the upper
arm. Again, if you need guidance, examine the included final scene.
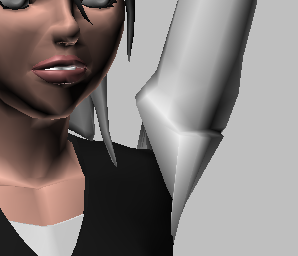
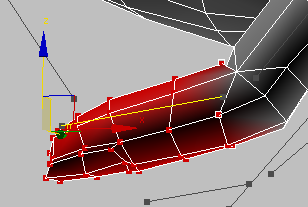
Back to the collarbone:
The shoulder is probably the biggest problem area. For most arm
animation, the upper-arm bone controls the skin adequately, but
when the arm is raised, the collarbone needs to come into play.
However, the collarbone currently does not have enough influence,
which results in the type of artifact illustrated here:
TipWhen resolving a
problem like this, it helps to have different poses to work on,
as found in the animation in this tutorial. Thus, if you get stuck
trying to fix the skinning in one pose, you can move to a different
pose and do some weighting there. This often helps you find the
route to success.
- Go to frame 210, select the collarbone
(EmmaRigLCollarbone),
select the vertices around the shoulder and top of the arm, and
click the 1 button on the Weight Tool dialog.
- Continue working on the arm, evening
out the weights and keeping a reasonably even distance between edge
loops. While doing so, you probably need to assign the uppermost
upper-arm vertices partially back to the upper arm bone, and some
lower ones partially to the collarbone. When you’ve done all you
can, go to frame 220, continue working on the upper arm and shoulder,
and likewise at frames 230 and 240.
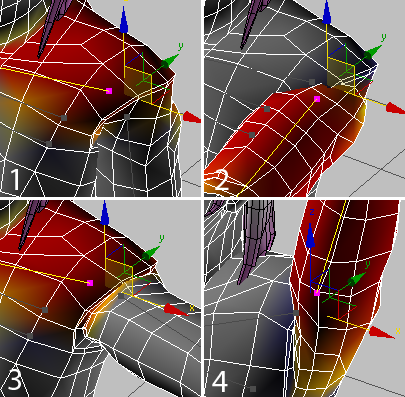
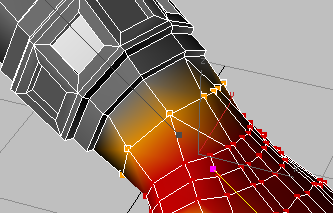
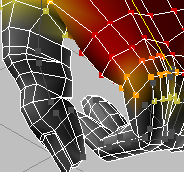
The following illustration
shows four different animation frames with the weighting completed:
TipThe underarm is not
weighted the same as the upper arm. For example, it’s influenced
by the upper-spine and ribcage bones, while the upper arm is not.
Also, the Copy and Paste
functions come in handy for this sort of weighting. If you find
a good balance for a vertex, copy and paste its settings to its
neighbors and then adjust from there.
Weight the head and neck:
If you scrub through
the animation section in which the neck moves, between frames 250
and 320, you can see that the neck bone has too much influence over
vertices outside its usual anatomic domain, such as the collarbone
area.
This is most evident
on the character’s right side, because you’ve improved the collarbone’s
influence over the upper-chest vertices on the left side. So the
first thing to do is mirror the changes.
- Select the hair object and hide it so
it doesn’t get in the way.
- Go to a neutral position, such as at
frame 265, and select the vertices of the upper arm, upper chest,
and lower neck.
Make sure not to select
the vertices on the vertical centerline of the neck.
- On the Mirror Parameters rollout, turn
on Mirror Mode and then click
 (Mirror Paste).
The selected vertices’
settings are mirrored to the opposite side of the mesh. Now the
distortion is less when bending the neck, but the neck’s influence
still extends beyond its proper volume.
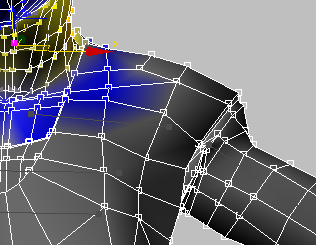
- Turn off Mirror Mode.
- Select the neck bone and the colored
vertices on the shirt (front and back) and upper chest and set their
weights to 0.0.
- Select the head bone and remove any influence
from the vertices of the lower neck and upper torso.
TipYou can save time
by reweighting only the character’s left side, as you’ll eventually
mirror everything to the right side anyway.
- With the head bone still selected, select
the head and upper-neck vertices and weight them to 1.0.
Next you’ll weight the
three neck loops increasingly (from top to bottom) for the neck
bone.
Start weighting the neck:
- Select the neck bone, and use the Loop
tool to select the uppermost of the three neck loops. Weight it
to 0.25.
- Select the next loop down and weight
its vertices at 0.5 for the neck bone, so it’s
also weighted 0.5 for the head.
- Select the lowest neck loop (one up from
the loop at the base of the neck).
There’s a significant
amount of influence here from the top spine bone, EmmaRigSpine3,
which is undesirable.
- Select EmmaRigSpine3 as
well as the vertices in the neck and upper torso and weight the
vertices to 0.0.
- Again select the lowest neck loop (one
up from the one at the base of the neck), then select the head bone
and click the .25 button on the Weight Tool dialog.
This sets the weighting
proportions for this loop at 3 to 1 between the neck and head.
- Select the loop at the bottom of the
neck and set it to 1 for the neck bone.
This is just a starting
point; then you adjust the side vertices for the influence of the
collarbones.
- Manually select the bottom vertices on
the right side of the neck (all the way around except for the very
front and back) , then select EmmaRigLCollarbone and
click the .5 button on the Weight Tool dialog.
- Scrub the neck-twisting section of the
animation and make sure the movement looks natural.
- Select the vertices you’ve just been
working on, activate Mirror Mode, and click (Mirror Paste).
- Turn off Mirror Mode.
- Again, scrub the animation through the
neck exercises and verify that the weighting is good; for example,
the collarbone should not move. If not, tweak the weights as necessary.
Complete the neck:
The vertices in the
vertical centerline of the front of the neck need to be weighted
equally to both collarbones. This is important to do because center
vertices are not mirrored.
- Starting at the base of the neck and
going upward, select the first three vertices in the front centerline.
These vertices are currently
weighted 100% for the neck bone.
- Select either collarbone, click the 1
button on the Weight Tool dialog, then select the other collarbone
and click the .5 button.
The vertices are now
weighted at 50% for each collarbone.
- Select the neck bone and go to a frame
such as 260 where the central neck vertices are not positioned correctly.
- On the Weight Tool dialog, click the
+ button to the right of the Set Weight button repeatedly (but slowly),
adding weight incrementally until the centerline is in the correct
position.
As you do so, 3ds Max subtracts
equal amounts of weight from the vertices with respect to the two
collarbones.
As you can see from the
included final version, a bit more fine tuning was required. We
ended up with the bottom vertex at 0.6 for the neck and 0.2 for
each collarbone, and the upper two at 0.65 and 0.175 respectively
The three vertices immediately
to the character’s left of the centerline vertices are too far over,
so they need to be adjusted.
- Adjust the three vertices to the character’s
left (your right) of the previous three vertices.
Again, some fine tuning
is required here. We ended up with:
- Top: 0.15 head, 0.85 neck
- Middle: 1.0 neck
- Bottom: 0.65 neck, 0.35 left collarbone.
- Mirror these three vertices to the other
side.
- Orbit around to the character’s back,
scrub the animation, and adjust the center vertices as necessary.
For example, vertices
in the shirt should not be influenced by the head. If the central
vertices in the back of the shirt move in response to head and neck
movement, assign them to the top ribcage bone. Similarly, you might
need to reduce the influence of the collarbone over vertices at the
top edge of the shirt.
A fair amount of fine
tuning is required in this area of the character, and it’s impractical
to detail it here, but, as always, when in doubt, check the results
in configuring_skin_finished.max.
- When you’re done weighting the upper
torso, select all the left-side vertices and use Mirror Mode
 Paste Weights to mirror
them to the right side.
Paste Weights to mirror
them to the right side.
-
 Save your work.
In the next part you’ll
learn how to skin the wrist and hands.
Skin the hand:
You’ll start with the
wrist and then move on and skin a finger.
- Adjust the view to focus on the character’s
left forearm and hand, and scrub the animation between frames 350
and 380.
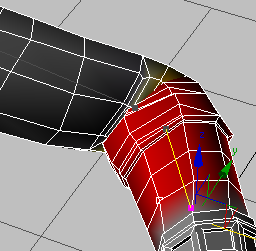
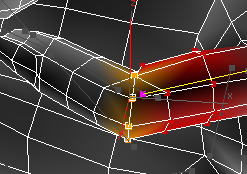
Currently the wrist is
weighted 100% for the second forearm bone, so the joint looks unnatural
when bent.
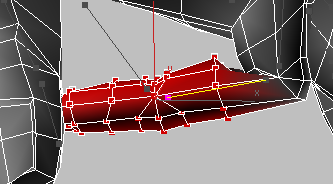
- Select the loop of vertices around the
wrist and weight the vertices 50% between the nearby forearm bone
and the wrist bone, as a starting point.
- Scrub the animation again. If it still
doesn’t look right, continue to adjust the weights of the wrist
vertices until it does. Chances are, for this particular loop, that
you’ll need to increase the forearm weighting to about 0.7.
TipSometimes you might
want to give the forearm bone a bit of influence over the vertices
on the back of the hand nearest the wrist as well, but in this case
it’s probably not necessary.
Weight the fingers:
- Scrub the animation through the frames
in which the fingers move.
Currently you see only
the bones moving, because all of the hand vertices are weighted
for the palm bone.
- Select all the vertices for one finger.
For this example we’ll use the forefinger.
- Select the first bone of that finger;
in this case EmmaRigLIndex1. Set it to 100%
weighting.
The whole finger now
responds to the motion of the first bone.
- Select the vertices from the loop above
the first joint to the end of the finger, and weight them to the
second bone: EmmaRigLIndex2.
- Repeat the process, weighting the end
set of vertices, after the second joint, to the last bone.
This is high-level blocking;
next you’ll work at a more atomic level.
- Select the six vertices below each joint
and weight them 100% for the underlying bone; do the same for the
six vertices above each joint.
TipMost likely the best
way to select these vertices is one at a time.
Next you’ll weight the
joint vertices.
- Select the eight vertices around each
finger joint and weight them to 50% for each neighboring finger
bone.
This allows for an even
blend at the finger joints.
TipIf necessary, you
can also use the Blend tool to weight the vertices near each joint’s
edge loop.
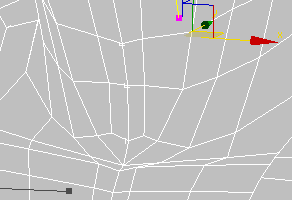
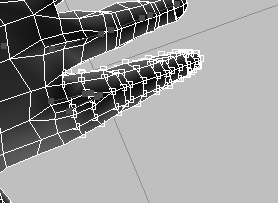
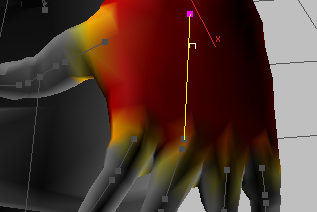
- Similarly, weight the knuckle vertices
50% for the palm, and the vertices just beyond the knuckle, near
the top of the finger, at 25% for the palm.
This can vary depending
on the animation and the location of the vertex. The goal is to
prevent distortion of faces that get “crushed” when the finger bends.
Aim for results that look like the following illustration:
- Do the same for each remaining finger,
including the thumb, and then mirror the results to the opposite
side of the mesh.
Save your work:
 (Open File), navigate to
the \character_animation\skinning\ folder,
and open the file configuring_skin01.max.
(Open File), navigate to
the \character_animation\skinning\ folder,
and open the file configuring_skin01.max.