In some cases, after you’ve skinned a character, you might need to make adjustments, either to the character mesh (for example, adding details such as pockets or increasing mesh resolution for more realistic-looking joints) or to the rig, such as modifying the structure. This section shows how to recover from such a situation without having to re-skin the character.
This section also covers using Skin Wrap to transfer a skinning solution to a similar character with a different mesh resolution.
 (Open File), navigate to
the \character_animation\skinning\ folder,
and open the file modifications_post_skin.max.
(Open File), navigate to
the \character_animation\skinning\ folder,
and open the file modifications_post_skin.max.
This scene contains the final Emma character with two modifications:
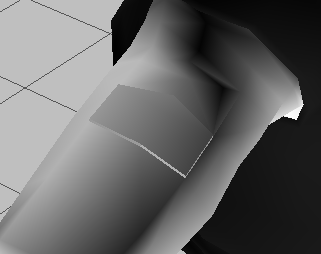
First, a patch has been added to the upper arm of the character mesh:
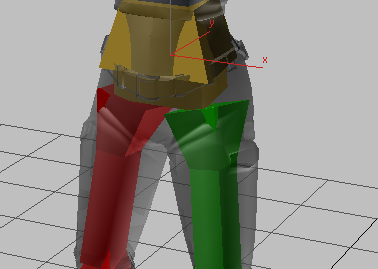
Second, the thigh bones have been subdivided to lend the rig more articulation:
Let the Skin modifier automatically adjust for mesh changes:
You can follow along on the included character or simply use this as a procedure for your own project.
 Motion panel, and clicking
  (Animation Mode) so the
button image changes to
(Animation Mode) so the
button image changes to  (Setup mode).
 Modify panel, select the
character mesh, and turn off the Skin modifier.
Modify panel, select the
character mesh, and turn off the Skin modifier.
For example, in the included scene, you could delete the shoulder patch and use Bridge to replace it with clean quads.
(Animation mode) for the
rig.
The Skin modifier weights any new vertices automatically according to surrounding existing vertices.
Let the Skin modifier automatically adjust for rig changes:
This method uses a special function in the Skin modifier that toggles whether rig changes affect the character mesh.
Modify panel, highlight
the Skin modifier, and on the Advanced Parameters rollout, turn
off Always Deform.
The rig changes do not cause any unwanted deformation of the character mesh.
Transfer skin to another mesh:
A quick way to transfer a skin map from one character to another that uses the same rig is with the Skin Wrap modifier. Basically, Skin Wrap uses location to transfer animation from one object to another. It does not depend on topological similarities.
Open the final version of
the Emma scene file (configuring_skin_finished.max),
turn off the Skin modifier, and place the rig in Setup mode.
 Clone
to copy the mesh to two new objects. Name them Emma_LowRes and Emma_HighRes.
Move them to either side of the original.
Clone
to copy the mesh to two new objects. Name them Emma_LowRes and Emma_HighRes.
Move them to either side of the original.
This produces a model with about four times the number of vertices.
This produces a model with the same look but about half the number of vertices. It’s suitable for a mobile 3D application or for a character that’s viewed only from relatively far away.
An important requirement of Skin Wrap is that the objects between which you’re transferring animation be in close proximity. You’ll start with the low-resolution model.
There will probably be a short delay while Skin Wrap performs its calculations.
 Select the Emma object, turn
on the Skin modifier again, set the rig back to Animation mode,
and hide the object and rig.
Select the Emma object, turn
on the Skin modifier again, set the rig back to Animation mode,
and hide the object and rig.
 Play the animation. It plays
back perfectly.
Play the animation. It plays
back perfectly.
The process is the same with Emma_HighRes, except that applying Skin Wrap takes longer because of the greater complexity of the mesh.
You covered quite a bit of ground in this tutorial. You learned how to fit a complex character mesh to an animated rig, how to adjust for edits to the mesh and rig, and how to transfer the skinning data to a character with a markedly different resolution. The main work in skinning a character is to make sure the vertices at bend points are properly weighted among the bones that influence the motion. This requires patience and attention to detail. But the result, in obtaining a realistically animated virtual person or other character, is well worth it!


