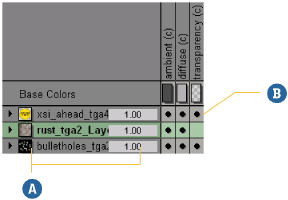
The texture layer editor is a grid-style editor from which you can view and edit all of a shader or material's texture layers. Rows in the grid represent layers while columns represent the selected shader's inputs, or ports. Individual cells are where you add ports to texture layers.
Each layer contains controls that allow you to edit the layer's properties, and every connected port's cell contains additional controls from refining the corresponding layer's effect on the port.
The advantage of using the texture layer editor is that it packs a tremendous amount of information into a relatively compact interface. At a glance, you can see which shaders are directly connected to a shader's port, how many texture layers have been added to the shader, how many ports those layers affect, and how and in which order the layers are blended together. Add to this the ability to modify the majority of each layer's properties, and the texture layer editor makes for quite a powerful tool.
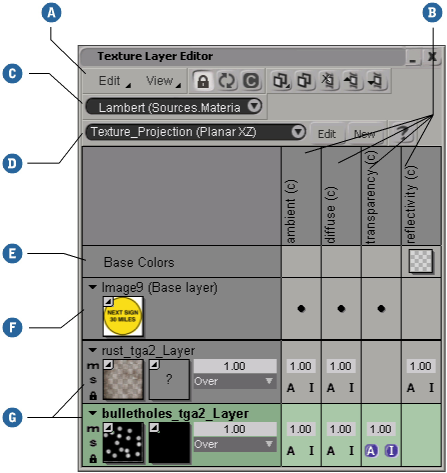
Layers are separated into two distinct groups: base layers and texture layers.
Base layers represent the underlying colors, or connected shaders, of the selected shader/material's ports. Texture layers are added on top of and blended with the base layers.
Base layers are displayed either at the very top or the very bottom of the texture layer editor workspace, depending on whether your layers are displayed in list mode or in stack mode (see Choosing the Layer Display Order: List View vs. Stack View).
Texture layers are displayed in the order in which they're blended together. The first texture layer is blended with the shader's base layers, the second texture layer is blended with the result, and so on.
The layer mixing order goes from bottom to top when layers are displayed in stack mode, or from top to bottom when layers are displayed in list mode. See Choosing the Layer Display Order: List View vs. Stack View for details.
The texture layer editor allows you to add and remove texture layers, control the order in which they are blended together, specify which ports each layer affects (and to what degree), and edit most layer properties (see Setting Texture Layer Properties).
For complete information about editing layer properties, see Setting Texture Layer Properties.
When you first open the texture layer editor, what you see depends largely on what, if anything, was selected before you opened it.
If nothing was selected, the texture layer editor is blank. You'll need to select an object, shader, or material and update the workspace.
If you selected an object or material, the texture layer editor displays the layers of the shader connected to the Surface port of the Material node.
If you selected multiple objects or materials, the texture layer editor displays the layers of the shaders connected to the Surface port of each Material node. Ports belonging to one shader are dimmed in layers belonging to the other shaders.
Once you update the texture layer editor for a given selection, the selection's entire material, including the material node and all shaders connected to it, are accessible from the selection list in the texture layer editor command bar.
Selecting a shader (or material node) from the list automatically updates the texture layer editor for that shader. When you add layers to the current shader, the shaders connected to those layer's ports are added to the selection list.
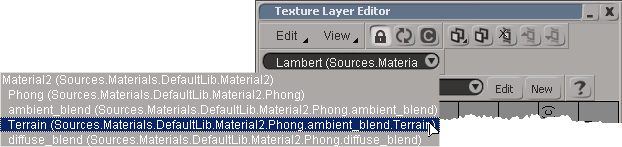
The selection list displays all the current selection's shaders and materials. Select one to update the texture layer editor with its layers.
This allows you add texture layers to several of an object/material's shaders without having to locate and select the shaders in the explorer, or add the layers using the render tree.
The texture layer editor's preferences allow you to control the default look and behavior of rows and columns, as well as the layers and ports that they represent.
Set the preferences as needed. See Texture Layer Editor Preferences.
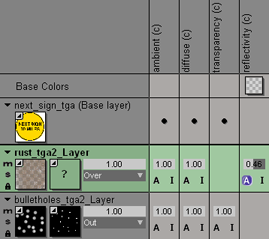
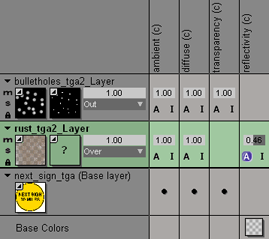
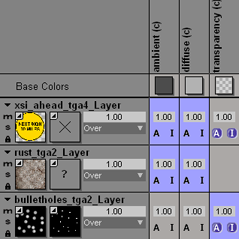
The texture layer editor displays a shader or material's texture layers either top-to-bottom as a list, or bottom-to-top as a stack. You can see the difference in the following image:
Open the texture layer editor and choose Views  Preferences from the menu bar.
Activate the Show Last Layer First (Stack View) option to display texture layers in stack view, or deactivate it to display them in list view.
The following sections describe the basics of selecting layers and ports, as well as working in the texture layer editor interface.
You can select rows (layers) and columns (ports) using the keyboard or the mouse. Use the arrow keys to move the cursor through the row titles or column headings.
You can select rows and columns using a variety of methods:
You can select texture layer editor cells using the keyboard or the mouse. Use the arrow keys to move the cursor within the grid, or click on a cell to select it.
Selected cells are highlighted in purple.
You can also select multiple cells using a variety of methods:
Holding the Shift key while using the arrow keys extends the selected area as a rectangular region.
Shift-clicking creates a rectangular region of selected cells spanning from the first selected cell to the cell that was Shift+clicked. You can also select a rectangular region by dragging the mouse from one cell to another.
Clicking the upper-left corner of the texture layer editor selects all of the cells.
You can get information about the textures and shaders connected to texture layers and base layers by hovering the mouse pointer over the any of a layer's thumbnails (or color boxes). The information is displayed in the tooltip that pops up.
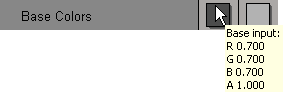
The tooltip for a base color box, or a layer's unconnected Color input show the color's RGBA values.
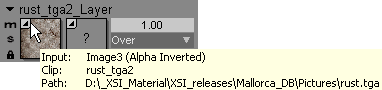
When connected to an image clip, the tooltip of a Color input, Mask Input, or base layer's thumbnail shows the name of the shader that uses the clip, the name of the clip, and the path to the clip's source.
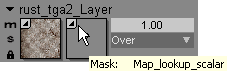
When connected to a shader preset, the tooltip of a Color input, Mask Input or base layer's thumbnail shows the name of the shader.
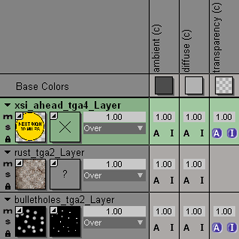
The easiest way to hide layers and ports is to select one or more of either and press H. Of course, there are several other options.
Right-click one of the selected ports and choose one of the following commands from the menu:
As you add layers and display ports in the texture layer editor, you may want to collapse some of the rows and columns to regain some space in the work area.
 Preferences and activate Default Collapsed in the preferences property editor.
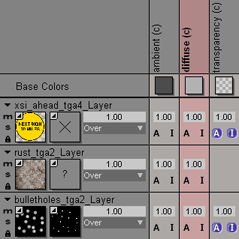
If necessary, you can increase or reduce the size of any port's column or any layer's row.
 Except where otherwise noted, this work is licensed under a Creative Commons Attribution-NonCommercial-ShareAlike 3.0 Unported License
 the texture layer editor.