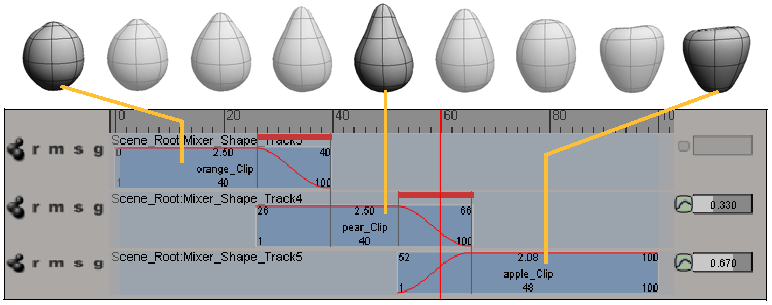
Once you have created shape keys, you can use the animation mixer to sequence and mix them. This lets you easily move shape clips around in a nonlinear way and change the weighting between two or more clips where they overlap.
In the animation mixer, shape keys are applied as clips on shape tracks in exactly the same way that actions are applied as clips on animation tracks. For general information about working in the animation mixer, see The Animation Mixer [Nonlinear Animation in the Animation Mixer].
The difference between shape and regular action clips is that shape clips do not actually contain animation (they are like static action poses). This is why creating transitions between them and weighting them against each other is necessary. You can create smooth and complex shape animation than is not possible with the shape keys simply set at different frames but unblended.

Shape clips are on different tracks so that they overlap in time. Transitions blend the parts where they overlap. Notice how the shape interpolates over time, from clip to clip.
The first step to using shape keys in the mixer is to add them as shape clips to a shape track. If you stored and applied shape keys, selected shape keys, or applied shape keys to an object, this is automatically done for you.
However, if you stored shape keys or selected shape keys without having Apply Selected Shape Keys active, you need to do this manually.
Make sure that the correct model is open in the animation mixer.
Open the animation mixer in a viewport or floating window (press Alt+0). Select the model and click the Update icon on the mixer's command bar.
If you want to add the clip to a new track, create a new track by right-clicking any existing track and choosing Add Track Shape (or press Shift+S).
To mix (overlap) clips, put each clip on a separate track and make sure that the part you want to mix overlaps in time with another clip.
Do one of the following to create a shape clip:
Right-click over the location on the track where you want the clip to start and choose Insert Source. Select one of the model's shape keys from the pop-up explorer.
Drag a shape key from the model's Mixer  Sources
  Shapes folder in the explorer onto a location on the track.

Right-click where you want to load a shape preset and choose Load Source From File. Use the browser that opens to select a saved shape preset with the *.preset extension and click OK (see Copying Shape Presets between Models or Scenes for more information).
A shape clip is created, representing an instance of the shape key.
Once you have added shape clips to the animation mixer, you can use any of the mixer's features to move, reorder, copy, extrapolate, scale, trim, blend, rename, and delete them.
For more information about using the mixer in general, see The Animation Mixer [Nonlinear Animation in the Animation Mixer].
Create a sequence of shape clips, using transitions to help smooth the spaces between them. For information on transitions, see Creating Transitions between Clips [Nonlinear Animation in the Animation Mixer].

Rearrange the order of the shape clips and duplicate them to repeat the same shape at different frames.
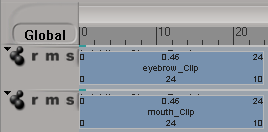
Composite shapes by creating compound clips for different clusters on the same frames of different tracks. For example, one compound clip could drive the eyebrow of a character while another clip drives the mouth. See Weighting with Compound Clips for more information.

Mix shapes that drive the same points or cluster by setting keys (or using other animation) to change the shape clip weights. For information on this, see Mixing the Shapes' Weights.
If you want to mix the clip weights in additive mode (such as for mixing different clusters on the same object, like eyebrow and mouth shapes on a face), see Mixing the Shapes' Weights for more information. Additive mode keeps the cluster shapes from being blended together.

You can scale a shape clip as any other clip in the animation mixer — see Scaling Clips [Nonlinear Animation in the Animation Mixer].
However, be aware that scaling is different from trimming. Scaling a clip scales the weight curve along with the clip, but trimming the in/out points crops the clip independently of the weight curves. For more information, see Trimming (Cropping) Clips [Nonlinear Animation in the Animation Mixer].
 Except where otherwise noted, this work is licensed under a Creative Commons Attribution-NonCommercial-ShareAlike 3.0 Unported License