You create an ambient occlusion effect by connecting the Ambient Occlusion shader in the render tree. This is most commonly done as an ambient occlusion pass for all objects in your scene which can then either be baked in as a texture, or composited in during post production. You can also use the shader on individual objects to limit the occlusion calculation or to drive specific parameter inputs.
There are a number of ways to connect the Ambient Occlusion shader in the render tree. Some of the more commonly used ones are illustrated below.
You can plug the shader into the material node's Surface port for many objects at the same time. This is often done at the partition level to create an ambient occlusion pass for all the objects in your scene. See Creating an Ambient Occlusion Pass.
You can also plug the shader into the Surface port of an individual object's material node, or into the Surface port of many objects (applied all at once on a group). Objects that share the same material will automatically inherit the ambient occlusion effect, regardless of whether they are in a group, or whether the shader was applied directly to only one of the objects.
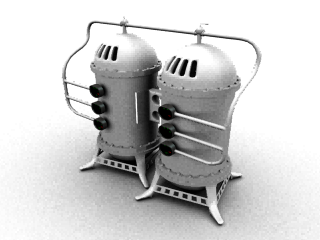

In this example, the Ambient Occlusion shader has been connected directly to the Material node's surface port (the same material is assigned to all of the objects shown). The result is an occlusion-only rendering.
You can use the rest of an object's render tree to drive the Ambient Occlusion shader's bright color.
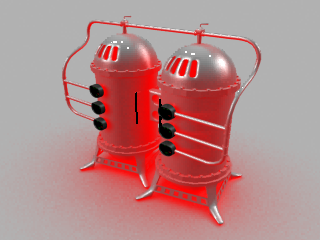

In this example, a Phong shader is used to drive the Ambient Occlusion shader's bright color. The dark color (set to red in this case) appears in occluded areas.
This allows you to scale the ambient lighting contribution to an object's surface based on where the object is occluded.
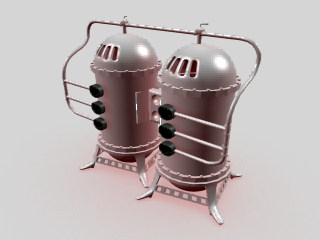

In this example, the Ambient Occlusion shader is used to drive a Phong shader's ambient color. This allows you to scale the ambient lighting contribution based on the amount of occlusion. Once again, the Ambient Occlusion shader's dark color has been set to red to make it more visible.
This allows you to blend the occlusion effect with an object's surface.
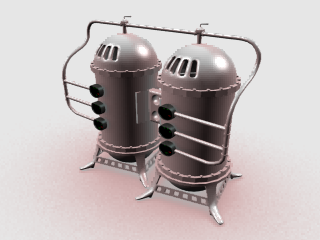
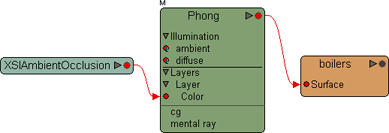
In this example, the Ambient Occlusion shader is blended with a Phong shader using a texture layer that affects only the Phong's ambient and diffuse ports. This allows you to blend the occlusion with the Phong's surface shading, giving you fine control over how visible the occlusion is. Once again, the Ambient Occlusion shader's dark color has been set to red to make it more visible.
This is used when you want a reflective, rather than ambient occlusion effect. You can then drive the bright color with an environment map. See Reflective Occlusion for details.
A common method used when working with ambient occlusion is to create an occlusion pass for all objects in your scene which can then either be baked in as a texture, or composited in during post production. For example, you could output and combine an ambient occlusion pass, a diffuse pass, and an ambient color pass. Shadows might be included with the diffuse pass or in a separate pass on their own. See Using Preset Render Passes [Rendering].
You can also use render channels which allow you to isolate preset scene attributes that are commonly rendered in separate passes. Essentially, all you need is your default pass and you can quickly output the ambient and diffuse render channels. See Working With Built-In and Preset Channels [Rendering].
Here's a quick overview of how to create an ambient occlusion pass.
Select all the geometric objects that you want to include in the ambient occlusion effect. Make sure that you branch select the models and hierarchies so that nothing is omitted. You can do this in the explorer by Ctrl+middle-clicking each object.
From the Render toolbar, choose Pass  Partition
  New Partition to create a partition that includes all the objects that you previously selected.
In the explorer, set its scope to Passes and select the partition you created (it's nested under the ambient occlusion pass).
From the Render toolbar, choose Get  Material
  Ambient Occlusion to apply it to the new partition displayed in the explorer.
The XSIAmbientOcclusion shader's property editor opens. Pin the property editor open and set the options as needed. See Setting the Ambient Occlusion Shader Options.
From the Render toolbar, choose Render  Regions
  Active Viewport Options and set the mental ray ambient occlusion options for the region.
When you are happy with the settings, you can copy them from the render region to the current pass in order to render the effect as previewed.
Make sure that the ambient occlusion pass is still current and choose Render  Regions
  Region Copy
  Active Viewport To Current Pass from the Render toolbar.
Choose Pass  Edit
Edit  Edit Current Pass and set the output options for the render pass. See Pass Rendering Options Overview [Rendering].
Choose Render  Render
  Current Pass to render the ambient occclusion pass.
 Except where otherwise noted, this work is licensed under a Creative Commons Attribution-NonCommercial-ShareAlike 3.0 Unported License