


Once you connect the Ambient Occlusion shader in the render tree, you need to set its options to define how the final effect is rendered. The following sections describe how to set those options, which are all located in the Ambient Occlusion shader's property editor.
Locate the shader in the render tree, and double click it to open its property editor.
Start with a low Number of Samples. A value of 10 or 15 is good for tuning. See Adjusting the Number of Samples.
Set the Output Mode. The available modes are described in Choosing the Output Mode.
Provided the output mode you chose calls for it, set the Bright Color and Dark Color. See Setting the Bright and Dark Colors for details.
Set the Spread value to define the size of the sampling cone. See Adjusting the Spread.
If desired, set the Maximum Distance to limit the range of the sampling rays. See Setting the Maximum Distance for details.
If desired, check the Occlusion in Alpha check box to store the amount of occlusion in the alpha channel. See Storing Occlusion in the Alpha Channel for details.
Once you've tuned the other parameters to you satisfaction, raise the Number of Samples until you are satisfied with the occlusion effect.
The Number of Samples parameter specifies the number of sample rays used to determine occlusion. Higher settings produce a smoother result but take longer to render. This parameter has the greatest influence over the smoothness and quality of the final occlusion effect.
The Bright Color and Dark Color values define the colors that the shader returns for completely unoccluded and completely occluded points respectively. Usually, most sampled points are occluded to some degree, so the final color for a given point is a blend of the bright and dark colors.
These parameters can be textured to add variation to the pattern of occlusion. For example, you might drive the bright color with a sky texture to suggest clouds overhead, or drive the dark color with a dirt texture to suggest dust, especially in corners or highly detailed areas.
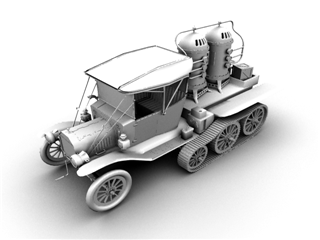
Bright Color = white and Dark Color = black
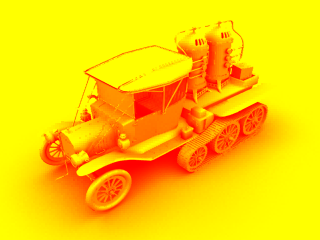
Bright Color = yellow and Dark Color = red
The Spread value defines, for each sampled point, the angle of the cone from which sample rays are fired. A value of 0 samples only in the direction of the surface normal, while a value of 1 samples the entire hemisphere above the sampled point.
In terms of effect, the lower the Spread value, the more localized the occlusion effect. The higher the value, the more the effect is smoothed out.
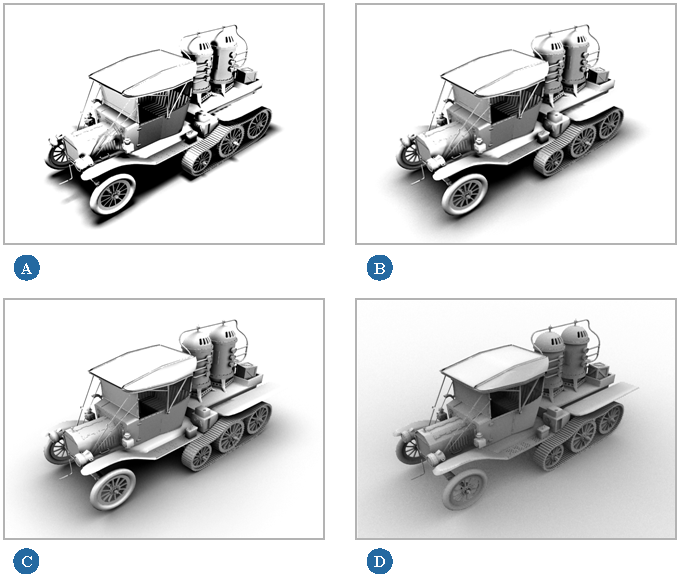
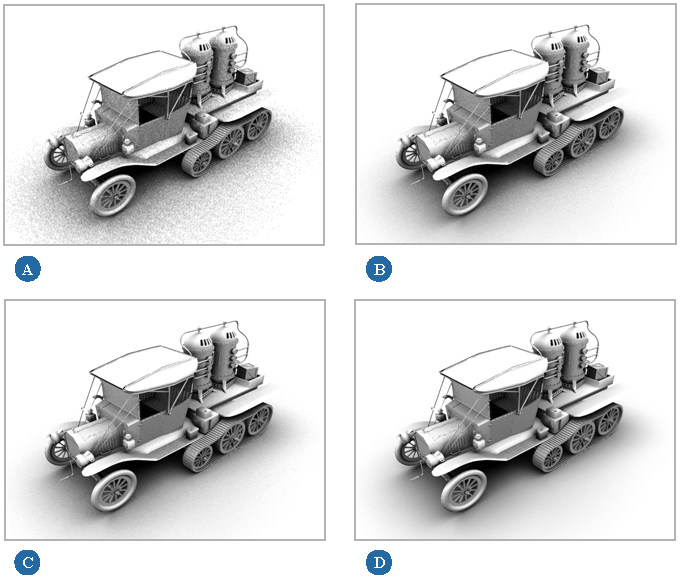
The Ambient Occlusion shader has five different output modes. You can choose the desired one from the Output Mode drop-down list:
Occlusion Using Shading Normal/Occlusion Using Bent Normals: these modes both create a "standard" occlusion effect, as seen in the image below. The former mode samples the direction of the shading normal, while the latter, which is the default mode) biases the sampling direction to return more of the Bright Color in the blended result.
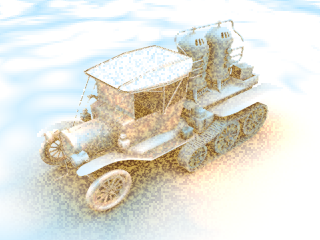
Sampled Environment is similar to regular occlusion, but also performs environment sampling. As such, when the scene uses an environment map (as in the example below), the map color is multiplied with the Bright color to produce the final unoccluded color value.
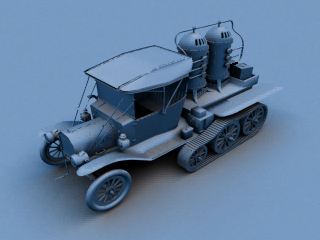

When the Output Mode is set to Sampled Environment, the Ambient Occlusion shader samples the environment map (defined at the render pass level in this case) and multiplies the result with the Bright Color to produce the final unoccluded color.
Return Bent Normals (World Space)/Return Bent Normals (Object Space): these modes return color values based on the unoccluded world-space and camera-space normal directions respectively. In either case, the Red, Green and Blue components correspond to the X, Y and Z axes respectively.
This type of occlusion effect, rendered by itself, can be used during compositing to fine-tune lighting, for example.

The Maximum Distance parameter sets the maximum range for sample rays fired from a given point.
When Maximum Distance is set to 0 the entire scene is sampled, meaning that rays are traced until they reach the scene boundary.
When Maximum Distance is set to a non-zero value, sample rays are traced only to the specified distance. Objects outside of this range do not appear to occlude the sampled object at all. Objects within this distance occlude more the closer they are to the object.
It's normally preferable to limit the maximum distance by using non-zero values. Distant objects generally affect the final result less because they occupy a proportionally much smaller area of the sampling hemisphere than closer objects of the same size. The slight reduction in overall occlusion that this may cause is offset by the accompanying reduction in render time.
Normally, the color returned for a sampled point is a blend between the Bright color and the Dark color, depending on how that point on the surface is occluded. This blend is stored in both the RGB channels and the alpha channel.
When the Occlusion in Alpha parameter is on, the blending between the bright and dark color is not done for the alpha channel. Instead, the alpha channel stores the actual amount of occlusion.
 Except where otherwise noted, this work is licensed under a Creative Commons Attribution-NonCommercial-ShareAlike 3.0 Unported License