Markers let you highlight and annotate frames in clips, such as for identifying phonemes when doing lip synching or marking a frame on a clip to match it up with a frame on another clip for doing a transition. You can create markers on any type of clip: action, shape, or audio.
For information on creating markers for use with audio, see Overview of Synchronizing Audio with Animation.
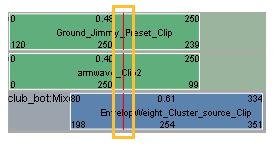
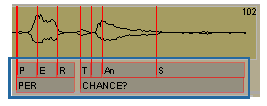
You can add markers to a range of frames on a clip, or to a single frame on one or more clips at a time. Frame-range markers appear as gray boxes below the clip, while single-frame markers are displayed as rust-colored lines on a clip.
|
|
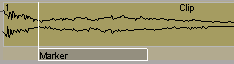
On the left, single-frame markers are displayed as lines on an action clip.
On the right, a frame-range marker sits below an audio clip.
Each marker has its own name, as well as any value or type that you assign to it. This lets you add notes to a marker, such as for marking the different phonemes (sounds) on an audio clip.
You can use either the Create Marker Tool to create a marker over a range of frames or the Add Marker command to create a marker on a single frame for one or more clips at a time.
Choose Edit  Create Marker Tool from the mixer command bar or press m to activate the tool.
Left-click and drag on the clip to create a marker at the exact location where you clicked. Release the mouse button when the marker is the desired length.
Middle-click and drag on the clip to create a marker at the closest frame to where you clicked. Release the mouse button when the marker is the desired length.
The marker appears as a gray box below the clip.
The tool stays active so that you can create as many markers as you like on any clip. You can even create markers that overlap each other in duration.
When you create or resize a marker, you can set a preference to have the marker snap to whole frames instead of seconds. For example, if you resize a marker that starts at frame 1.5, it will snap only to full-frame numbers.
When you create a new marker with this option on, the duration will be on full frames.
You can select markers in a number of ways. Selected markers are highlighted in white.
Click on the marker. Press Shift or Alt while clicking to select multiple markers.
For single-frame markers, click on the bottom of the marker (below the clip). Press Shift or Alt while clicking to select multiple markers.
Right-click the clip and choose Select All Markers to select all markers on that clip.
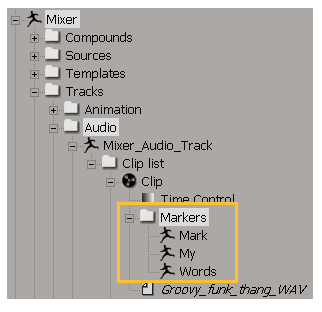
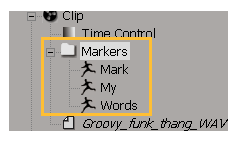
In the explorer, expand the models' Mixer > Tracks folder and select one or more markers in the clip's Markers folder (see previous page).
You can move frame-range markers within the same clip, but not from one clip to another. When you move a clip, its markers move with it.
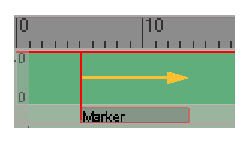
Press Alt while dragging the end of a marker to the desired length. You can resize the marker only forward in time (to the right).

If you have multiple markers selected, they are all resized the same amount.
Select a marker and press Enter or choose Edit Properties.
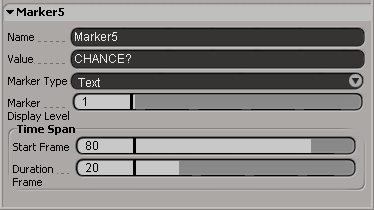
In the Marker property editor, enter a value for the Time Span Duration. This is the length of the marker in number of frames.
When you resize a clip, its markers scale with it to keep the same relative range of frames marked.
You can copy markers within the same clip, but not from one clip to another. When you copy a clip, its markers are also copied.
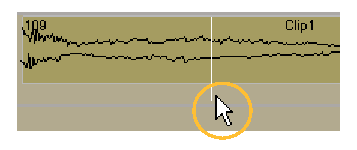
Make sure the Select and Move tool (the cursor with the double-headed arrow) is active — see Selecting Clips. Press the space bar to toggle between it and the Select tool.
Press Ctrl while dragging a marker to a new location on the clip.
The name of a marker must be unique to other markers for any clip of any type for the model. By default, the marker's name is Marker plus a number to indicate its order of creation (such as Marker4). This marker name appears in the explorer but does not appear in the mixer; for that, you can set a Value (see the next section, Setting Marker Values and Types).
In the explorer, expand the models' Mixer > Tracks folder and select one or more markers in the clip's Markers folder (see full path in Finding Markers in the Explorer).
Press F2 or right-click on the marker and choose Rename, then enter a new name.
Select a marker and press Enter or choose Edit Properties from the mixer's command bar.
In the Marker property editor, enter a Name. Spaces and other illegal characters are automatically converted to underscores.
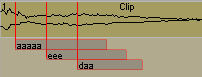
The marker value is any string of characters that you can use to identify the marker, such as different phonemes for audio syncing, or an annotation. This value appears in the marker below the clip in the mixer. Any number of markers can have the same value; for example, you could have three "eee" phoneme values for any number of markers in the mixer.
The marker type allows you to classify the marker as a certain type, such as a phoneme, text, emotion, or event type. The marker types make it easy to find certain groups of markers, filter out markers using scripting, and lets you more easily exchange data.
Marker values appear as part of the marker in the mixer.
Select a marker and press Enter or choose Edit Properties from the mixer's command bar.
In the Marker property editor, select an option from the Marker Type list.
You can choose from types such as General Event, Phoneme, Text, Range, Cycle, Emotion, or any Custom Value number that you can define as you like.
The display level allows you to display markers of different types or overlapping markers on different levels below the clip.
The markers are displayed in levels in consecutive order starting directly below the clip. For example, if you specify a marker to be at level 0, it is placed directly under the clip. If you then specify another marker to be at level 3, it will be directly below the level 0 marker with no space between.
You can toggle the display of markers and their information in the mixer in any of the following ways:
Choosing View Clip Markers on the animation mixer command bar to toggle the display of all markers in the mixer.
Choosing View Preferences from the animation mixer command bar to set a preference for the marker display options.
In the Animation Mixer Preferences dialog box, click the Markers tab and select whether to display markers or not, as well as which display options to view (marker name, value, and tool tips).
In the explorer, expand the models' Mixer > Tracks folder and select one or more markers in the clip's Markers folder (see Finding Markers in the Explorer), then press Delete or right-click on the marker and choose Delete.
 Except where otherwise noted, this work is licensed under a Creative Commons Attribution-NonCommercial-ShareAlike 3.0 Unported License