Lets you define output and camera settings for the specified render pass. You can add or delete shaders from its shader stack. You can also define in what order the shaders will be computed as well as edit each one individually.
To display (do one of the following):
The Render Manager > (select a pass)
Set a current pass and choose Pass  Edit
Edit  Edit Current Pass or Render
  Render
  Pass Options from the Render toolbar.
Set the explorer scope to Passes and click the icon for the Pass node you want to edit.
| Pass Renderer |
Specifies which rendering engine to use when rendering the pass: Use Scene Render Options: renders the pass using the renderer defined in the Scene Render Options Property Editor. mental ray: renders the pass using the mental ray renderer, according to the settings defined in the mental ray Render Options Property Editor. Hardware Renderer: renders the scene using a hardware renderer as specified in the Hardware Renderer Property Editor. |
Render Channels Output (Framebuffers)
A framebuffer specifies where and how each channel's image data should be written out. The grid displays the name of the render channel for which the framebuffer is defined and the filename and output format for the rendered frames.
Right-click anywhere on a row to display a context menu with the following commands:
Browse opens the output folder of that render channel in a Softimage Browser window.
Run Flipbook launches the render channel's output in the standalone Flipbook player.
| (check) |
Indicates whether the render channel is active. If there is no checkmark in the cell, the render channel will not be output with the pass. |
| Filename |
Specifies the file name for the frames being rendered. The file name is appended to the scene output path specified in the Scene Render Options Property Editor. Together a fully resolved path is defined for the rendered sequence. You can build the filename using Tokens and Templates. |
| Format |
Displays the file format and the image bit depth of the rendered sequence. This also determines the file-name extension. Select a format cell and click the Edit... button to modify the image output format. |
| Channel |
A render channel is a named description of image data for a given data type. mental ray provides built-in render channels for depth, motion vectors, normal vectors, labels, and pixel coverage. Each channel has a specific data type. By default a "Main" render channel is declared and has a color data type. Activate/deactivate the channels you want to output for your render pass by clicking the first cell in the row. You can add built-in, preset, and any custom channels for the render pass by clicking the Add... button. |
| Show Resolved Paths |
Shows the final path and file names of the files to be rendered, after tokens like [Pass] and [Framebuffer] have been replaced by their actual values. |
| Add... |
Opens the Create Framebuffer From Render Channel Dialog Box where you can add a new framebuffer for the chosen render channel. |
| Edit... |
Opens the Render Channel (Framebuffer) Property Editor for the selected render channel where you can modify the file name and change the output format. |
| Remove |
Removes the selected render channel for the pass. You cannot delete the "Main" render channel. |
| [frame source] |
Frame Range: Renders a specified frame range in the sequence as defined by the Start, End, and Step options. Frame Set: Renders a specified set of frames in the sequence as defined by the Set option. Timeline: Renders all frames in the sequence as defined by the scene's timeline. Use Scene Render Options: Uses the option set in Render Manager |
| Skip Frames — Skip Rendered |
When enabled, rendered frames are not re-rendered. |
| Start |
When the frame source is set to Frame Range, this option sets the first frame of the sequence to be rendered. |
| End |
When the frame source is set to Frame Range, this option sets the last frame of the sequence to be rendered. |
| Step |
When the frame source is set to Frame Range, this option sets the increment between rendered frames. This allows you to skip frames. For example, if you select 4, every fourth frame is rendered. |
| Set |
When the frame source is set to Frame Set, this option defines a specific set of frames to be rendered. Use commas to separate individual frame numbers. Spaces are optional. For example: 1,5, 7 Use a dash to indicate a range. For example: 1,5-10,4,20-39 Use a period to render a partial frame. For example, to render at a time 20% of the frame length from frame 7 to 8: 7.2 Note that when rendering partial frames, you should use the [PartialFrame] token in the file name template because the [Frame] token gets rounded to the nearest integer. See Tokens and Templates. |
| Camera |
Specifies which camera you want to be active for your render pass. The menu lists all of a scene's cameras. |
| Inspect |
Click the Inspect button to open the Camera Property Editor for the pass camera. |
| Override Scene Render Options |
Activates the output format options for the pass, so that you can override the defaults set for the scene. |
| [output formats] |
See the Scene Render Options Property Editor for descriptions of these output formats. |
| Update from Camera |
Click the Update from Camera button to copy any related output formats that you may have modified in the Camera property editor for the pass. You can access the Camera property editor by pressing the Inspect button next to Camera. |
| Enable Motion Blur |
Enables motion blur options for the pass. |
| Override Scene Render Options |
Activates the motion blur options for the pass, so that you can override the defaults set for the scene. |
| [motion blur options] |
See the Scene Render Options Property Editor for descriptions of these motion blur options. |
| Override Scene Render Options |
Activates the field rendering options for the pass, so that you can override the defaults set for the scene. |
| [field rendering options] |
See the Scene Render Options Property Editor for descriptions of these field rendering options. |
If you are performing rendering tests and are only interested in a portion of the image, you can render a subregion.
| Apply Display Gamma Correction |
When enabled, the render pass is output using the gamma correction values set for the global gamma correction display preference under Color Management in the Display Preferences [Preference Reference]. The images' pixels are modified accordingly on output. Applying a display gamma correction in the render pass is useful when you want to output a preview video of a scene in linear color space that looks correct right away without having to go into the compositor. Ideally, you shouldn't be baking in the gamma correction at render time, instead it should be applied during compositing. For more information on the different ways to perform gamma correction in Softimage, see Displaying and Rendering Gamma Correction [Data Management]. |
These options allow you to create AVI and QuickTime files.
| Template |
Specifies the file name for the movie files being output. You can build the file name using Tokens and Templates. |
| Resolved |
Displays the fully resolved file name and output path for the movie file(s). The output path is defined in the Scene Render Options Property Editor. |
| Filename |
The path and file name for exporting scene render archives (*.mi2 files). By default archives are saved to the Render_Archives folder of your current project as defined by the Scene Archive Template setting in your Rendering Preferences [Preference Reference]. |
| Resolved |
Displays the fully resolved file name and output path for the mi file(s). The output path is defined in the Scene Render Options Property Editor. |
You can render out custom information with your image sequences by specifying preset tokens and text strings to create a render slate. A different render slate can be defined for each render pass in your scene.
You can also copy the contents of any viewport slate to and from the render slate defined for the current pass. For more information about creating a viewport slate, see the Viewport Slate options in the Objects.
| Enable |
Enables the output of template information on your rendered frames. This includes the rendered output from the render region and the render preview. |
| Format |
Enter tokens and text strings to create a render slate. You can enter template information on a single line or on multiple lines (each line is considered a separate template). The render slate recognizes all universal tokens and their optional parameters, as well as the context-specific render slate tokens. For information about the available tokens and how to build templates, see Tokens and Templates [Data Management]. |
| Resolved |
Shows the resulting slate information as interpreted from the templates specified in the Format text box. Note that you may have to click inside the Resolved text box to get updated results. |
| Layout |
Sets the text size, position, and offsets for the slate information on the rendered frames. Position: Places the slate information at the "top left", "top center", "top right", "bottom left", "bottom center", or "bottom right" of each rendered frame. Text Size: Sets the size of the slate text. Offset X: Moves the slate text along the X axis by the amount specified. Offset Y: Moves the slate text along the Y axis by the amount specified. The render slate (whether it is made up of a single line or multiple lines) is formatted as a complete block of text on the rendered frames. See Render Pass Property Editor. If you want to format each template string (line of text) in the render slate separately, you must use xml slate layout tags instead. In the Format text box, enclose each template with the <slatelayout></slatelayout> elements and specify position (pos), offsets (offset), text size (size), text color (color), and background color (bgcolor) attributes. For example: <slatelayout pos="top left" offset="0.02;0.02" size="0.04" color="1.000;0.000;0.000;1.000" bgcolor="1.000;1.000;1.000;0.278">[Frame #4]</slatelayout> If an attribute is not included as one of the xml slate layout tags, then its value is the one specified for the equivalent parameter in this property editor. See Render Pass Property Editor |
| Text Color |
Defines the color and transparency of the slate text. For more information, see Defining Color Properties [Interface and Tools]. |
| Background Color |
Defines the color and transparency of the highlight around each line of text. By default, the alpha (A) channel is set to 0.0 which makes the background color completely transparent. You must increase the alpha value to show the background color. |
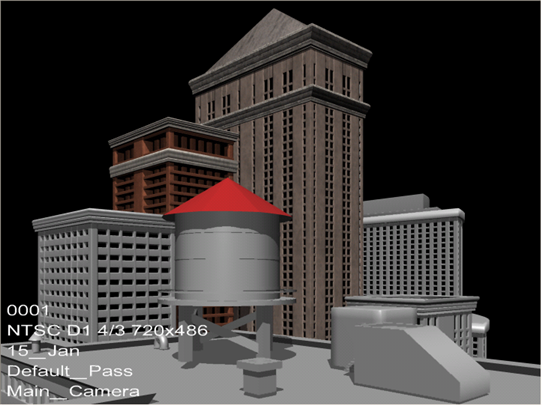
| Slate Result A |
The following templates... [Frame #4] [CameraFormat] [DATE dd_mmm] [Pass] [Camera] Yield this slate... 
|
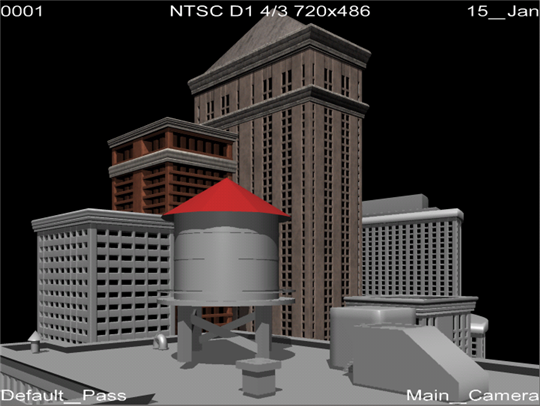
| Slate Result B |
The following template... <slatelayout pos="top left">[Frame #4]</slatelayout> <slatelayout pos="top center">[CameraFormat]</ slatelayout> <slatelayout pos="top right">[DATE dd_mmm]</ slatelayout> <slatelayout pos="bottom left">[Pass]</slatelayout> <slatelayout pos="bottom right">[Camera]</slatelayout> Yield this slate... 
|
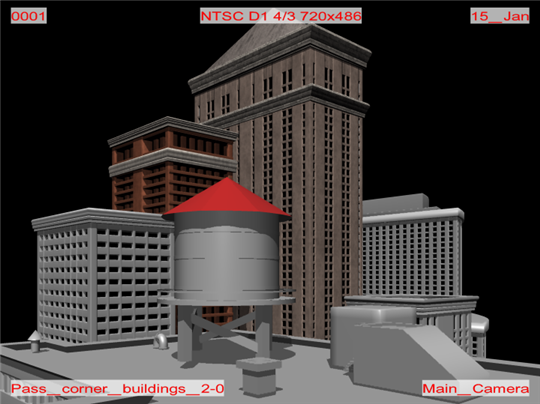
| Slate Result C |
And with offset, text size, text color and background color attributes, this template... <slatelayout pos="top left" offset="0.02;0" size="0.04" color="1.000;0.000;0.000;1.000" bgcolor="1.000;1.000;1.000;0.7">[Frame #4]</slatelayout> <slatelayout pos="top center" offset="0.02;0.02" size="0.04" color="1.000;0.000;0.000;1.000" bgcolor="1.000;1.000;1.000;0.7">[CameraFormat]</slatelayout> <slatelayout pos="top right" offset="0.02;0.02" size="0.04" color="1.000;0.000;0.000;1.000" bgcolor="1.000;1.000;1.000;0.7">[DATE dd_mmm]</slatelayout> <slatelayout pos="bottom left" offset="0.02;0.02" size="0.04" color="1.000;0.000;0.000;1.000" bgcolor="1.000;1.000;1.000;0.7">[Pass]</slatelayout> <slatelayout pos="bottom right" offset="0.02;0.02" size="0.04" color="1.000;0.000;0.000;1.000" bgcolor="1.000;1.000;1.000;0.7">[Camera]</slatelayout> Yields this slate... 
|
"Stacks" environment, output, volume and lens shaders in the pass shaders stacks. You can define in what order the shaders will be computed as well as edit each one individually.
For a complete procedure on how to do this, see Applying Shaders to Passes [Rendering].