If you want to isolate and render particular aspects of your scene that are not defined by any of the preset passes — matte, shadows, highlights, or others — then you can create your own render passes. Your scene can contain as many render passes as you need. Each new pass is independent of the original Default_Pass (also known as The Beauty Pass). The new pass automatically becomes the current pass and any further pass or partition commands are applied to this pass until you select another pass to be the current pass.
You can create a custom render pass in several ways:
Choose Pass  Edit New Pass Empty from the Render toolbar. This not only creates an empty new pass named "Pass," it also creates empty background partitions.
Choose Pass Edit New Pass Based on Layers from the Render toolbar. This creates a new pass and a partition for each layer you have defined in the Scene Layer Manager.
For more information about using layers, see Scene Layers [Scene Elements].
Keep in mind that you can also load a preset pass and customize it to fit your particular needs. For more information, see Using Preset Render Passes.
After you have created a new render pass, you can define its objects and light partitions as described in Defining Partitions.
When you create a scene, it has a single pass named Default_Pass. This is a "beauty" pass that is set to render every element of the scene as is. It is also the current pass for the scene and its name appears in the pass text box on the Render toolbar.
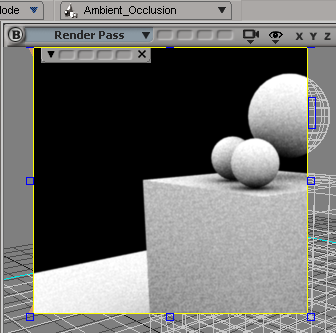
The current pass is the pass to which all pass and partition properties are applied. Every time you create a new pass, it immediately becomes the current pass. The current pass is also the pass displayed in a 3D view when the Render Pass Camera view is set for the viewport.
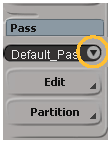
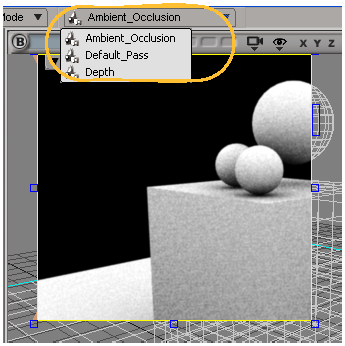
Click the arrowhead beside the Pass Selection menu on the Render toolbar to display the pass list. The list contains all available passes defined for the scene. The Pass Selection menu is also available from the main menu bar.
The Pass commands on the Render toolbar to set the camera for the pass, add a partition, or delete the current pass, etc. are all applied to the current pass.
To make a change to another pass, set it as the current pass.
Setting and Showing the Render Pass Camera
You can specify the camera (or group of cameras) you want to use for a render pass. The camera provides the viewpoint from which the pass is rendered. You can add new cameras to your scene and associate them to a render pass as needed.
In the explorer, a Pass Camera node appears as a sub-node of each render pass. This doesn't signify that a new camera is created with each pass: the Camera node represents the camera used for that pass only.
Open the Render Pass Property Editor for the current pass: choose Pass Edit Edit Current Pass.
Click the Output tab and select from the Pass Camera menu which camera you want to render your pass. The menu lists all of a scene's cameras. You can also choose to render from a group of cameras as described in Rendering with Multiple Cameras [Cameras and Motion Blur].
You can apply environment, output, volume, and lens shaders directly to a render pass using its pass shaders stack. Different sets of these shaders can be defined for every pass in your scene.
The pass shaders stack allows you to modify the order in which the different shaders are evaluated, thereby changing the results of the final effect. Since you can also apply lens shaders to a camera, you can decide which of the two shader stacks to use, what order they will execute in, or whether or not the pass lens shaders will overwrite the ones in the camera stack. For more information, see Applying Lens Shaders to Cameras [Cameras and Motion Blur].
Adding Pass Shaders Using the Render Pass Property Editor
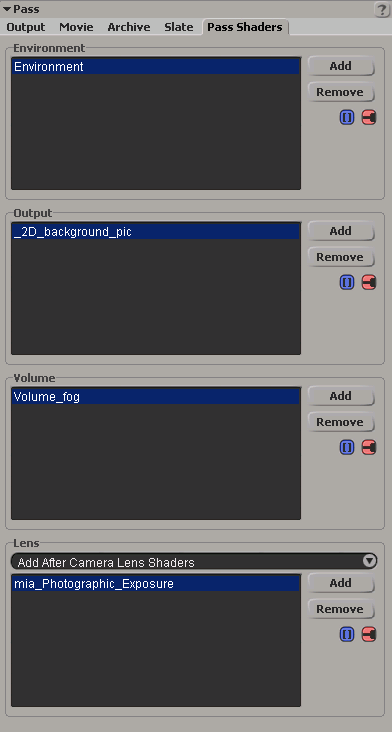
You can apply environment, output, volume, and lens shaders to the pass shaders stack from within the Render Pass Property Editor on the Pass Shaders tab.
| Add |
Adds a shader entry to the pass shaders stack.
|
| Remove |
Deletes the selected shader from the pass shaders stack. |
| [shaders list] |
Lists the names of the environment, output, or volume shaders that are applied to the pass shaders stack. Shaders are displayed in their order of execution. Click the Edit Array Item icon (the " blue socket") to change the order. Double-click a shader entry in the list to open its property editor. You can also click the Connection icon (the "red plug") to edit a shader's properties. |
| [lens shaders list] |
Lists the names of the lens shaders that are applied to the pass shaders stack.
|

|
Select a shader entry and click the Edit Array Item icon (the " blue socket") to open a pop-up menu with the following commands: Remove: Deletes the selected shader from the pass shaders stack. Once a shader is removed from the list, it no longer influences the effect. Move Up/Move Down: Promotes or demotes the selected shader in the pass shaders stack. The position of a shader in the stack indicates its order of evalution. Changing the evaluation order can impact the results of the final effect. |

|
Click the Connection icon (the "red plug") to open the selected shader's property editor where you can modify its parameter values. |

|
Click the Connection icon (the "grey plug") to open a pop-up menu of shaders that you can apply to the pass shaders stack. For more information, see Connection Icon Status and Working With Conversion Shaders. |
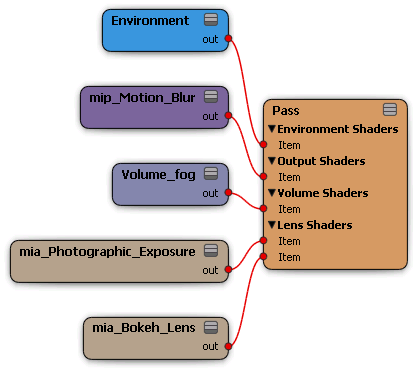
Adding Pass Shaders Using the Render Tree
You can apply environment, output, volume and lens shaders to the pass shaders stack directly from the Pass node in the render tree. You do not have to open the Render Pass Property Editor to access the shaders stack.
Select a pass (from an explorer for example) and press 7 to open the render tree.
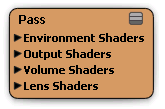
The Pass node is displayed in the render tree workspace.
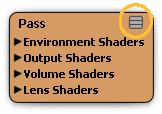
Set the node to its fully expanded state.
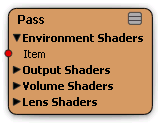
Right-click one of the Shaders port groups and select Add Item.

A port named "Item" is added to the port group.
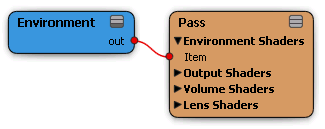
Right-click the port and select a shader from the pop-up menu, or select More... to locate other shaders.
Repeat this task to add as many ports and shaders as you require for your effect.
To change the order of evaluation for a shader in the pass shaders stack, right-click its port and select Move Up or Move Down. Changing the evaluation order can impact the results of the final effect.
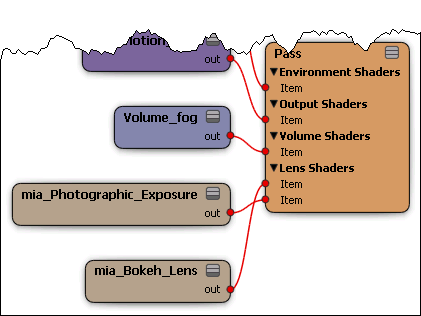
To delete a shader (and its port) from the pass shaders stack, right-click its port and select Remove. Once a shader is removed from the list, it no longer influences the effect.
Overriding Global Renderer Options for a Pass
If your global renderer options are set exactly as you like them, but you need to make a few minor parameter tweaks for a specific pass: create an override containing only those renderer options and then modify them just for that pass.
You can create a pass override by marking the parameters in the global renderer options property editor. The parameter marking method for overriding renderer options is only available from the render manager.
You can also create property overrides by using the Get > Property > Override command on the Render toolbar: the result is the same, so it is just a matter of how you like to work. For more details about working with overrides in general, see Overriding Properties [Scene Elements].
To add parameters to the override by marking
Open The Render Manager.
In the explorer view, expand the pass node that uses global renderer options for which you want to create an override.
When you expand the Pass node, its renderer is displayed in italized letters indicating that it is a global property.
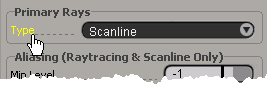
In the right panel, the Global Renderer options are displayed. Mark (by selecting) the parameter names of each parameter you want to override. Marked parameters are highlighted in yellow.
When selecting you can do any of the following:
When you have finished your selection, choose EditOverride Marked Pass Parameters from the render manager's menu buttons. The selected parameters are added to the PassOverride property editor and a PassOverride
node is displayed under the pass node.
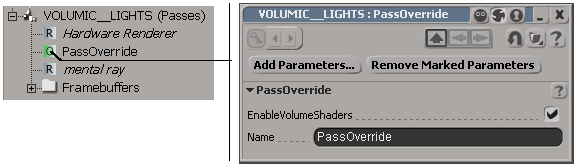
You can use the controls in the override property editor to change the values of the overridden parameters.
When saving a pass preset, you are actually saving its render options and any shaders applied to the pass's shader stack.
Click the icon of the pass that you want to save to open its property editor.
Click the Save icon at the top of the property editor to save the pass's render options and the shaders applied to its shader stack.
The Save Pass Preset browser is displayed. Enter a file name for the preset and click OK.
If you do not want to use any of the predefined pass presets, you can easily load your own.
You can also drag a preset pass from the browser or custom toolbar and drop it directly on the Render Passes root in the explorer. The preset pass appears as a subnode under the Passes node.
As you add passes to your scene, you may find that many of them use a similar structure or have partitions that contain mostly the same objects or lights.
In cases like these, it's often easier to duplicate a render pass and modify the duplicate than it is to create several similar passes from scratch (or by modifying presets).