After you have created animation in a layer, you can edit the fcurves as you usually would, such as by using the fcurve editor, the dopesheet, keys in the timeline, and clip weighting in the animation mixer.
You can also copy and paste keys within a layer (that is, not from one layer to another), remove keys, and retime, offset, and scale (sequence) the animation in a layer using the commands from the Animation menu at the bottom of the interface. For more information, see:
Editing Layer Keys in the Timeline
When you set keys in an animation layer, the keys appear as blue bars in the timeline. The keys are blue to remind you that you're animating in a layer, and not the base layer where the keys are red.
You can, however, edit the layer keys in the timeline in the same way as you can for the base layer: you can move keys within the same layer, cut or copy and paste keys within the same layer, scale a region of frames with keys, and delete keys.
When you edit keys for a parameter in a layer, all layers (excluding the base layer) that have animation on that parameter are also affected. If you want to edit the keys for each layer separately, you can edit their fcurves in the animation editor.
See Editing Keys in the Timeline for more information.

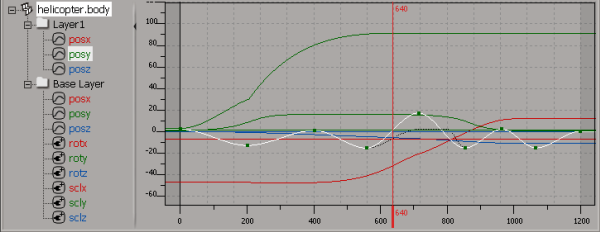
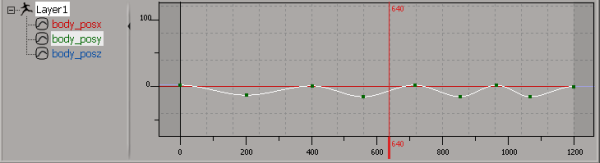
You can either display only the selected layer's fcurves in the animation editor, or you can also display all fcurves for the selected object by opening the animation editor as usual. This shows all the layer's fcurves in relation to the base layer's fcurves.
Displaying Only the Layer's Fcurves
To display only the animation layer's fcurves in the animation editor, do either of the following:
Right-click on an animation layer in the Animation Layers panel and choose Animation Editor.
Right-click on a layer clip in the animation mixer and choose Animation Editor.
These fcurves represent the parameter's actual values, not just the offset from the base layer.
See Editing Function Curves for general information about fcurves.
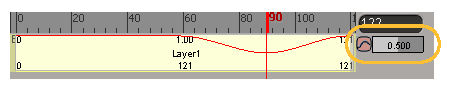
Weighting the Layer Clips in the Mixer
The layer clip in the mixer is a little different from a regular action clip in the mixer because it is in global time. As a result, you can't use a layer clip in the same way as you would an action clip in the animation mixer; for example, you can't scale, move, trim, freeze, merge, cycle, or timewarp a layer clip, or put multiple layer clips into a compound clip.
You can, however, use the mixer to blend the weights of multiple layer clips with each other, including the base layer.
See Mixing and Weighting Clips for more information.