To add a layer of animation to an object, the object needs to already have animation on it in the base layer. The base layer is the main animation layer on the object, which can be either fcurves, expressions, linked parameters, or an action clip in the mixer, such as a mocap clip. Only the parameters that are already animated in the base layer can be animated in an animation layer; for example, if the object's translation parameters are the only ones animated in the base layer, you can set keys on only the translation parameters in the animation layer.
When you animate in a layer, you can set keys using the same workflow as you would normally in Softimage. The keys that you set in the animation layers are added as an offset to the animation that is in the base layer.
For example, let's say you have a mocap clip in the mixer of a character running and then jumping on a flat surface. Now the director wants the character to jump off an elevated platform and land on a surface far below. With layering, you can simply set keys for the character taking off with a big leap, being in the air for a longer time, and then landing with a deeper crouch. This offset is added on top of the mocap clip without ever touching its original data.
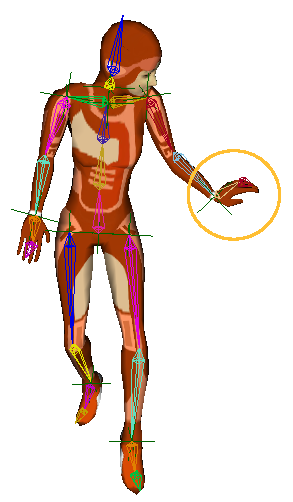
You can only set keys in an animation layer: no other type of animation is supported. While you'll probably add keys in layers mostly on an object's scaling, rotation, and translation (SRT) parameters, you can set keys in layers on any type of animatable parameter (except for parameters in the animation mixer, such as a layer clip's weight)
Animation Layers and Expressions
You can't use expressions or linked parameters in an animation layer, but you can add a layer of keys on top of expressions or linked parameters that are in the base layer.
To do this, go to a frame where you want the layer key to be and set a zero key in the animation layer (see Setting Zero (Anchor) Keys for Blending the Animation). You can now move the object to where you want because it is being driven by the layer instead of the expression, and continue to set keys in the animation layer as you like.
Changing the Base Layer's Animation
Because the animation layers contain only offsets from the base layer's animation, it's recommended that you don't change the base layer's animation after you have created animation layers. However, if you do change the base layer animation, the offset in the animation layer is kept because it always refers to the value of its corresponding animated parameter in the base layer.
This concept is similar to creating an action clip in the mixer, adding an offset to it with a clip effect, then changing the action clip's source fcurves: the clip effect remains relative to the source's fcurves.
Setting Keys in an Animation Layer
Select an object that already has animation in the base layer. Remember that only the parameters that are already animated in the base layer can be animated in an animation layer.
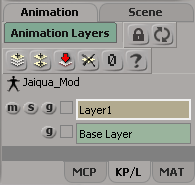
Create a new layer or select an existing layer (see Creating Animation Layers).
When you do so, the timeline goes blank so you can add a new layer of animation.
Transform the object or change the object's animated parameters, and set a key as you would normally. This creates an offset from the base layer's animation.
As soon as you set a key, a few things happen:
A blue key appears in the timeline. The keys are blue to remind you that you're animating in a layer, and not the base layer where the keys are red.
A little yellow dot is added to the corner of the animation icon for the animated parameter.

Keep on setting keys as you like in this layer, or select another layer and set keys there in the same way.
To edit the layer's fcurves, see Editing the Layer's Animation.
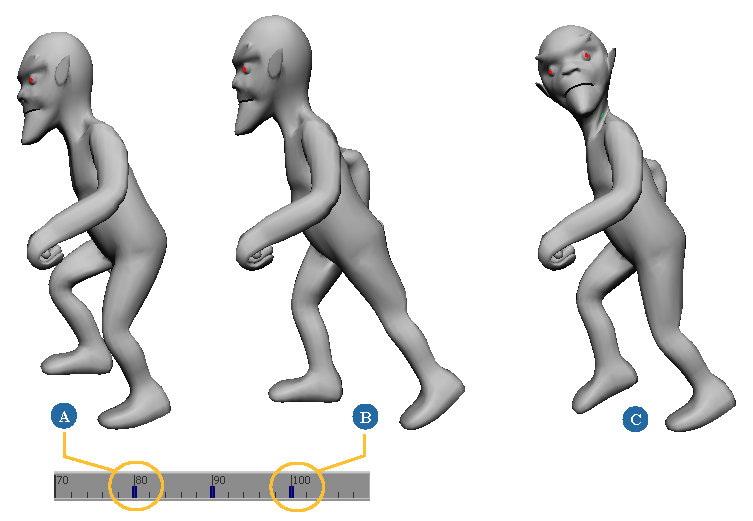
|

|
On the left, the character is animated by an action clip that contains mocap data.
On the right, the left hand bone is selected, rotated to the correct position, and keyed. The the head is also rotated and keyed to fit the action in the current scene.
Setting Zero (Anchor) Keys for Blending the Animation
In addition to adding an offset to the base layer's animation, you can set zero keys (sometimes known as anchor keys) to blend in the offset in a layer over a range of frames.
For example, let's say you have some animation on a character, but his arm passes through his body as he reaches for his laser gun. To correct the arm passing through the body, you place zero keys at frames on either side of the problem area, go to the frame between these keys where you need adjust the arm, and then key its correct position.
Select an object that already has animation in the base layer.
Scrub through the timeline and click the Save Zero Key button in the Animation Layers panel to set a key at the beginning of the segment that you want to blend.
This sets a keyframe with the value 0 so that the layer has no influence at the current frame. This key anchors the animation at the current parameter values.
Move to the frame at the end of the segment that you want to blend and set another zero key by clicking the Save Zero Key button again.
On one or more frames between the two zero keys, transform the object and set a key as you would normally.
This creates an offset from the base layer's animation that is blended only between the two zero keys.
Keying rotations in an animation layer is a little different from keying other types of parameters. You can choose to calculate the rotations in a layer using either Euler or quaternion type rotations.
Select an animated object and create or select an animation layer.
Rotate the object and set a key as you would normally, such as by pressing K or clicking the keyframe icon.
You need to set keys on all three (XYZ) rotation axes' parameters for quaternion interpolation to work.
Choose Mix  Animation Mixer Properties from the mixer's command bar to open the Mixer property editor.
Select either of the options for Animation Layer Options Interpolate Rotations Using:
Euler calculates each of the rotation's XYZ axes independently. It computes the layer rotation values in between keys using the same interpolation as you do when normally keying rotations on an object. The results may not be as smooth an interpolation as quaternion, but you can have more control over the layer's resulting fcurves.
Quaternion calculates all three rotation axes as a single unit. The keys from the rotation fcurves are extracted and interpolated smoothly using quaternion interpolation. The fcurves' keys are used for calculating in-between values, but not the rotation fcurves themselves. Because the quaternion fcurve has a key inserted for every key in the original rotation fcurves, it helps if the XYZ keys in the original fcurves are aligned on the same frames.
If you're primarily adjusting an existing animation with layers, this option is useful if you want to offset the rotation in an arbitrary way (for example, not just around one of the existing axes). Quaternion interpolation usually gives smoother results than Euler when you add a rotation offset in the middle of multiple rotation layers.
For more information in general about Euler and quaternion rotations, see Animating Rotations.


