This topic describes how to move image maps using the Material Properties dialog box. To open the Material Properties dialog
box, right-click a material and select .
To move image maps with parametric (UV) mapping
For parametric (UV) mapping,
- Enter u and v values to offset or repeat the image pattern.
Use the fields to position, scale, and rotate the image onto the surface.
- Type in the number of degrees or use the slider to rotate.
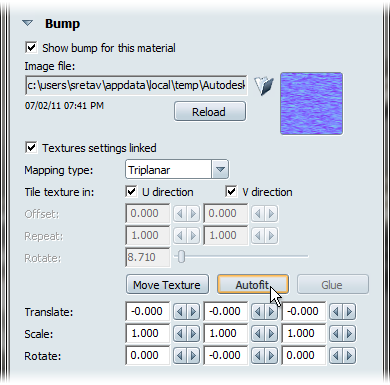
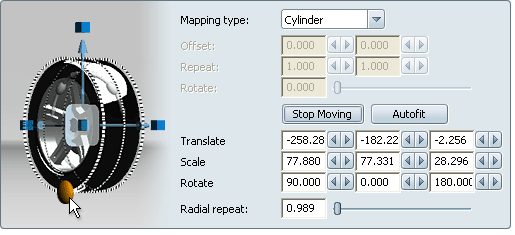
To move image maps that use planar, triplanar, or cylindrical projection mapping:
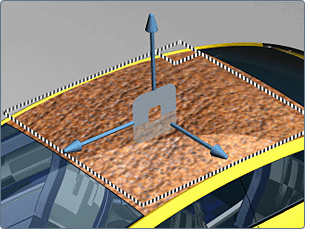
- Click the button.
This action aligns the image map to the surface bounding box, making the image map the same size and plane as the selected
objects.
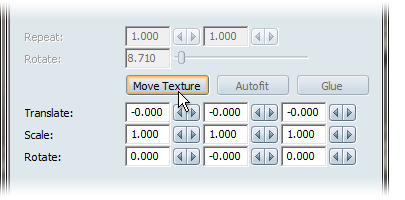
- To manually adjust the texture image to best fit the model, click the button.
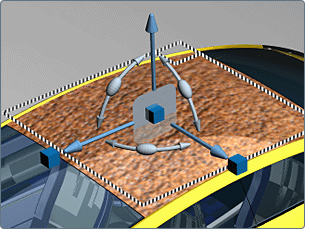
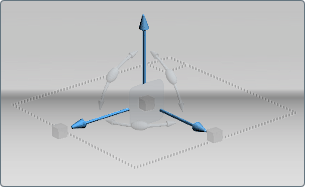
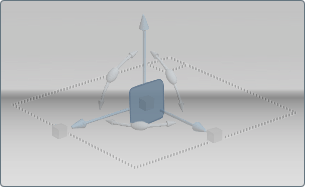
- A manipulator appears to rotate, move, or scale the texture map.
- To move the texture in one direction, click on the arrows and drag.
- To move the texture in one plane, click on the large plane in the middle. (To change the plane, rotate your view until it automatically adjusts.)
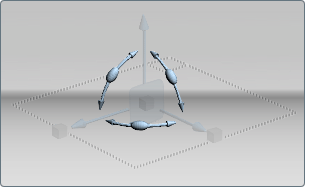
- To rotate the texture in one plane, click on the arc handles and drag.
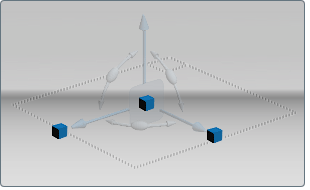
- To scale the texture in one direction, click on the cubes and drag. To scale the entire texture, click on the small cube in the middle.
- To align the projection to be perpendicular to a surface, hold down the Ctrl key and click with the left mouse button. Click and drag to interactively drag across the surface.
- To move the pivot point about which you're rotating and scaling the texture, press the Insert key. The manipulator changes so you can move the pivot point in one direction or in one plane.
- To stop moving the image map, click the button again, now called , or press the ESC key.
Note
Your changes are reflected in the Translate, Scale, and Rotate fields (which you can use to type in exact x, y, and z coordinates).
Duplicate mapped material onto other objects using Glue
The Glue button is a companion to Autofit. Use it to align material or decal textures across multiple objects. For example,
apply a decal across the doors of a car or apply a brick material across multiple walls of a building.
To duplicate the mapped material onto other objects using Glue:
- Select the Showcase material or decal you want to duplicate.
- In the Material Properties dialog box, make sure the mapping type is Planar, Triplanar, or Cylinder.
- Click and adjust the scale, rotation and offset of the material as needed.
- Select .
- Select the objects on which you want to paste the material.
- Select .
The material appears on each of the objects.
- Click to align the pasted texture with the texture of the target object.
See also: Delete or duplicate (copy) objects.
Repeat textures for cylindrical mapping
For cylindrical mapping, use the value to repeat the texture several times around the surface. For the textures to repeat uniformly, it is recommended that
you type an integer value (1, 2, 3, 4, and so on).
Or, use the manipulator to drag the texture interactively: