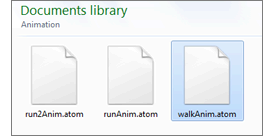
Improved import and export with ATOM file format
Nonlinear animation improvements
 |
When manipulating clips of animation in the Trax Editor, new clip matching tools let you define an offset object to better align the movements in your animation sequence. See the following topics for new or updated information: More easily set relative or absolute clip offsets Updated clip Offset settings are now included in the Create Clip Options (Animate > Create Clip > The Rotation Blend setting in the Blend Clip Options (Create > Blend > |
 |
|
The new Stepped Tangent preview playback mode lets you temporarily set all keys to display with Stepped tangents, switching easily from Spline to Stepped and back. Play your animation in this mode to get a quick view of object positions as they hit each keyframe.
To turn the playback mode on and off, right-click the Time Slider and toggle the Enable Stepped Preview option.
See Animation controls menu and Stepped tangents for updated information.
Keyframe and Tangent marking menu updates
The marking menus available for editing keyframes and tangents have been updated to allow manipulation of motion trails, keys,
and tangents directly in the scene view. To access the updated marking menus, press  + S +
+ S +  , then select the Keys or Tangents menu for more options. For example, the Keys menu contains options to let you copy and paste keys on a motion trail, while the Tangents menu lets you quickly change the tangent type for a selected key.
You can now create an ubercam for camera shots that are keyed with weighted curves. In addition, sequences with gaps between camera shots are now handled correctly. See Create a single camera for all shots in a sequence.
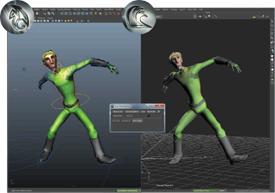
New options in the Character Controls Bake menu let you bake animation to a HumanIK skeleton, Control rig, or Custom rig. The Bake menu updates dynamically to display options that reflect the current character's state.
Maya now supports H.264 Quicktime output on Windows 64-bit. In addition, audio and multi-track audio are supported.


 >
>  This feature is only available if Maya is used as part of the Autodesk Entertainment Creation Suites.

 ) and in the
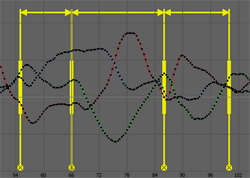
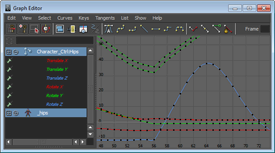
 lets you directly adjust the timing of key movements in your animations. This tool provides a new type of timing manipulator
in the graph view, letting you shift key moments in time, or warp entire sequences to make them occur faster or slower.
lets you directly adjust the timing of key movements in your animations. This tool provides a new type of timing manipulator
in the graph view, letting you shift key moments in time, or warp entire sequences to make them occur faster or slower.
 now represents the
  marking menu.